I just got the Simon Says Stamps Thank You card kit. Every now and then, they put together a limited edition special card kit and this was one of those kits.
The kit has quite a few goodies in it including the Thank You Flowers stamp set, a 2 piece Kind die, some Pink Fresh Sweet and Simple 6 x 6″ paper, 3 hybrid ink cubes, some card stock and envelopes, a slick writer, an envelope address stencil, postage stamps, a variety of envelopes and card stock, and 2 sets of stickers.
You can buy the pieces that you want separately, but by the time I added a couple of items from the kit, I realized that purchasing the kit was more cost effective. It usually is!
I played with the stamp set last night and I love the graphic, almost folk art look that the layered floral stamps have. 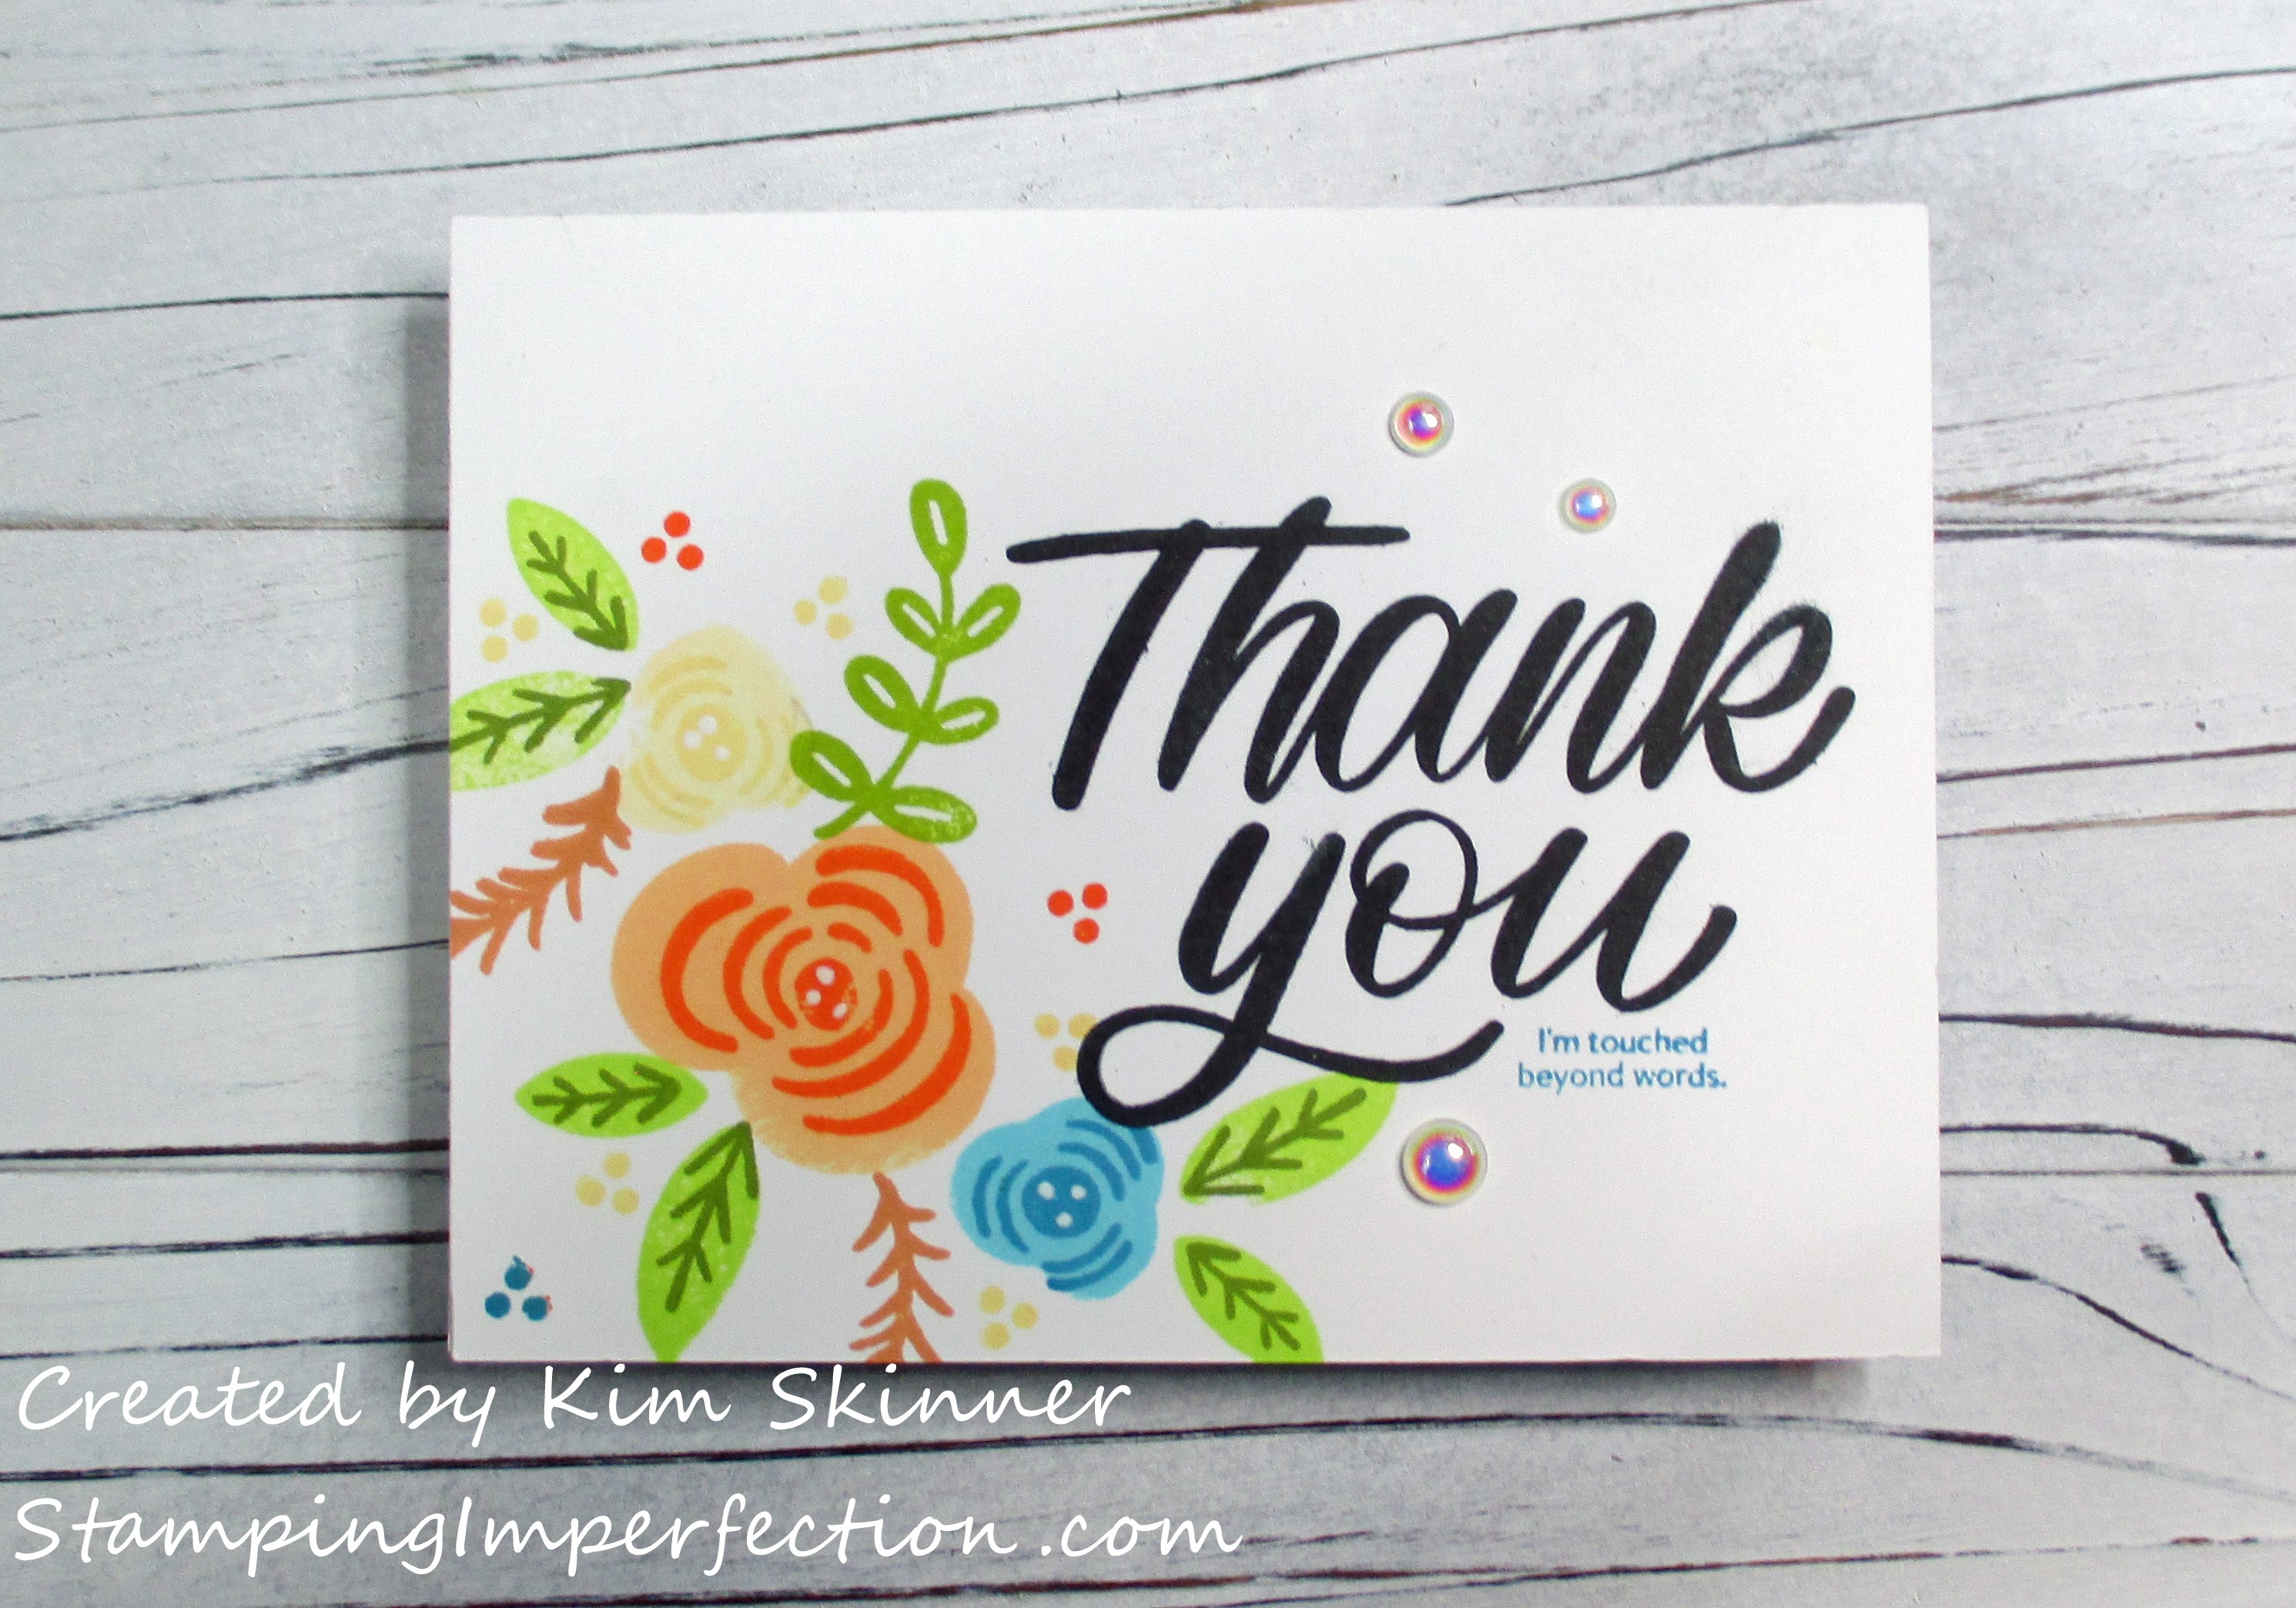
I pulled out my color swatch ring for my Altenew inks to select the colors for this card. I love my Altenew inks whenever I am layering stamps. Altenew sells their ink pads in convenient sets of 4 colors that coordinate and layer together. Each set of 4 has a name for the set and I’ve got my swatches organized on the ring so that each color set is together making it easy to select the ones that I want to layer together.
For this card, I was looking for bright colors. I selected:
- Moss and Bamboo
- Sunkissed and Autumn Blaze
- Buttercream and Warm Sunshine
- Ocean Waves and Dusk
- Black, Caramel Toffee, and Olive
I used my MISTI to add my large sentiment. Sometimes with large sentiments, I don’t get a great inking on the first try. I’ve gotten in the habit of using my MISTI every single time I stamp a sentiment. I want it to be perfectly inked so I get that nice crisp, clean stamped sentiment. This one took me 3 tries.
While I was creating my layout, I kept in mind that I wanted to keep that corner of the card balanced. I stamped the large orange image in the center of the corner and then stamped an image below and to the right and then another above and to the left. If I add something to the right part of the image, I then do the same to the left to keep it balanced. I like to add one nice leaf stem in the center going up and then I filled in the spaces with the 3 dot stamp to complete my card.
I really like stamp sets that have those little extra stamps like the 3 dots. You can always use them to fill in or add some accents to the card.
I did add some dots to the center of each flower with a white gel pen. This was the Sakura Gelly Roll 10 pen. I also added some Studio Katia iridescent bubbles.
Here are my affiliate links for most of the supplies for the card:
Thank you for stopping by! I hope you have a productive, relaxing day!


