Digital stamps are quickly becoming one of my favorite new creative tools. I know that I’ve said this before, but they are so easy to store! Although, I must confess that I do print out several copies at a time so I have a file folder full of images I can just pull out and color.
I also really like the price point of digital stamps. You can find sets of sentiments and digital papers that you can just print out on your printer. I don’t even have an expensive or fancy printer. My printer is just a Brother ink jet all-in-one printer, copier, scanner. As long as you are printing on good cardstock or watercolor paper, you are good!
Today I created a couple of birthday cards to wish my sister a happy birthday! (I did send a card out to her earlier this week, but I thought I’d celebrate her on my blog as well.) Happy birthday, Lori!
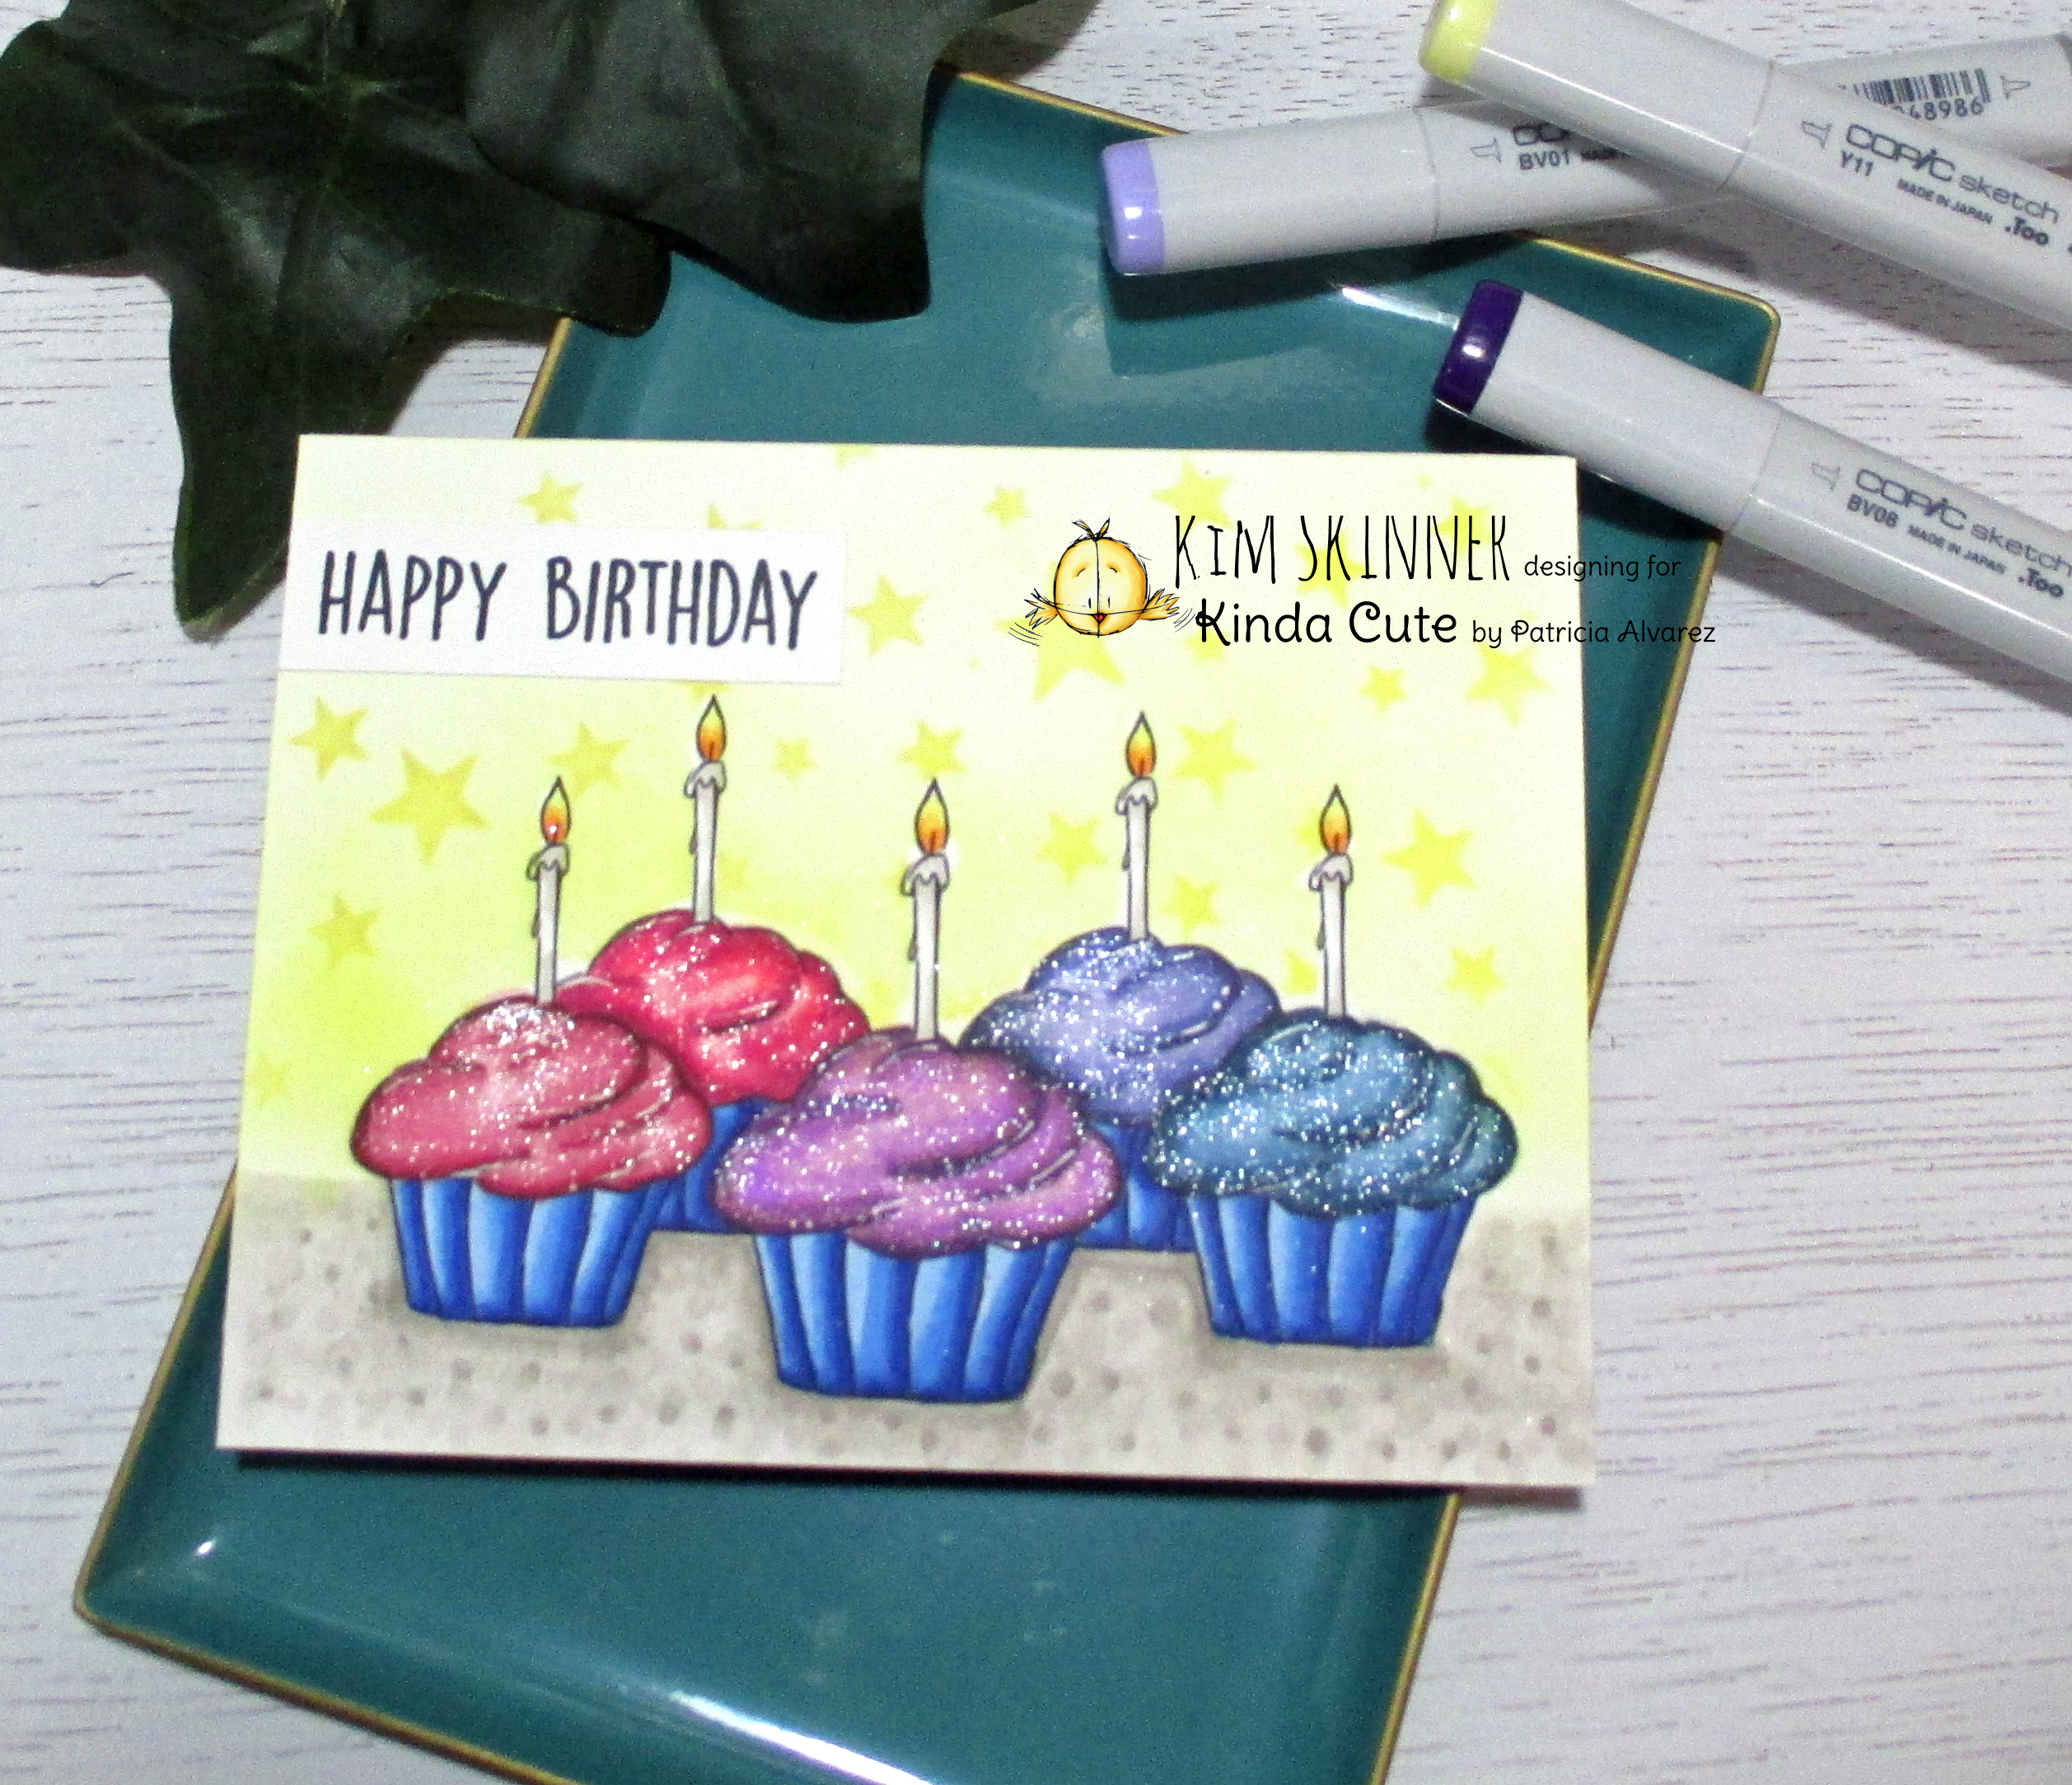
For this card, I am using this Cupcake digital stamp from Kinda Cute by Patricia Alvarez. I actually used 5 of these images and moved them around until I came up with a configuration that I liked! Then I colored them in with my Copics using a variety of color combinations. I started with a red combo, then a red-violet, then a violet, then a blue-violet, and finally a blue. I used a second blue combination for all the wrappers and a warm gray combo for the counter and the candle. I used a couple of yellows and yellow-reds for the flame.
To finish the card, I masked the cupcakes and blended on some Citrus Burst ink from Altenew as lightly as I could. (I’m a bit heavy handed when I ink blend!), then I used a Catherine Pooler Star Stencil and using the same ink, just stenciled the stars a little darker over the background. I’ve added some white gel pen for highlights and some sparkle pen which I managed to capture in the photo!!
A simple happy birthday sentiment was my final touch. 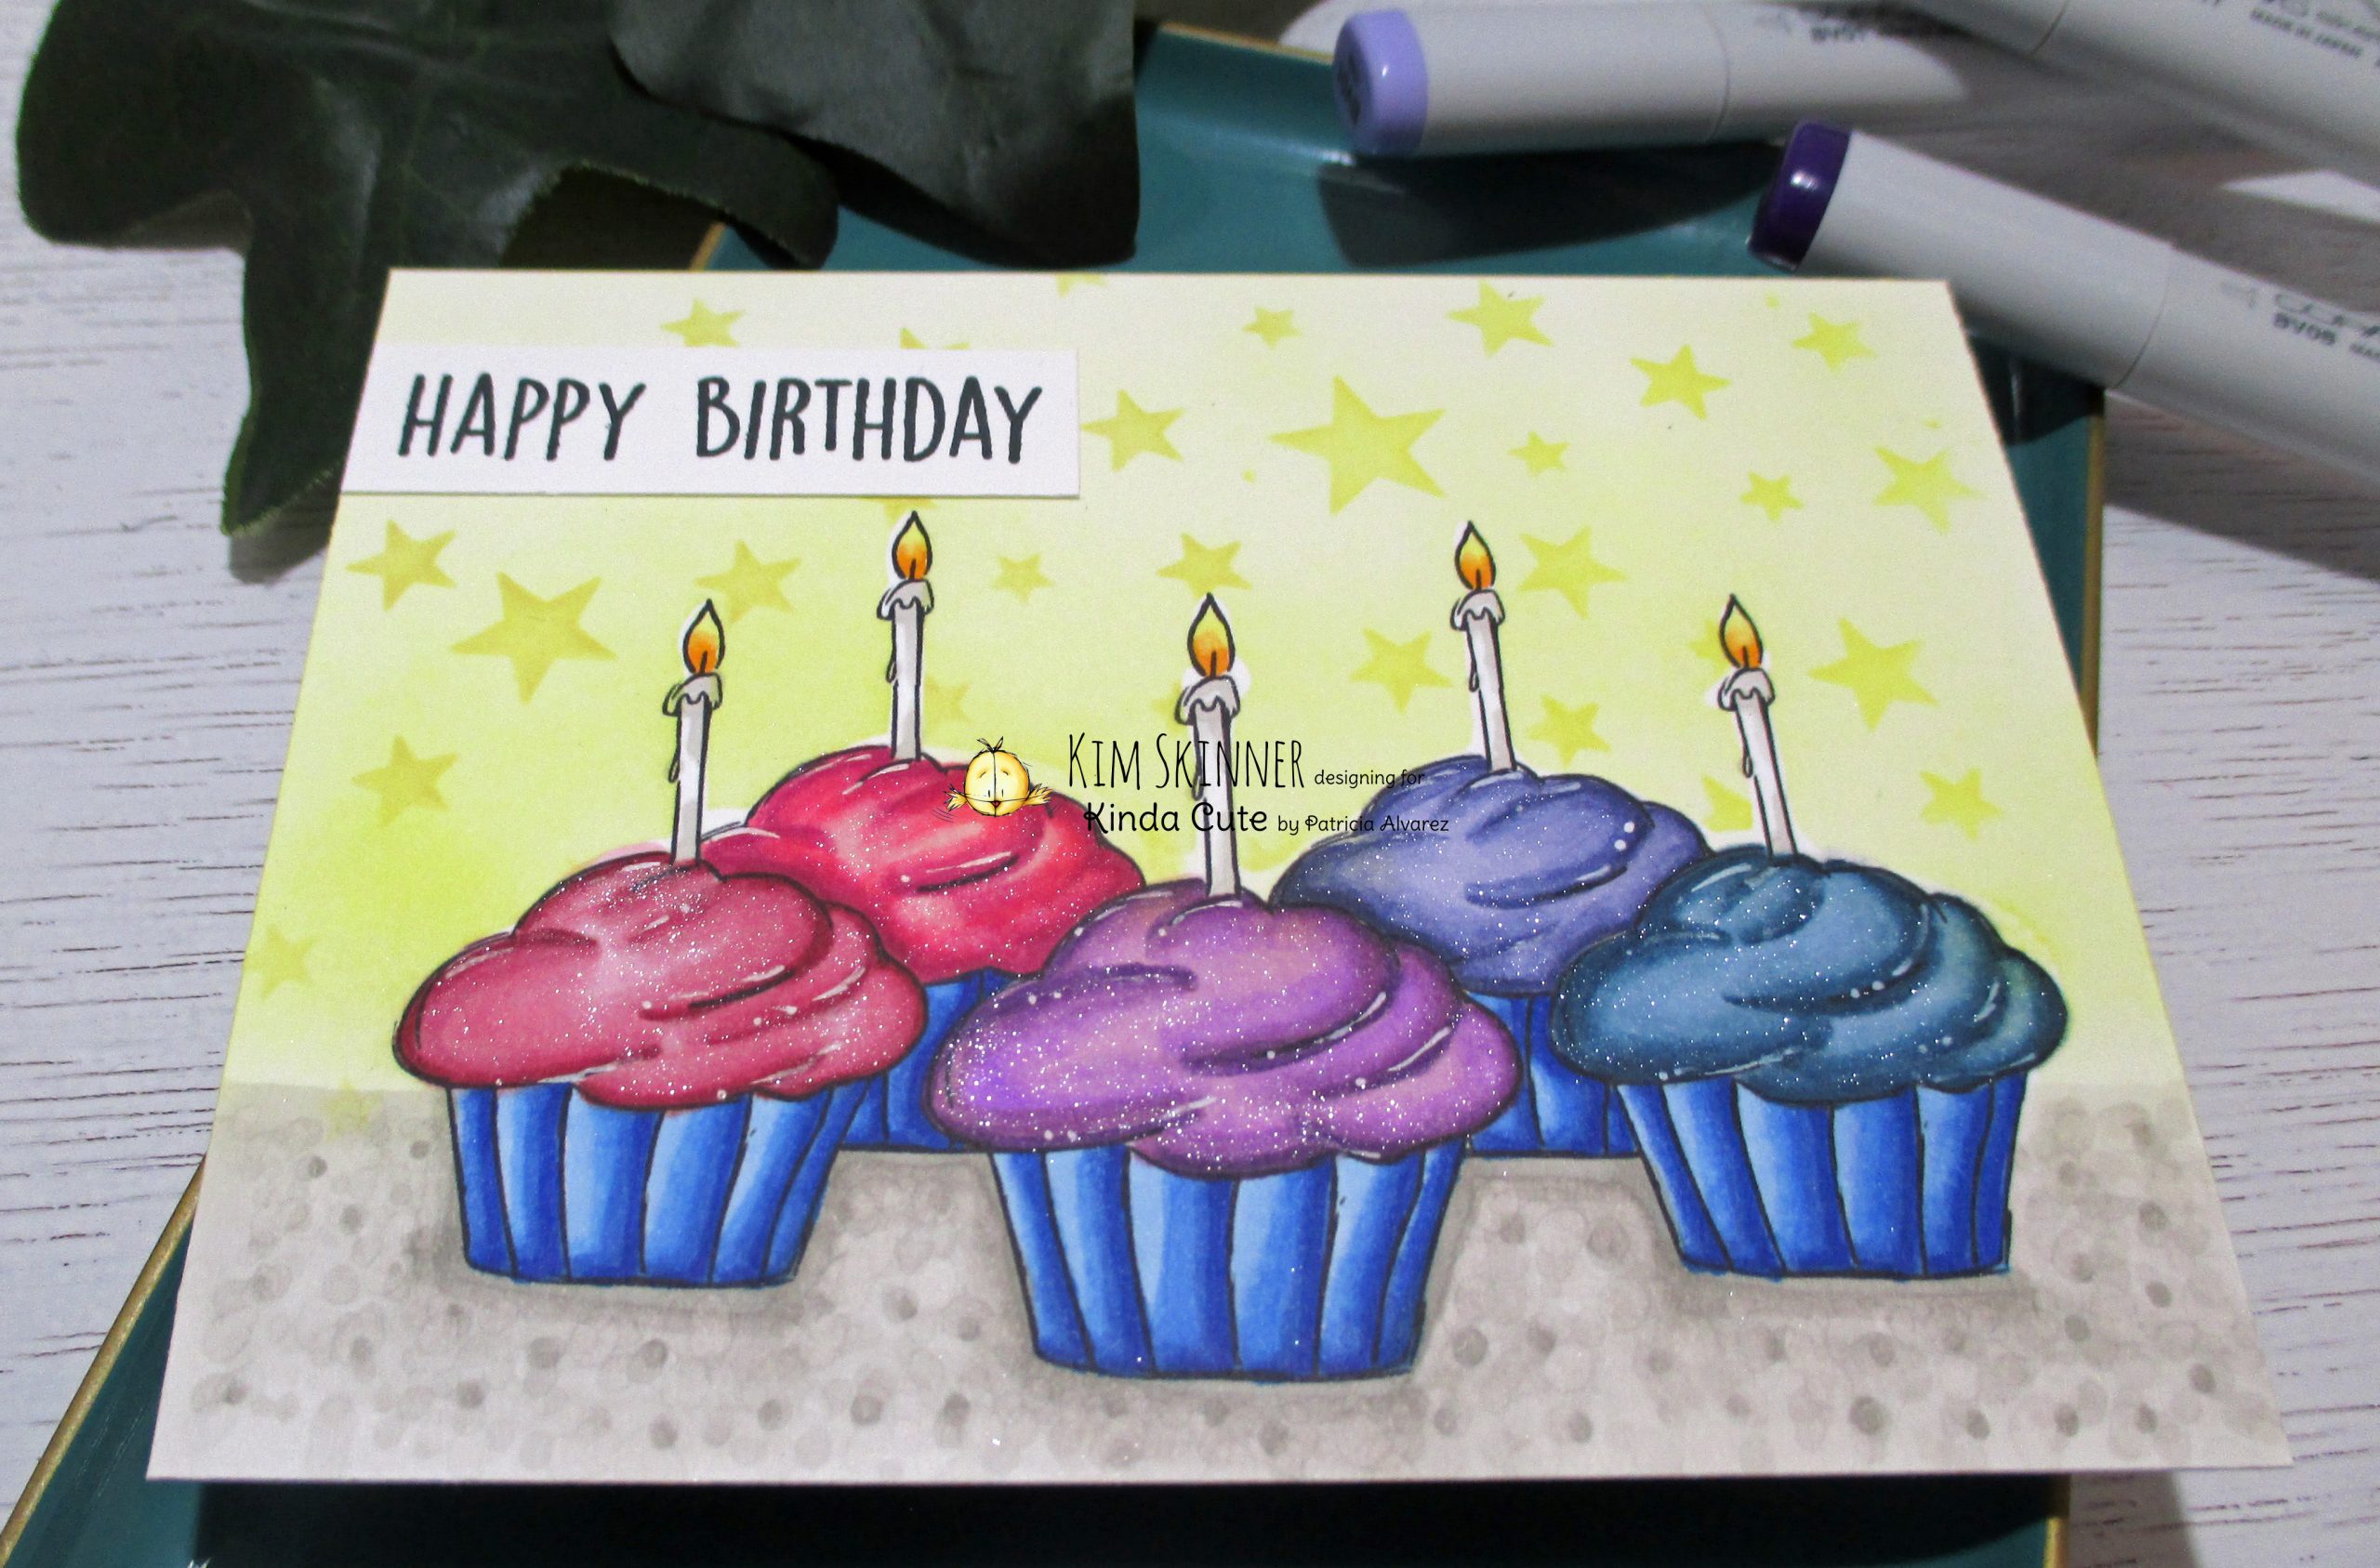
The cupcake frosting on this digital stamp was a nice empty space, so I could make the frosting swirls where I wanted them to go. I got bolder with my color choices and bravely used a very dark marker in each of my color combos for that bold outline where I wanted the frosting to swirl. I am happy with the way these turned out! I really liked being able to move the cupcake image around until I had a layout I liked. Big plus for the digital images!
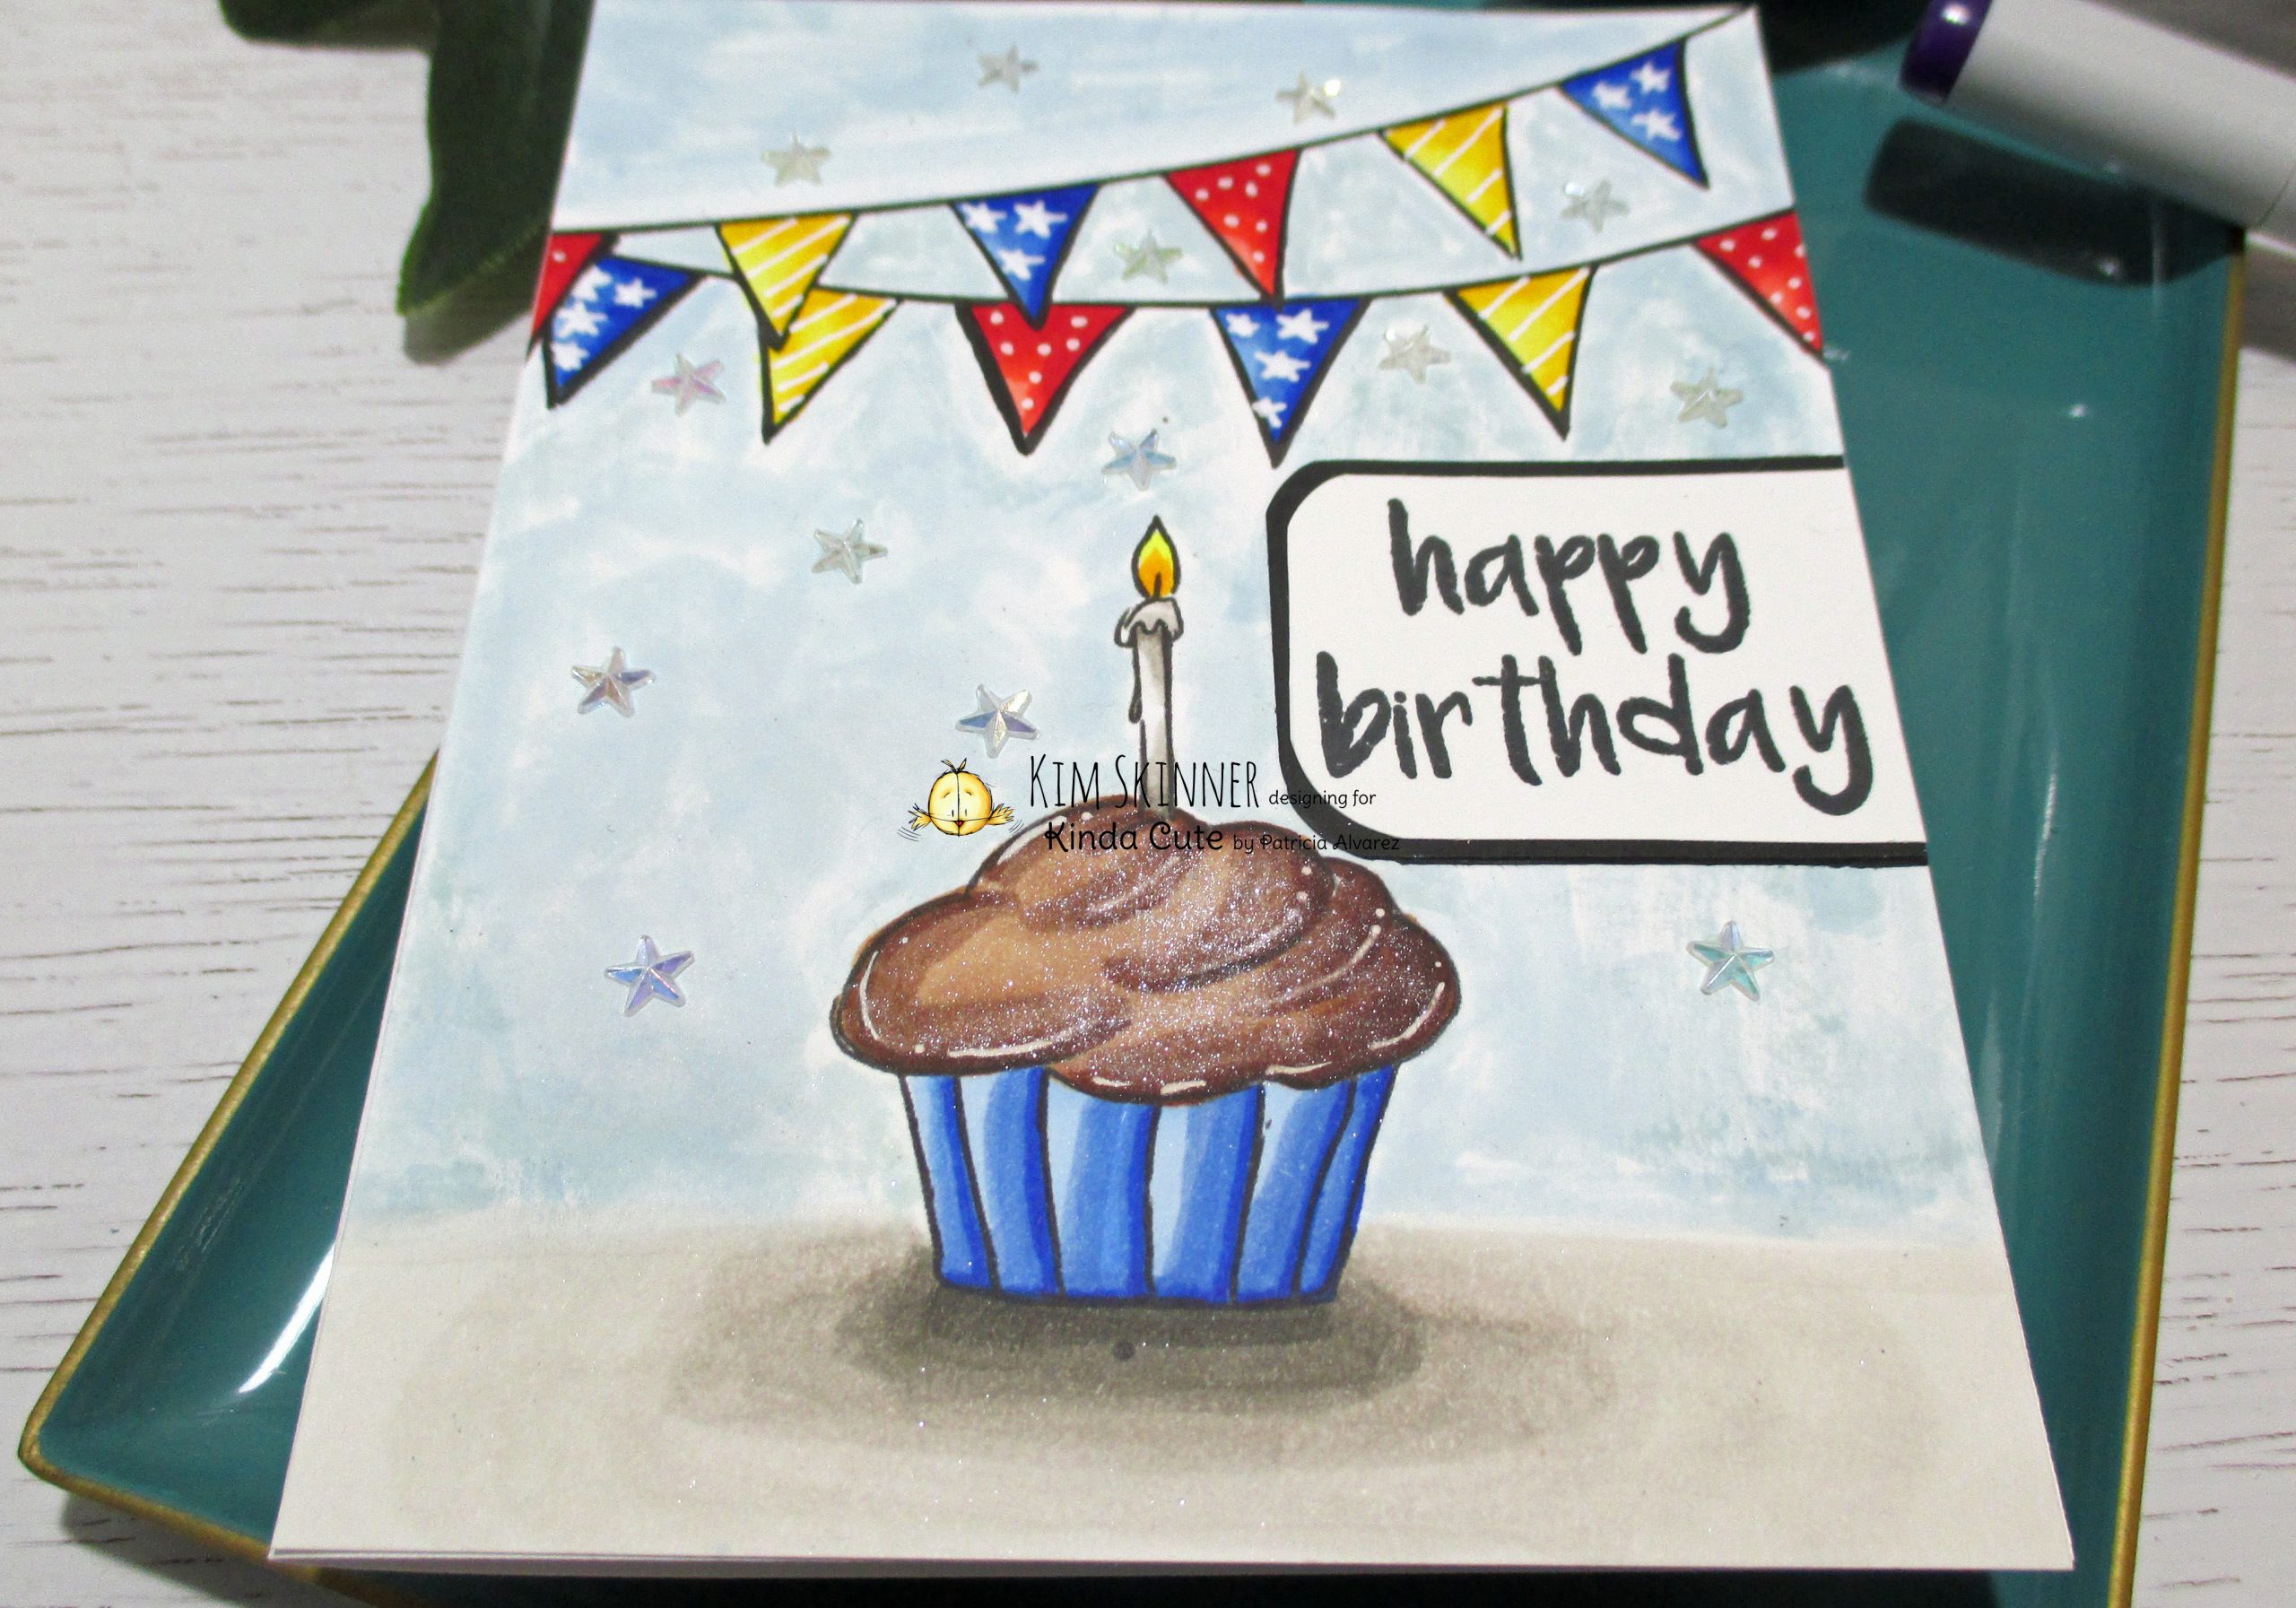
I made a second card as well. This time I used just one cupcake and added a banner digital stamp.
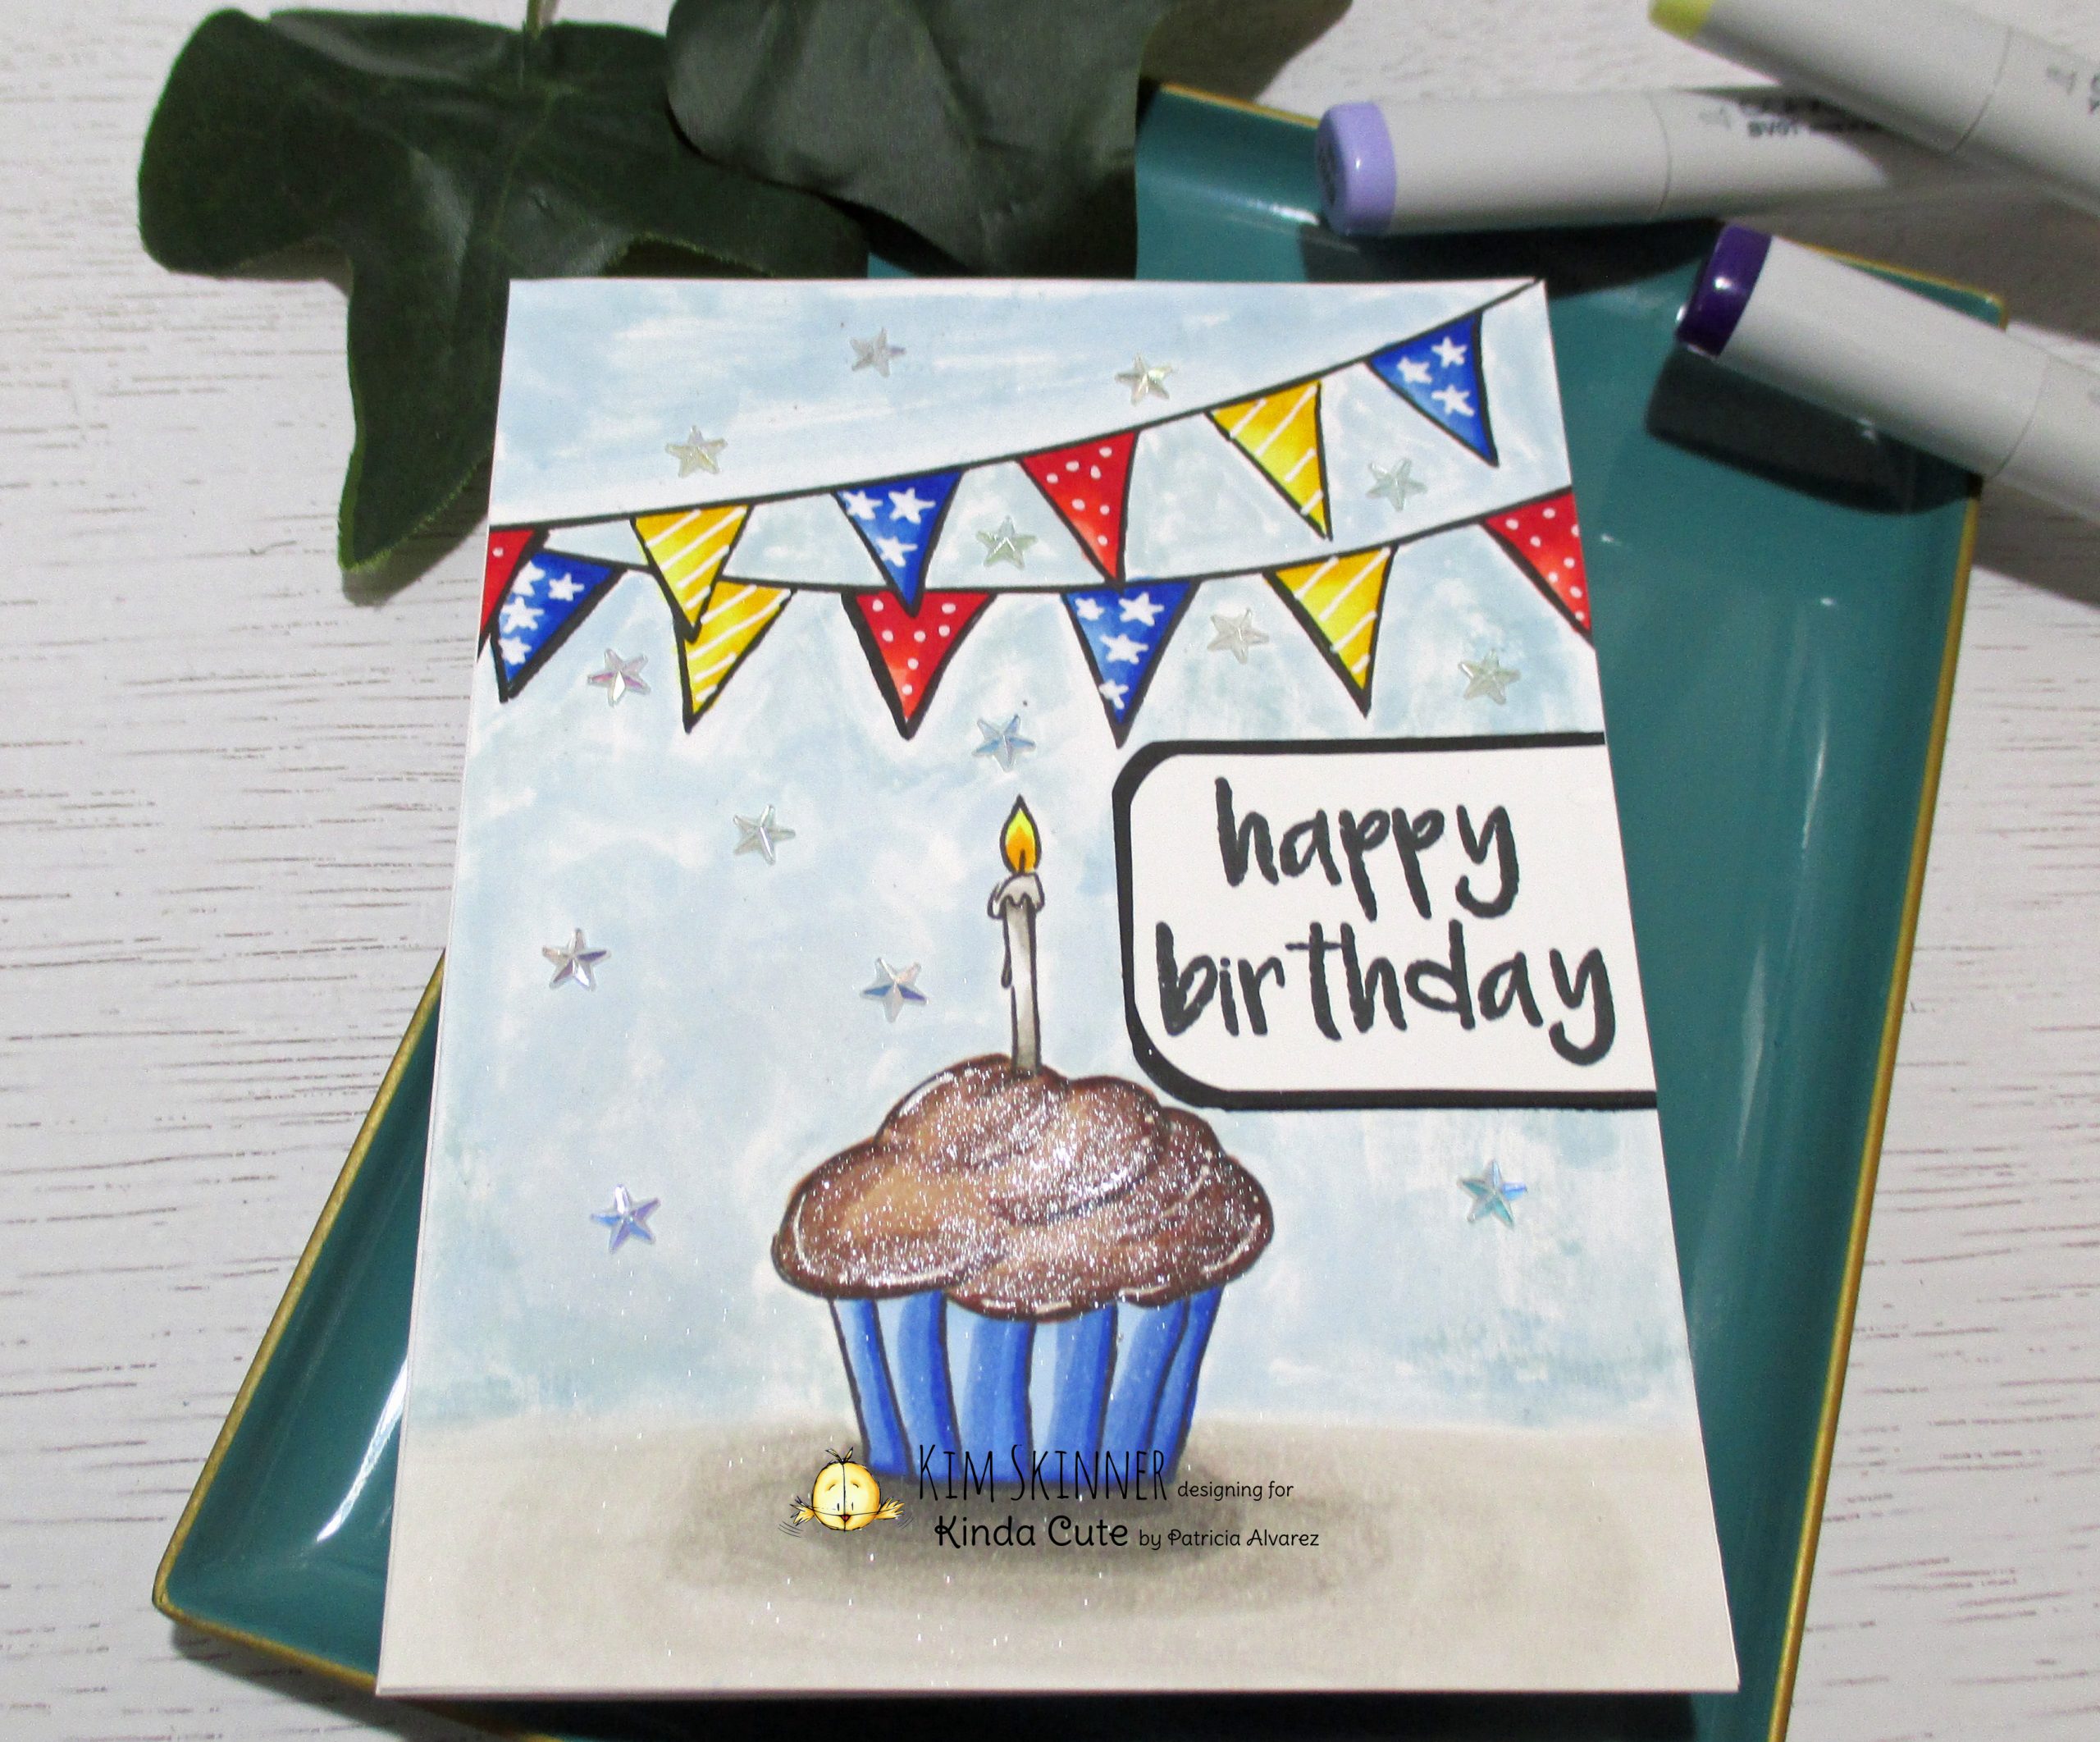
At least one cupcake has to have chocolate frosting! I loved that I could create scenes before I printed my images out. I could add the stamps together and move them around. I did this using Word and it made it so easy to do. I could also resize the images which is very nice to be able to do. I like to make multiple projects with my stamps and being able to resize things is a huge plus.
For this one, I added some white gel pen details to the banner flags and cupcake frosting. I did add the sparkle pen here as well. I did a soft watercolor wash in a messy style (which I like…it may not be for everyone), and finished it off with some star embellishments.
Copic Color Combinations:
Red: R81, 83, 85, 89
Red-Violet: RV 11,14,17,19
Violet: V1,4,6,9
Blue-Violet: BV 01, 02,04,08
Blue: B91,93,97,99
Cupcake Wrapper: B21,24,26,29
Flame: Y11, Y13, YR15, 16
Candle and Table: W0,1,2,4
Chocolate Frosting: E71,74,77,79
Supply List: These images were provided to my by Patricia Alvarez, the genius behind the digital images at Kinda Cute!
Are you interested in the products I used? To make them easier for you to find, I have linked them below. (Affiliate disclosure ) Your purchases help keep my blog running at no additional cost to you and I thank you for the support!
From the Kinda Cute by Patricia Shop:
From the Kinda Cute by Patricia Etsy Shop:
Thank you so much for stopping by! I hope you enjoyed your visit! Personally, I’m off to make some real cupcakes!
Have a great day!


