Who doesn’t love the episode of the office where Dwight puts the pumpkin on his head and then can’t get it off?!
If you are a fan of The Office, you will understand why I had to pick this digital image from Kinda Cute by Patricia as soon as I saw it!
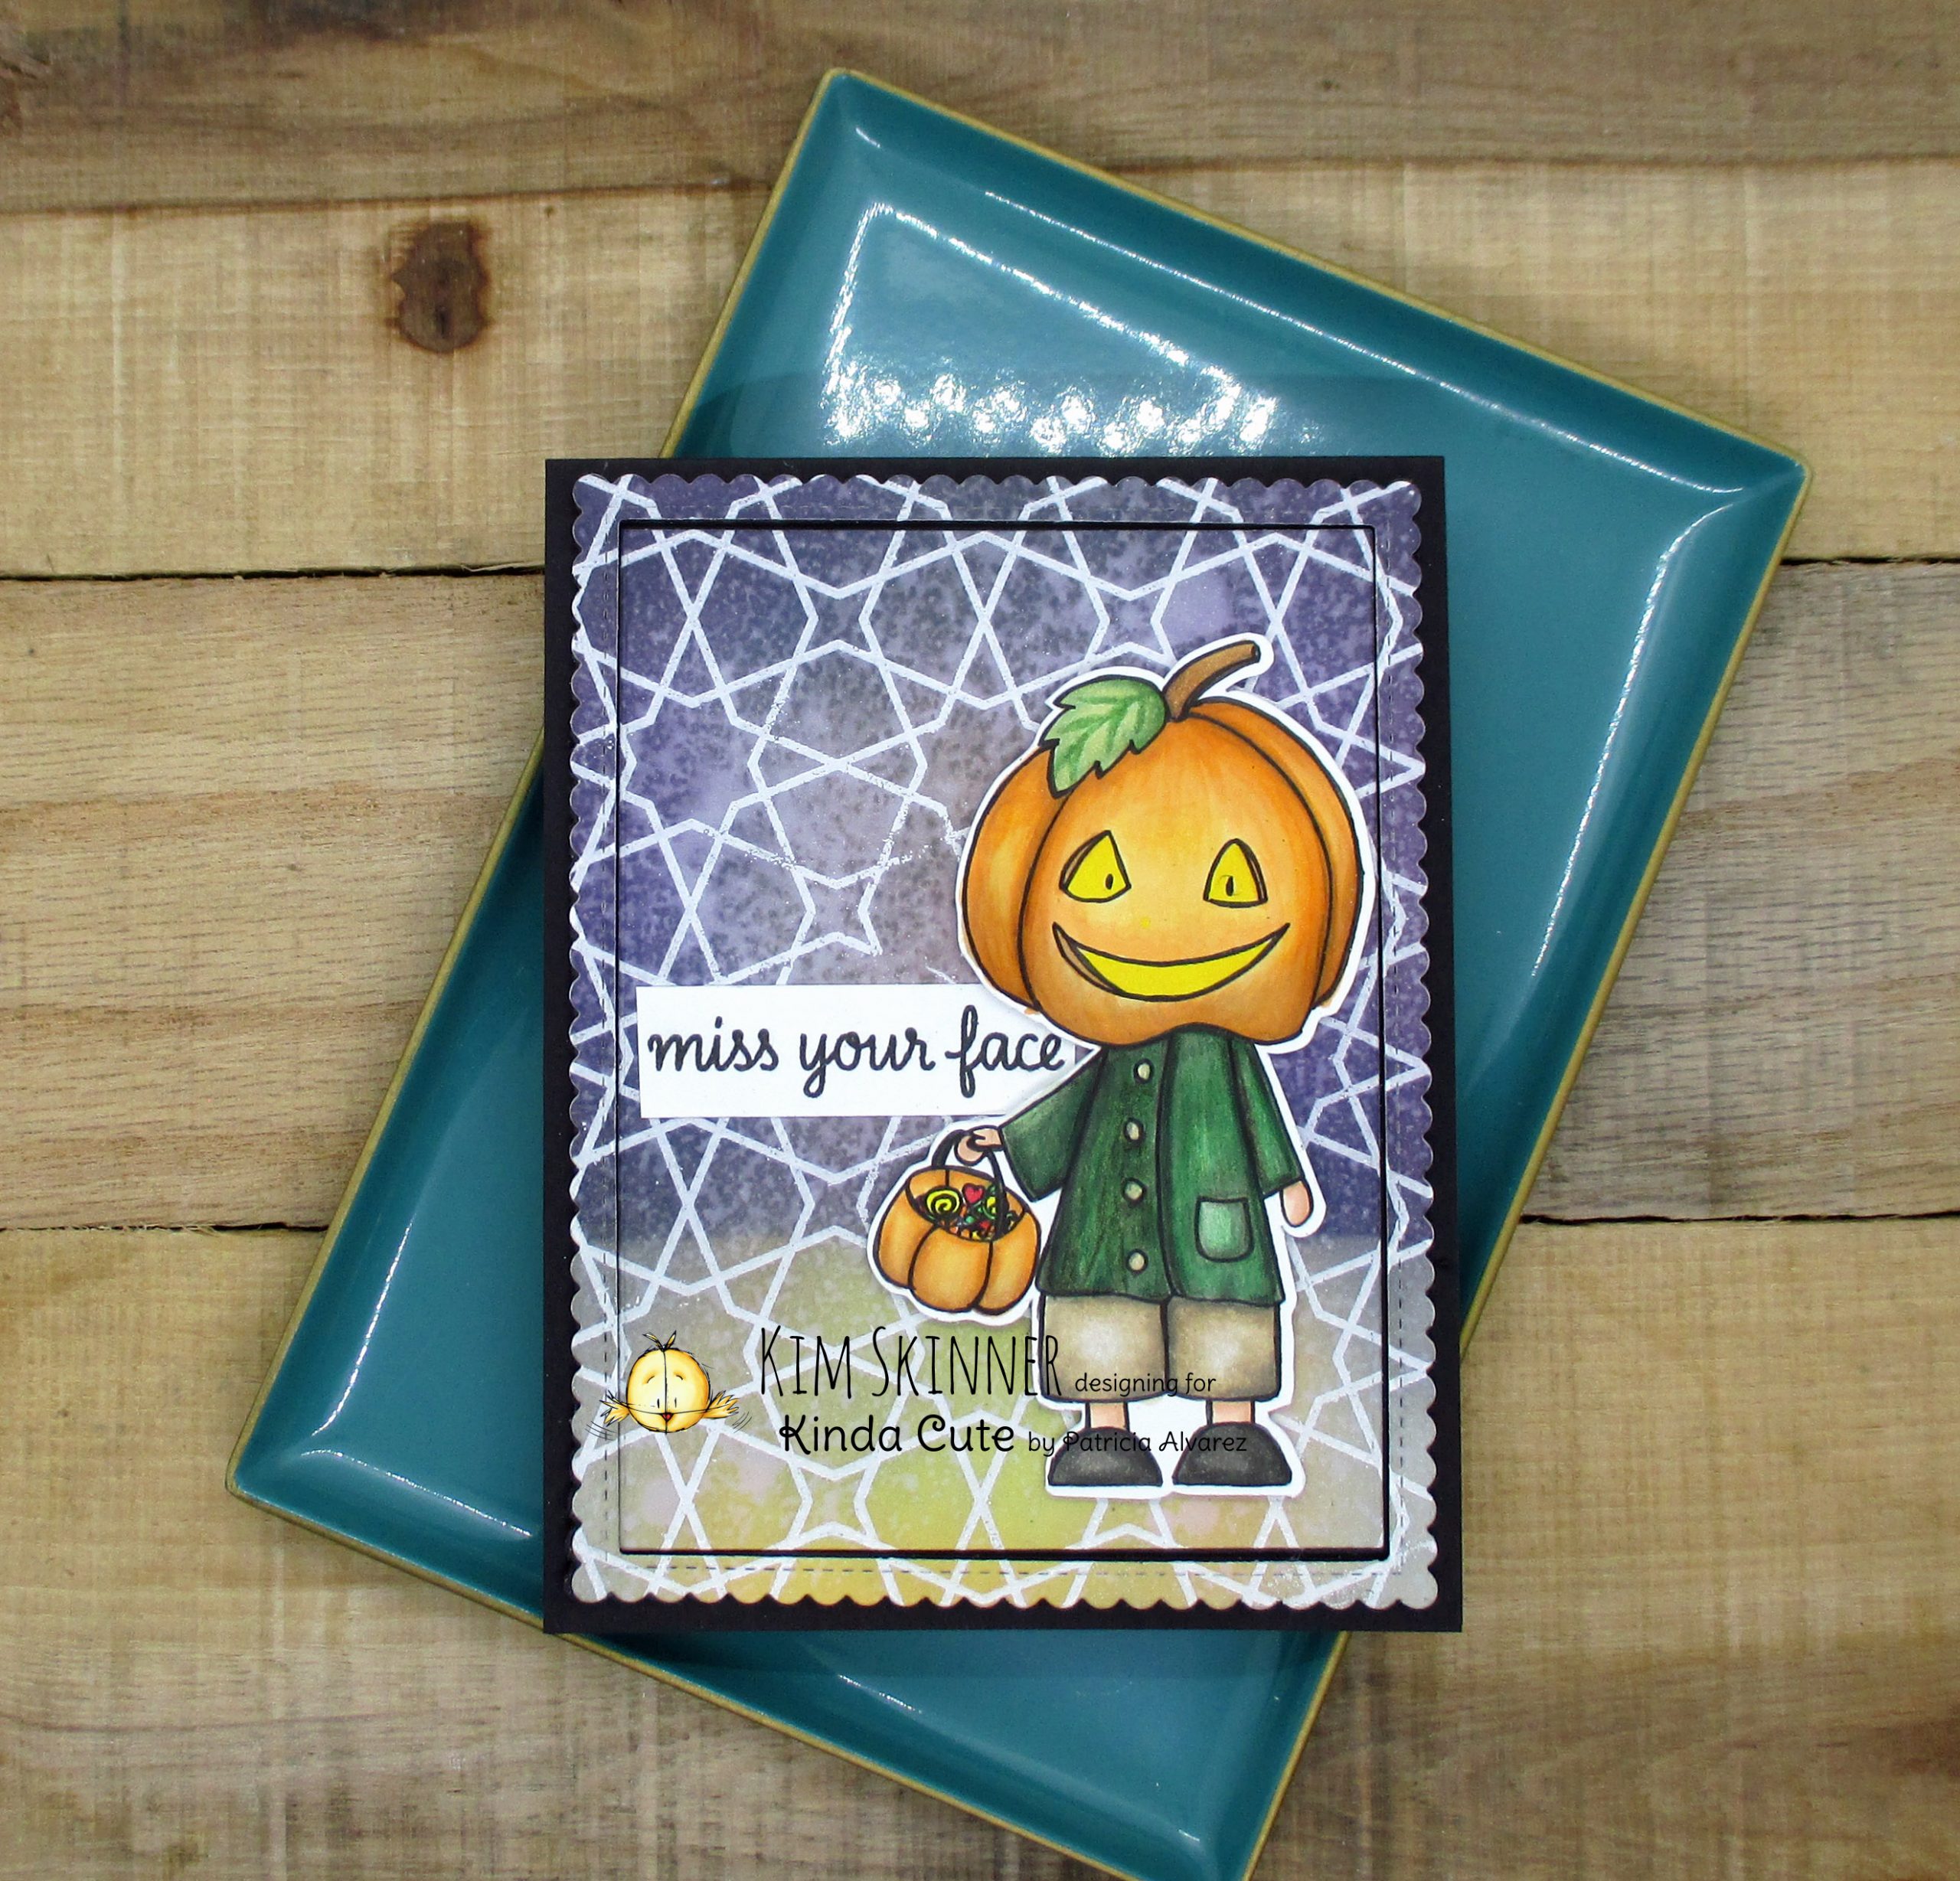
I couldn’t resist making a mixed media background using an emboss resist technique and some ink blending with my Distress Oxides. I feel like it has been ages since I’ve played with this old favorite technique.
I colored the Pumpkin Head digital stamp from Kinda Cute by Patricia using my Copics and then cut it out with my Brother Scan-n-cut. I honestly love this machine. I always have it cut a 0.04 border around it and it’s always just perfect. I could never achieve this with fussy cutting! Plus, this machine is saving me a bundle because I am no longer purchasing coordinating dies with stamp sets.
I love this digital image. I laugh every single time I see it!
To create the background, I stamped the Moroccan Mosaic background stamp from Altenew in Versa Mark ink and then heat embossed it in white embossing powder.
I used my Fossilized Amber, Chipped Sapphire, and Seedless Preserves on the top part of the card to create a “night sky”. I added some Black Soot on top of it once I had it all blended to get a darker sky look. Along the bottom, I used Fossilized Amber, Rusty Hinge, and Pumice Stone. Once I had all my ink blending done with my blender brushes, I used a cloth to buff the card top and remove the ink from my embossing. The embossing resists the ink, so you can just wipe it off!
I did spritz the card background with water using my distress sprayer and blotted it up with my cloth. I love that look and it just adds one more layer of interest to the background.
My final background step was to die cut the scalloped frame using the MFT Stamps Stitched Rectangle Scallop Edge Frames. I popped the frame up on a piece of black craft foam that I also die cut with that same frame die. This was then attached to the card base and the center of the rectangle was adhered directly to the card base with no foam. This gave an inlaid die cut feel to the card. I added my pumpkin head image with some foam and then added the sentiment from the Concord & 9th Lots to Say sentiment set. I love this set. It has several sentiments that cover lots of occasions. It’s my go to sentiment set and it is around $10!
I do have a video of the background creation for this card:
Copic Combinations:
Pumpkin: YR 14,12, Y23, E 35,42,43 YG 61,63,67, Y08
Shirt: W1,3,5 BG 93,96
Pants: E40,42,43,44, W5
Skin: E11,13,00
Shoes: W9,7,5
Candy: YR97, Y08, G05, R24
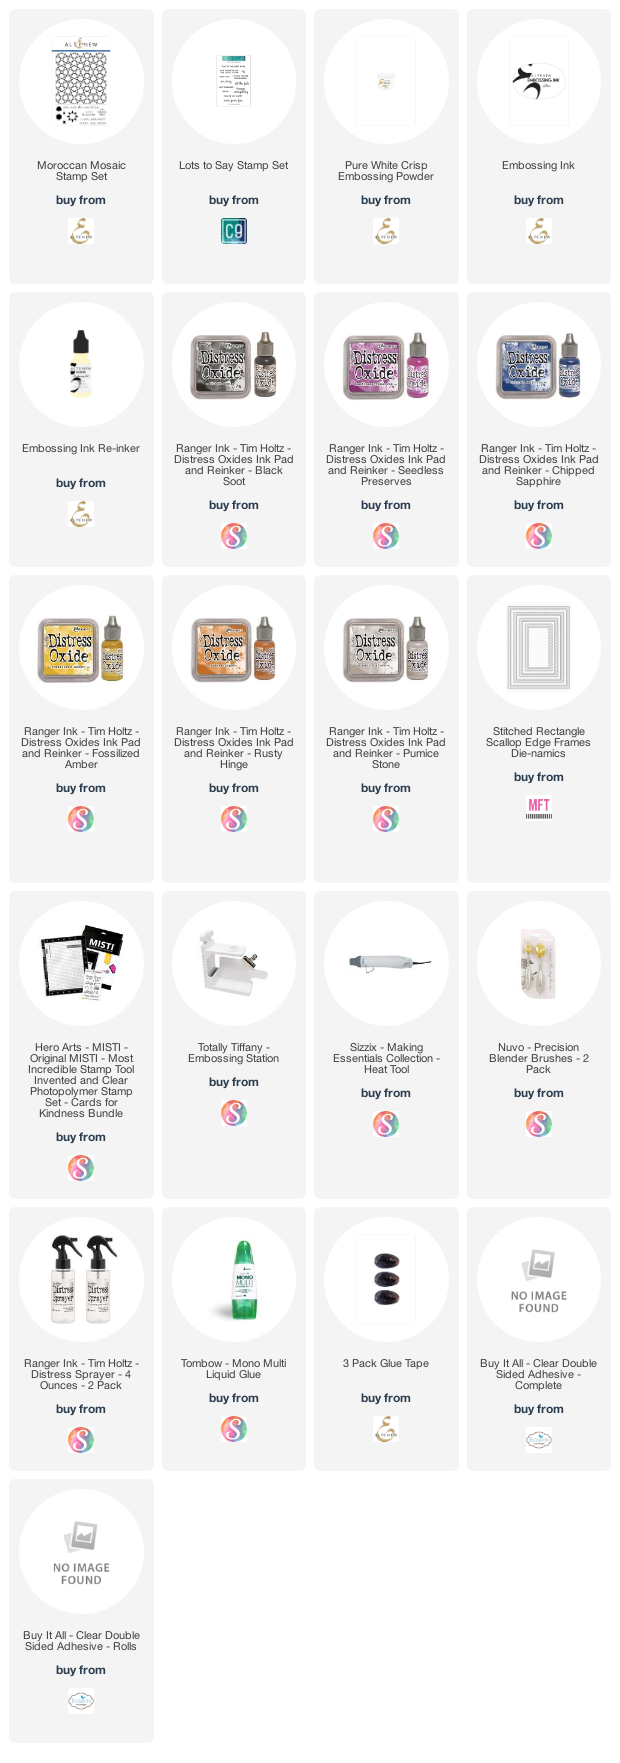
Supply List:
Are you interested in the products I used? To make them easier for you to find, I have linked them below. (Affiliate disclosure ) Your purchases help keep my blog running at no additional cost to you and I thank you for the support!
The Pumpkin Head Digital Image was given to me by Kinda Cute by Patricia!
Links for Kinda Cute by Patricia:
Online Store: http://kindacutebypatricia.com
Blog: https://kindacutebypatricia.blogspot.com/
Join Patricia’s Facebook Group and share your projects (there are also free images there!): https://www.facebook.com/groups/101964597212215
Pumpkin Head Image (online store): https://kindacutebypatricia.com/pumpkin-head-halloween-digital-stamp/
Pumpkin Head Image (Etsy Shop): https://www.etsy.com/listing/822688240/pumpkin-head-halloween-digital-stamp
Other supplies used:
Supplies from Amazon:
Thank you so much for stopping by my friend! Be well and have a creative and relaxing day!


