This is series of How to Stamp Lessons! You will need to scroll down to get to the part that you want!!! Here is a list of what I have on this page so far and all lessons have PDF printables!
- Getting Started
- Lesson 1: The basic materials you need to get started
- Lesson 2: How to Ink a Stamp and How to Stamp
- Lesson 3: Clear Mount Stamps verses Wood Mount Stamps
- Lesson 4: Kinds of Inks
- Lesson 5: How to Clean Your Stamps!
- Techniques Every Stamper Should Know: Heat Embossing
- Lesson 6: Card Layers
- Lesson 7: Watercolor Backgrounds
I’m doing a series of videos and posts on my this page for the very beginning paper crafter. If you think you want to get started and would like to take some basic stamping and scrapbook classes, YOU ARE IN THE RIGHT PLACE!
GETTING STARTED:
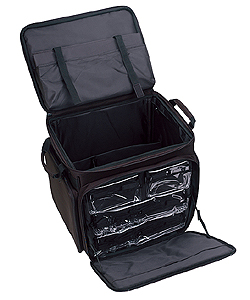
To get started, you need one of two things…a space dedicated to your crafting or a good size portable storage box to move your stuff to the kitchen table when you are ready to craft. This will give you a quick place to put everything when you need to eat dinner and it will be your craft storage box.
I used a giant organizer on wheels that I could move from room to room or even take to someone else’s house for a fun afternoon of crafting! Here is an example similar to the one I had:
We all start out with the box or portable storage. We all outgrow that box! There are really 4 parts to being a paper crafter. (A papercrafter is anyone who stamps, creates scrapbooks or uses paper in any way at all to create gifts, art, home decor and so on.)
As I was saying…there are really 3…maybe 4 aspects to being a paper crafter.
1. You buy and use paper, inks, stamps and the works.
2. You collect paper, inks, stamps and the works.
3. You love to organize, re-organize or just look at your paper,inks, stamps and the works.
4. You love to browse blogs, Facebook, Youtube and Pinterest for inspirational ideas on how you might use your paper, inks, stamps and the works. (Maybe you are like my sister and actually print the ideas out and collect pages of ideas for your crafting as well.)
We all do those 4 things!
If you can, find yourself a space that you can leave set up and ready to craft. It doesn’t need to be big. You basically need a surface to craft on (even a TV tray works!) For me, I find a 2 x 4′ space is just perfect. I purchased a piece of MDF pre-cut at 2 x 4′, painted it a deep red and put it across two 2-drawer file cabinets. I could keep my basic tools that I needed right out on the surface and have room to actually work. The file drawers were perfect for storing my materials. That required a small corner in a room and it was my space. It was just the right height to put a chair under because there is leg space between the two file cabinets. (Of course…we all outgrow that too!)
I’m more likely to sit down and craft if two things happen:
1. My stuff is all set up and ready to go. I don’t have to drag a box of things out. I can sit down for 15 minutes and make something if that is all the time I have.
2. My space is cleaned up. I always leave myself 5 minutes to clean up the project and materials that I was working on. I also organize in a way that isn’t fussy. My punches are stored in fabric drawers, not on shelves in any kind of order. I use little buckets for my tools that I can just stick the stuff in. It isn’t a jigsaw puzzle organization system. I am consistent about which basket things go in, but not which specific slot something goes in. I don’t make it difficult to put things away fast. I know what works for me! I know that a messy craft space doesn’t work for me, so I never leave my desk messy. I promise you, I am not a neat freak. I just know that I can’t create without a clear work space. The rest of the house may be chaos, but not my craft table!!!!
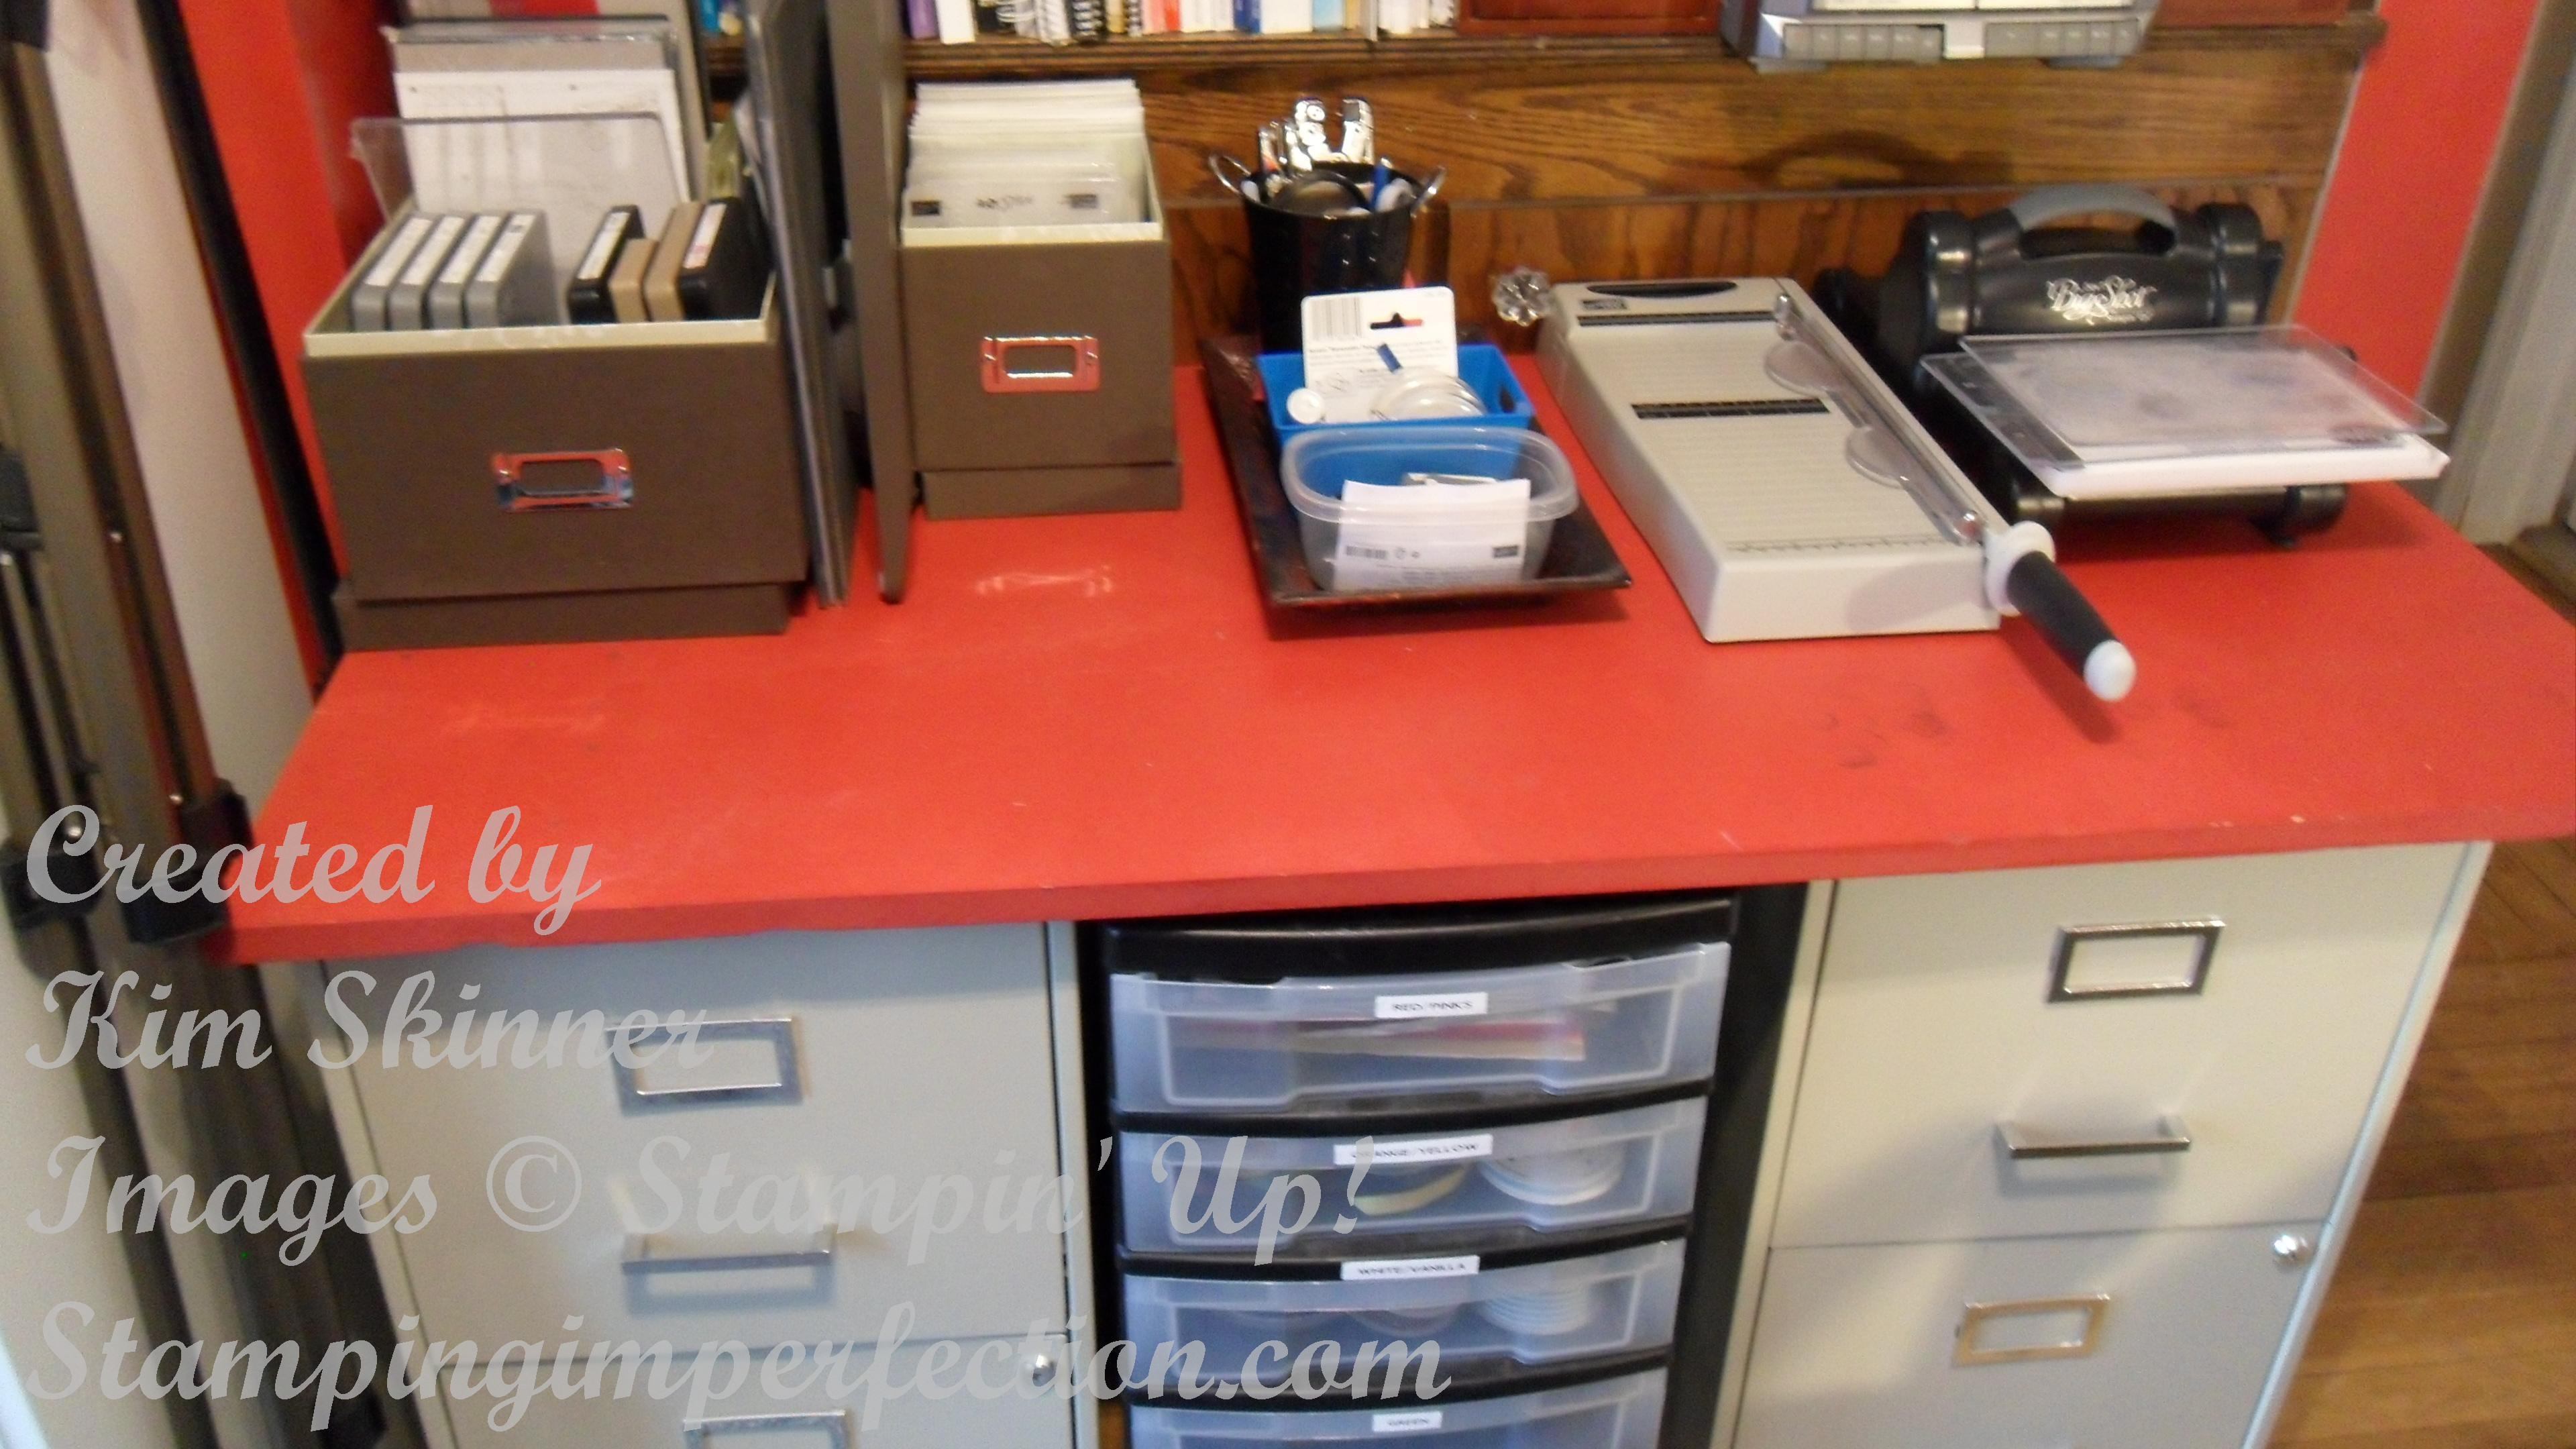
My original craft table, now my cutting table.
This is my original craft space. I slid the file cabinets to the edges and had plenty of leg room. Now, I have a set of plastic rolling drawers to hold ribbon and extra embellishments. This has become my cutting table. Love it! Above it, I have a set of built in shelves that hold my scrapbooks, school books and the family dvd collection.
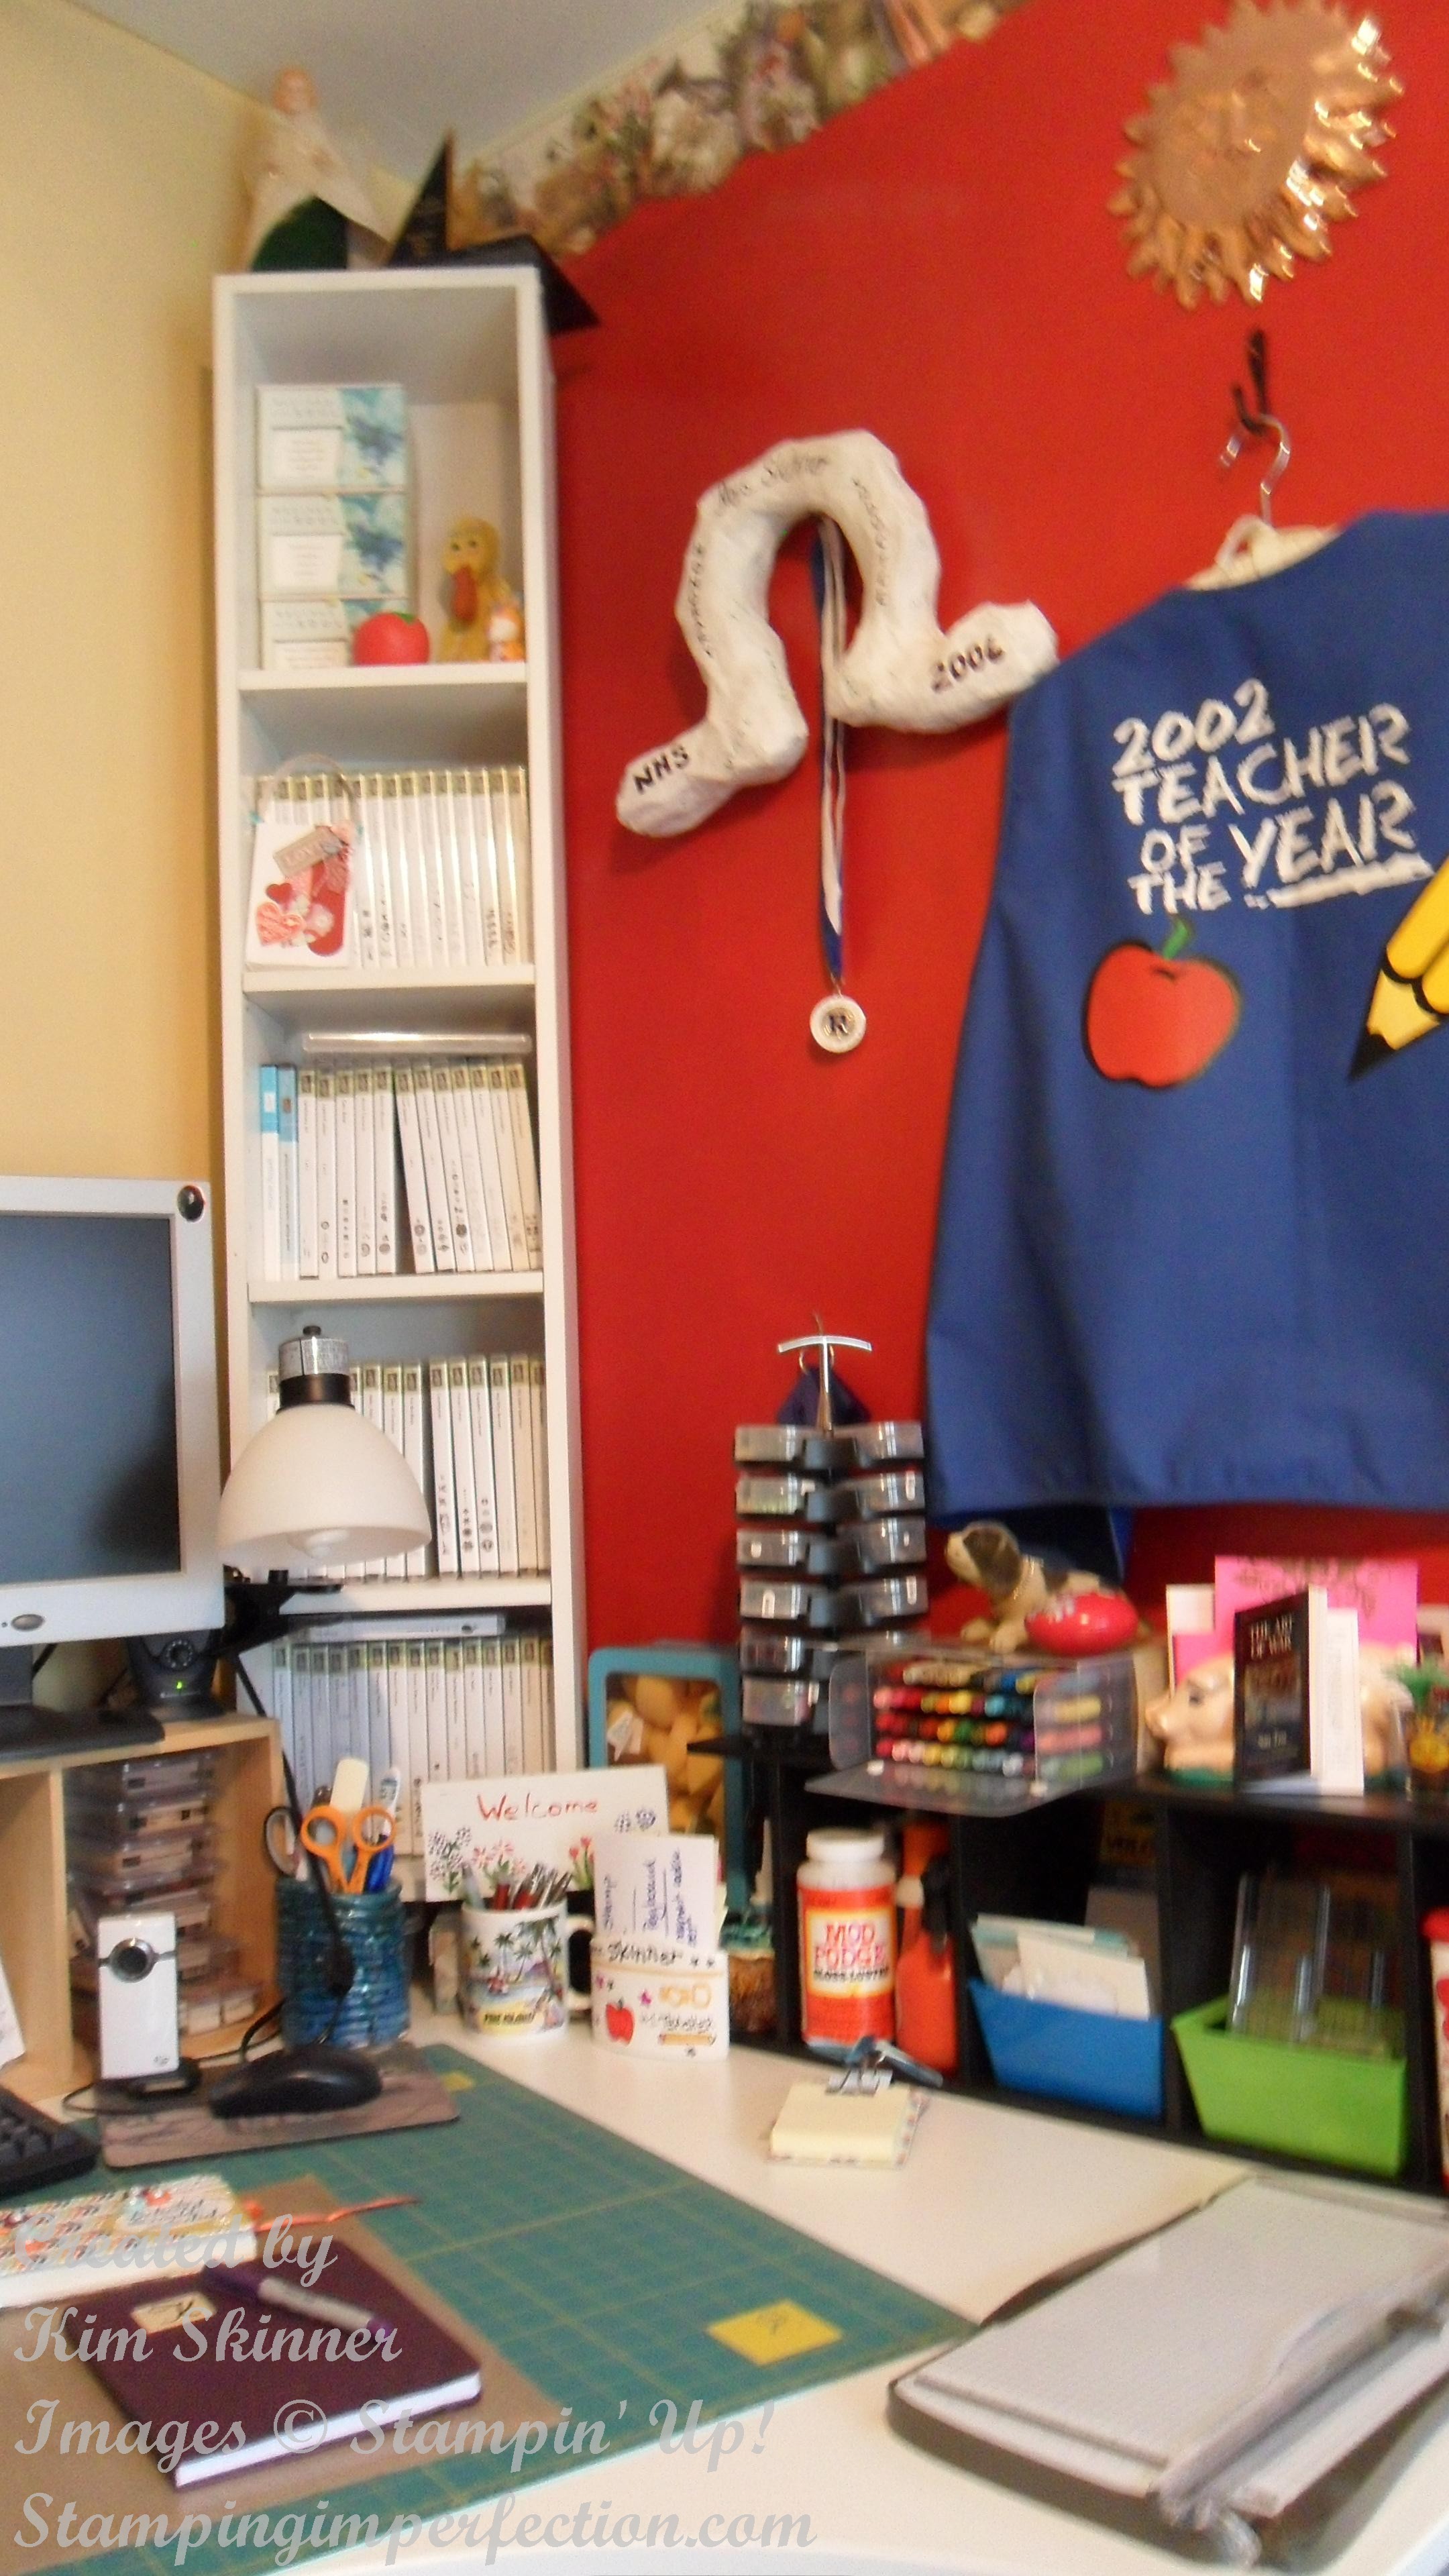
Here is my new craft space, which also doubles as my office space for grading papers and planning lessons.

This space is perfect for me! I have 3 sets of vertical shelves from a dollar store that were $15 or less each. Two are turned sideways and one is vertical. You can see that I have all of my tools within reach. I also have all of my stamp sets in full view so I don’t forget I have them. In sight, in mind! If I see it and it’s right next to me…I use it. If it’s on a shelf in another room…maybe later.
I also have all of my treasures there…things the kids or students made me, special awards, treasured pictures.
This desk is set up for me. I am left handed and it works perfectly for me. This desk was about $70 from Ikea. LOVE this. It’s huge! The room is not even 7 feet wide and maybe it is 10 feet long…maybe. I actually have a pull out couch on one wall, which I promise will never be pulled out again. One of the kids will be getting that for their first apartment and then…more room for stampin’ stuff!
Here is a better view of my stamp storage “tower”.
 The retired stuff is closer to the top along with more of my treasures. Notice I have two smaller tower shelves tipped sideways along the front and side of my desk. All of my stamp sets and tools are in there!!! Right within arm’s reach. Of course I use this stuff all the time! I don’t forget I have it!
Here is the left side of my desk. Behind the laptop is my ink storage. Love that caddy.
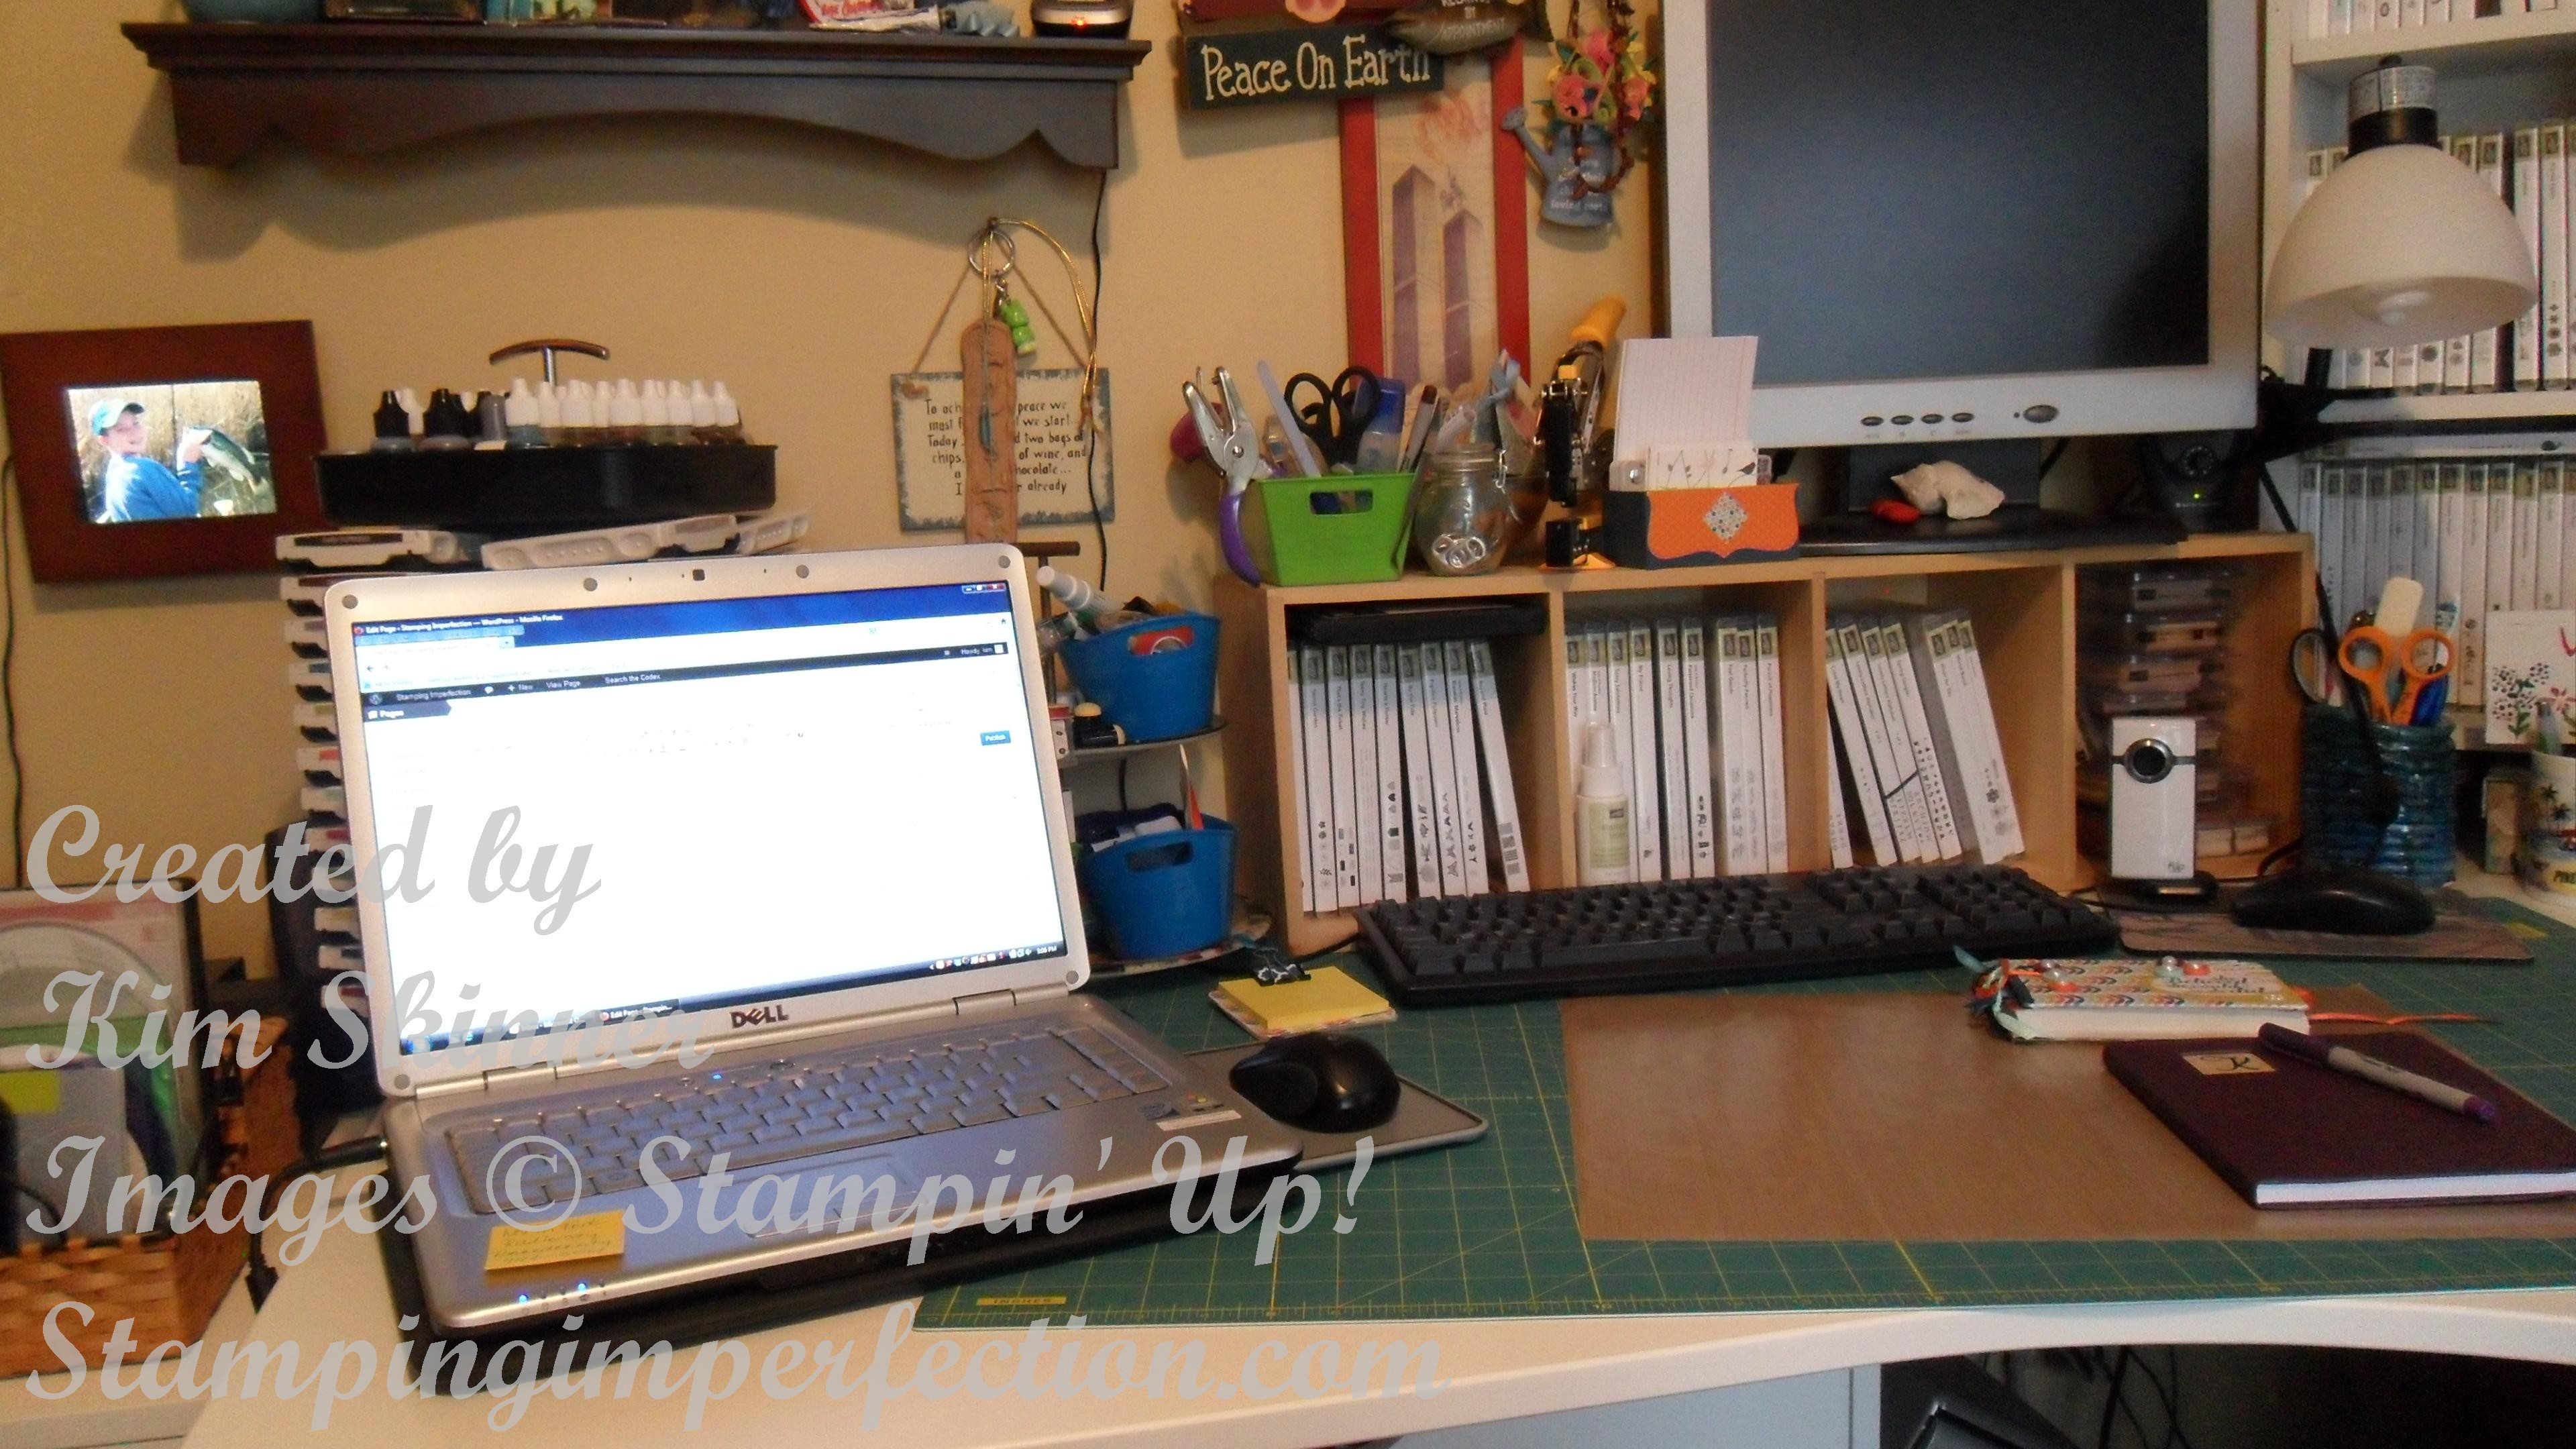 These little cubbies are really vertical storage. They are about 8 inches deep, so they are perfect for stamp storage. I love the little baskets (also from the dollar store) that I can toss my most used tools into. Stuff is easy to grab when I need it and easy to slide back into place, keeping my desktop tidy.
For my paper storage, I have two drawer units that I got from Ikea. My mother gave me some money for Christmas, so I splurged on perfect paper storage!!! These are perfect for 12 x 12″ paper. I also use the top drawers for office supplies. This room also functions as my “office”. I run my business from here and I create my lessons and grade papers here.
 The desk is so deep that leg room is no problem. I can have this underneath and still have plenty of room for my legs. Love these long drawers!!!!
Stamping Lesson 1: The Basic Materials You Need to Start!
Here is my first video tutorial…what absolute basic stuff do you need to get started?
Here are some suggestions to get started:
Stamping 101: Basic Supply List ©Stamping Imperfection 2013
These are my recommendations for different price points when you are getting started stamping.
My Basic Recommendations Include 5 Items:
- Inks: Choose a neutral stamp pad and a set of markers.
- Paper: Get White paper and one package of colors to match your markers.
- Adhesive
- Paper Snips
- Stamp Set
Sample Supply List: ($33.85-38.25) (This would be my budget friendly list for people who want to give it a try. You could choose a kit or some basics like these.)
- Neutral Ink Pad: Chocolate Chip (#126979) $5.95
- Note Cards & Envelopes (#107311) $5.95
- Stamp Set: Here is where your price can vary depending on the set you choose. Choose one you love! I would select something with images and sentiments like:
Pennant Parade (#122740 for wood at $21.95) or (#122742 in clear at $16.95 plus you need Clear Block C #118486 at $6.95)
Lacy and Lovely (#122887 for clear at $17.95 and you need Clear Block D #118485 at $8.50) or (#122885 for wood at $24.95)
Here are a couple of sample cards you could make with just these basics:
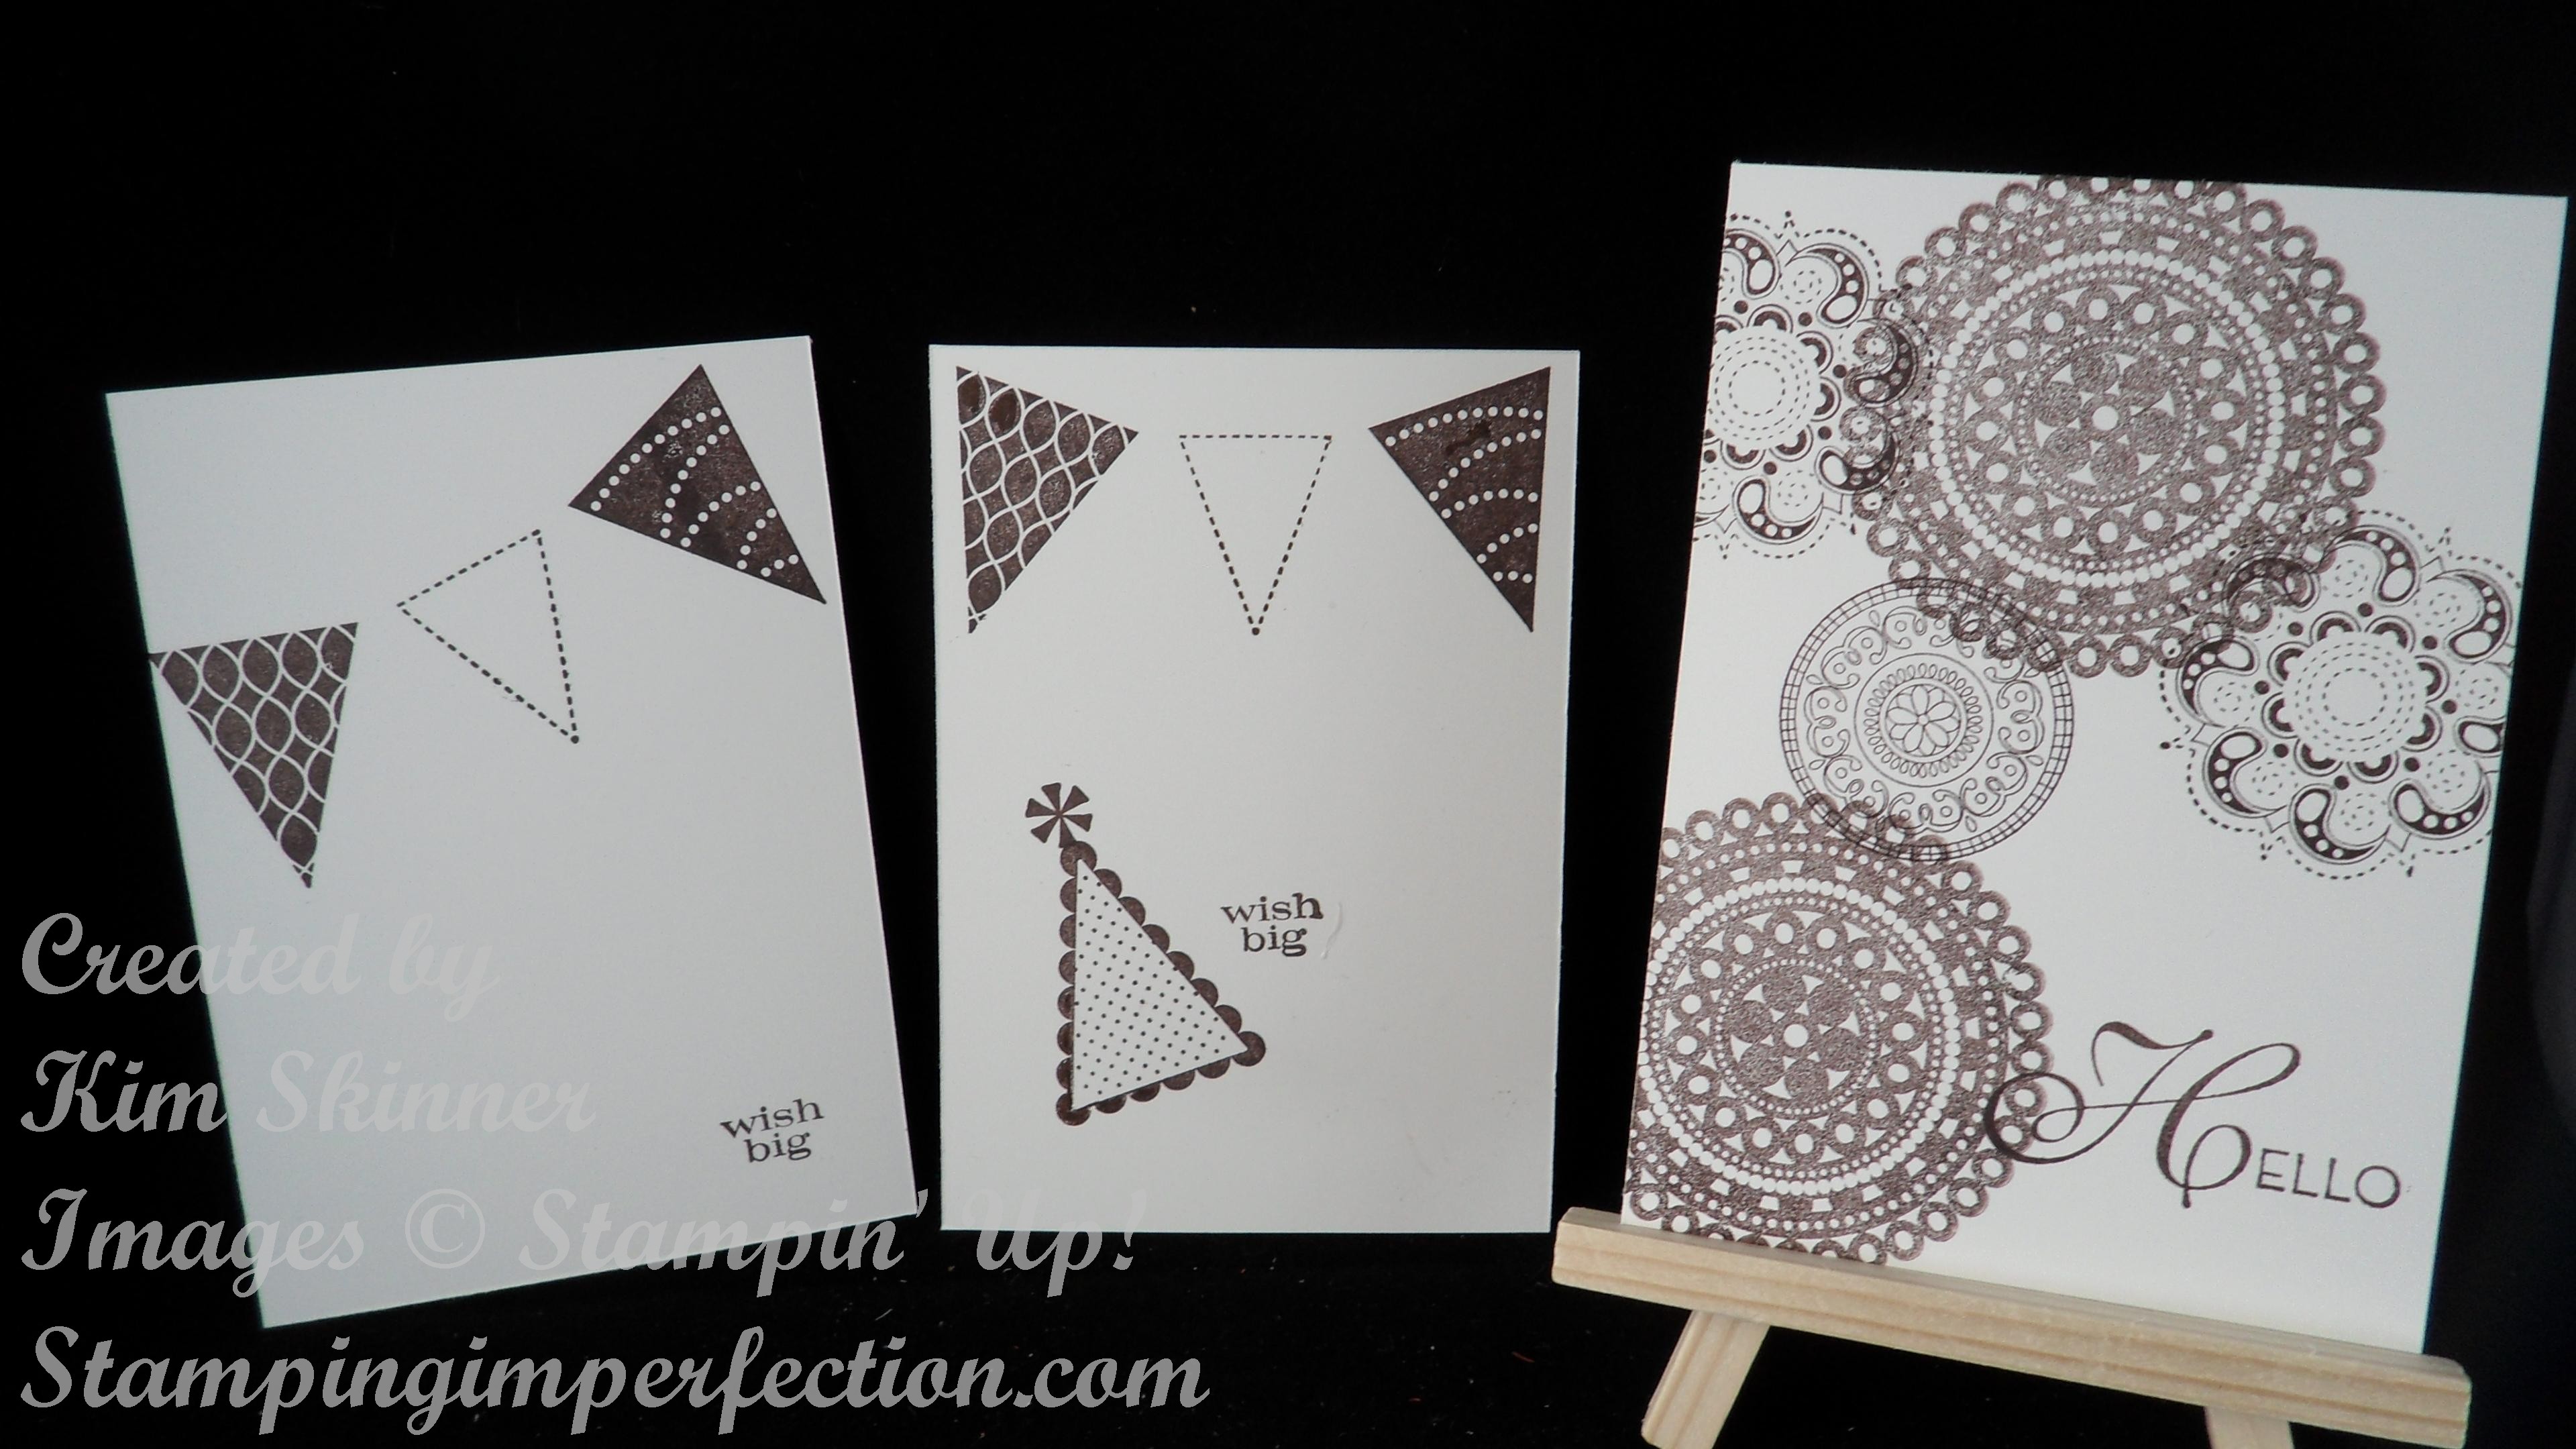
The two on the left are made from Pennant Parade and the one on the right is made from Lacy and Lovely and I did use a technique called stamping off to create it. I have a video tutorial for that technique on my You Tube channel and on my blog at http://stampingimperfection.com!
Your paper choice will be your limiting factor for the list above, as would color. You are limited if you only have one color to start with, but it’s doable! The note card set gives you 20 note cards to start with.
The ink pad and stamp set will last. (Eventually, you will need to re-ink the pad, but you will get tons of cards from that one ink pad if stored properly.) Once you buy a clear block, you have that forever also!
If you want more color and the ability to make a greater variety of cards, my basic list is below.
Sample order list: ($75.20-83.70)
Early Espresso Ink Pad (#126974) $5.95
In Color Markers (#126856) $14.95
Whisper White Paper (#100730) $8.50
In Color Card Stock (#126838) $6.95
Adhesive: Multipurpose Liquid Glue (#110755) $3.95
Paper Snips (#103579) $9.95
Stamp Set: Choose something that you love or try one of these:
Lacy and Lovely (#122887 for clear at $17.95 and you need Clear Block D #118485 at $8.50) or (#122885 for wood at $24.95)
Easy Events (#123225 for clear at $24.95 and you need Clear Block D #118485 at $8.50) or (#116958 for wood at $32.95)
For the Birds (#126407 for clear at $24.95 and you need Clear Block D #118485 at $8.50) or (#126405 for wood at $32.95)
My splurge here would also be a paper trimmer to make cutting the card stock much easier! I would also add a bone folder!
Stampin’ Trimmer (#126889) at $29.95
Bone Folder (#102300) $6.95
***If you purchase the entire list with all 3 stamp sets plus the trimmer and bone folder, your order is at around $160. This would qualify as a hostess order and you would get $25 worth of free stamping supplies of your choice!!!!
After this, it is just a matter of adding to your ink colors, adding papers, embellishments, tools and stamp sets that you love. Eventually, you will want a Simply Scored Tool, some punches and of course…a Big Shot!!!!
Here is a sample card with more supplies to start out with!
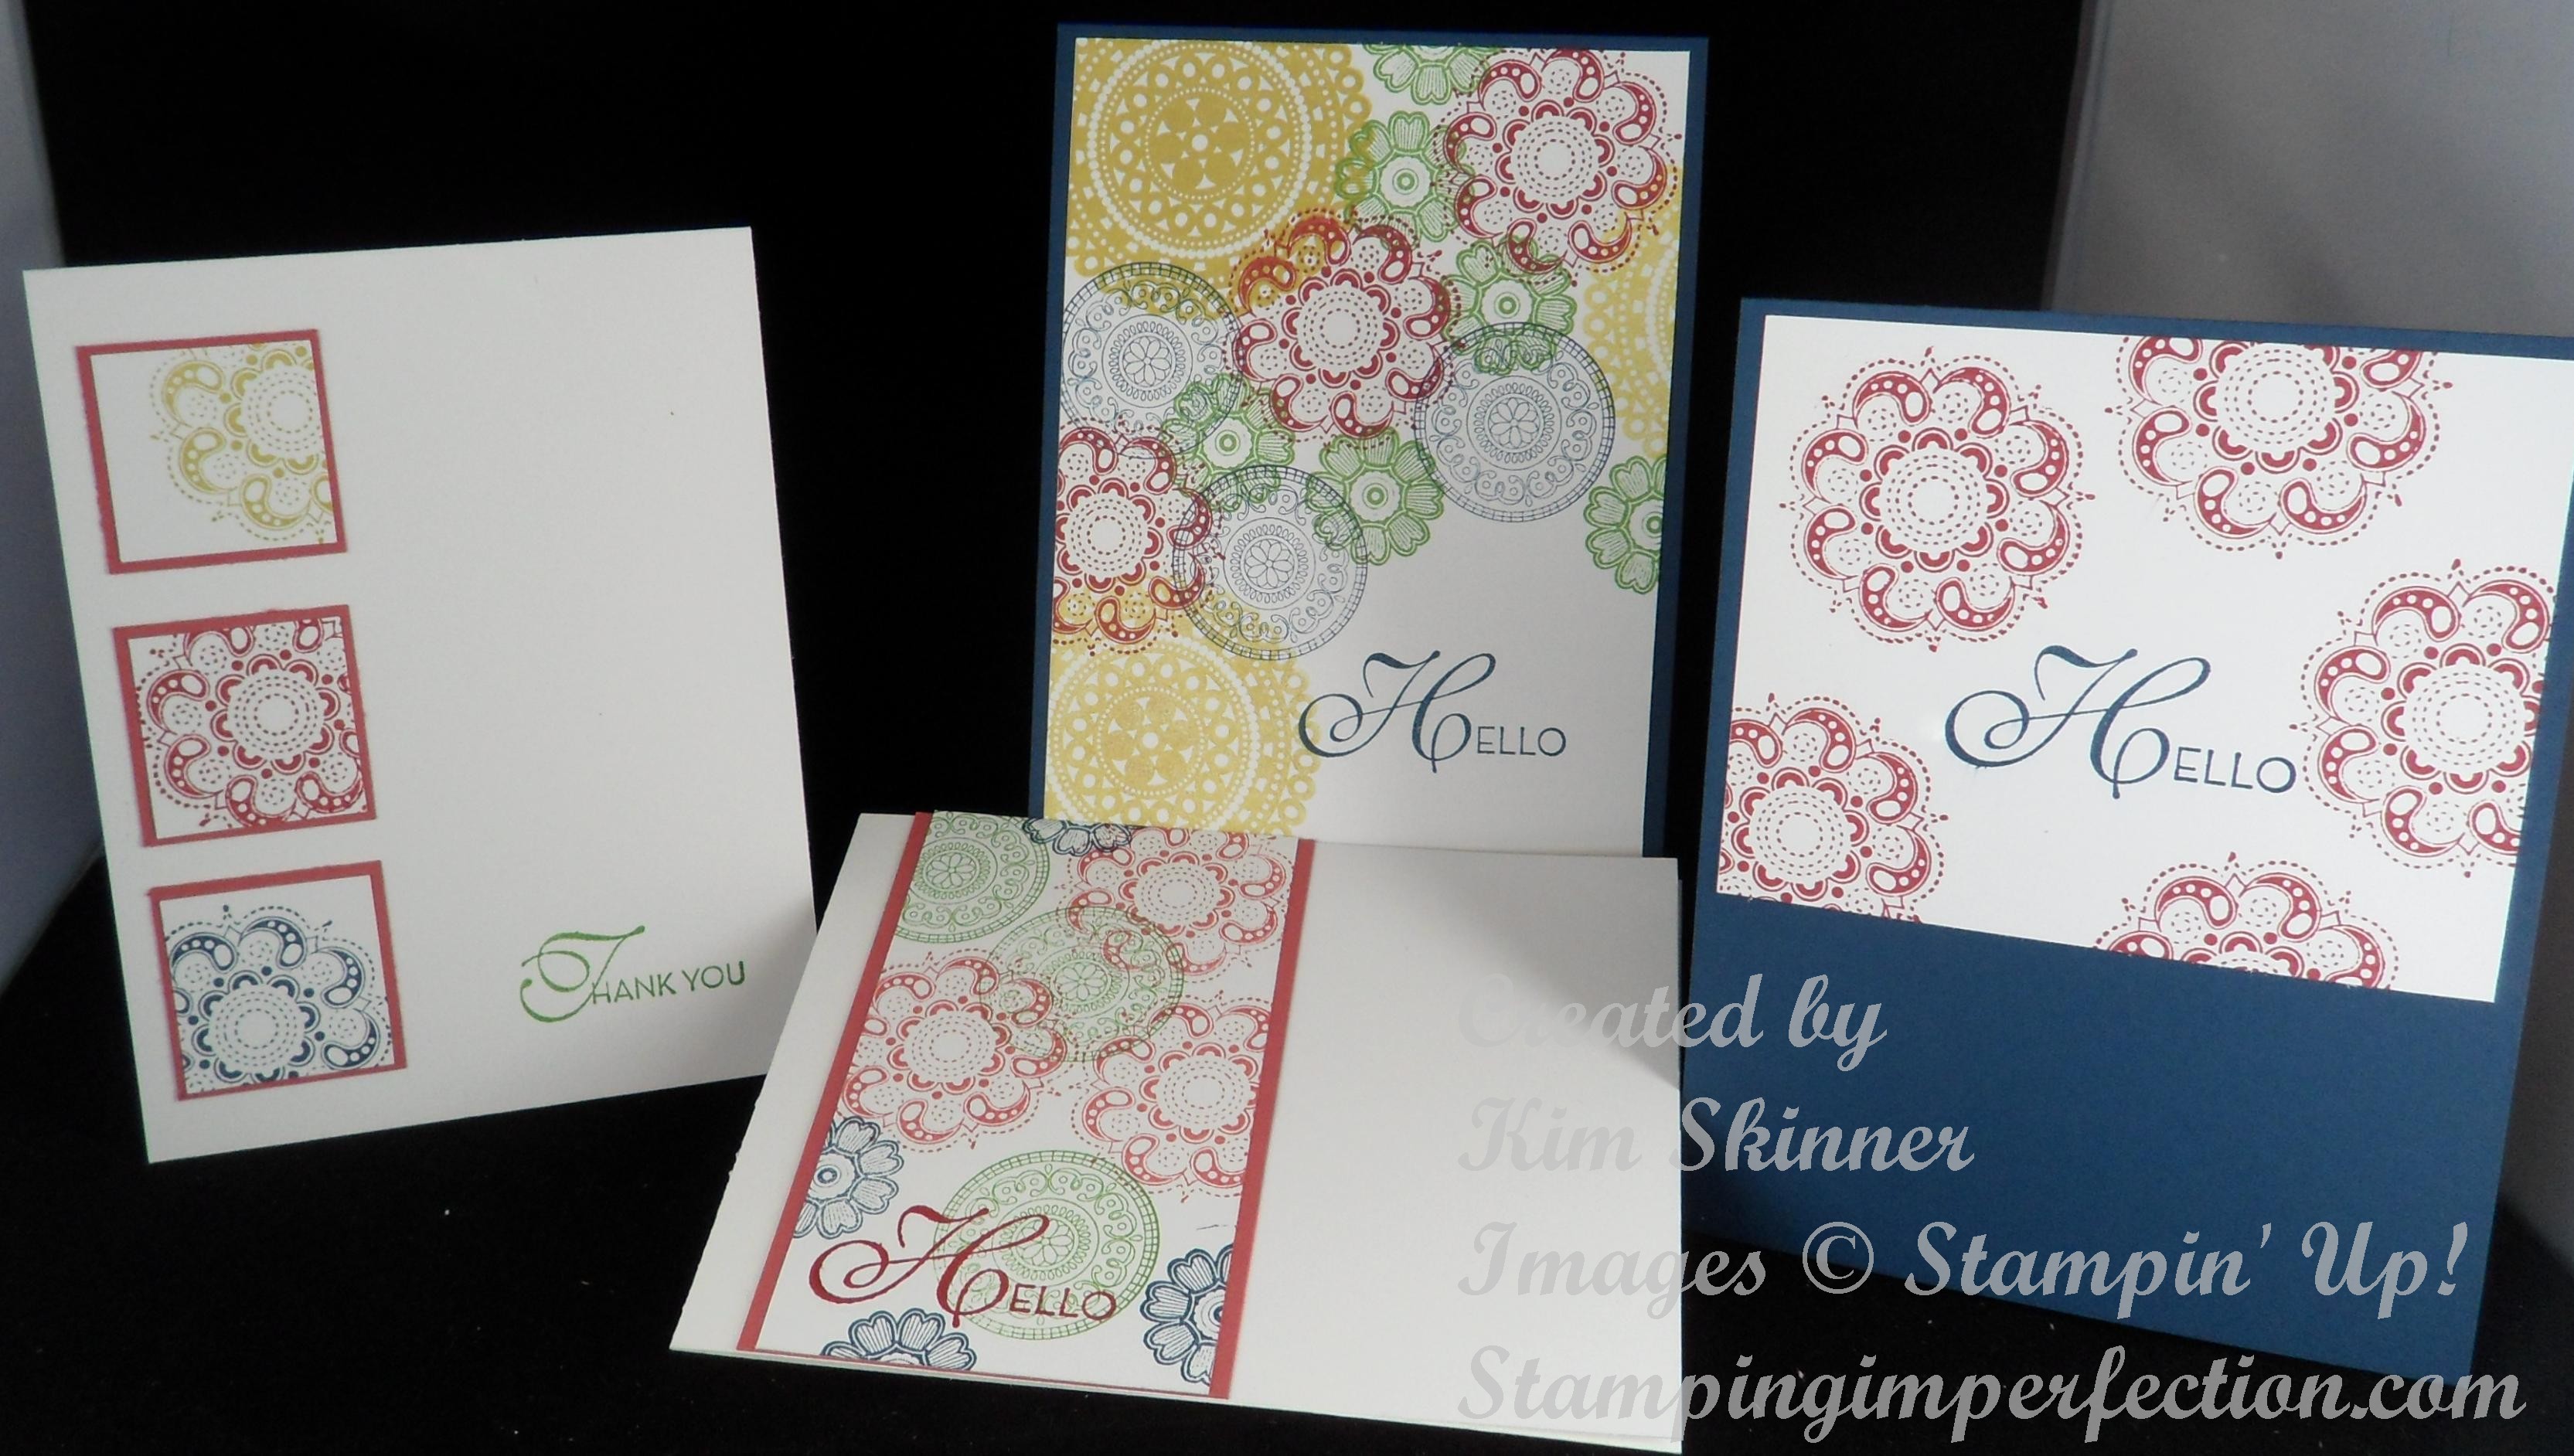
You can see that these cards are still simple, but so much more sophisticated with the colors and layers. What a difference it makes!
Of course, I am dying to add embellishments and texture that only the Big Shot can add…but those are lessons for another day!
Note: At some point you should consider adding Stampin’ Mist and a Stampin’ Scrub to clean your stamps. When you first start out, a wet paper towel or dish cloth will work, but the proper cleaning tools will help your stamps last longer!
Here is a printable supply list: Stamping_101_sample_lists
Ready to order and get started?
Lesson 2: How to Ink a Stamp and How to Stamp
Here is the printable version of this article: 7 Secrets to Perfectly Stamped Images
Article Word Count:
There are 7 secrets to creating perfectly stamped images each time you rubber stamp. There is nothing more rewarding than creating and giving a handmade card or gift to someone. You want to be proud of the card or gift, even if your not a perfectionist!
1. Condition and prepare your stamps: When you first get your stamps, you should lightly sand them with a pumice stone. This will give the ink some texture to actually stick to. You can recondition them at any point that you notice the ink is not sticking well. This is especially important to do with large stamps with lots of flat surfaces. You should do this for both clear and rubber stamps.
2. Use a foam stamping mat. When I first learned to stamp over 20 years ago, I was encouraged to purchase a large foam mat to do all of my stamping on. Using the mat under your paper, gives you a nice crisp image. It helps to prevent that halo or smudge from ink that is sitting on the edges of the rubber as well. The foam “gives” as you stamp and the image you get is much crisper. A piercing mat works well for this. You can stamp on one side and pierce on the other. You can also use the foam craft pads from the children’s section of the craft store!
3. Use the correct ink for the job: You need to choose the ink for the kind of surface you are stamping on to get crisp, clear images that won’t smudge or smear. For example, dye based inks work well for paper projects but I would choose a pigment ink for stamping on tile or glass.
4. Make sure you fully ink your stamp: The first time I use a stamp, I always test it on scrap paper. I also always look at the rubber side after I ink it up. Push it firmly into the ink pad and then look at it to see if the ink is covering the entire stamp. For larger surfaces, you should consider using a brayer to help you fully cover then entire surface of the stamp.
5. Don’t rock your stamp: Always make sure you stamp straight down, apply even pressure and lift the stamp straight back up. Be very careful not to rock the stamp as you are creating the image. Rocking it will cause any ink on the edges of the rubber to transfer to your paper, giving you the halo of ink that we all hate to see when we lift our stamps!
6. Use your tools: You purchase your tools to help you make great cards. Use them! Keep them within reach of your workspace at all times so you remember you have them. Don’t guess where to place your stamp, use your Stamp-a-ma-jig to position it! Make sure you have fully inked your rubber surface with a brayer!
7. Keep your stamps clean and store them properly: Use a cleaner and a scrubber designed specifically to clean your stamps. Clean them as soon as you use them. Store them in the recommended containers away from the elements. Don’t store them in direct sunlight as it will break down the rubber. DVD cases work great for clear stamp storage. There are all kinds of craft drawer units available to store your wood mount stamps. Check out the hardware store for great storage ideas. Take care of your stamps and tools and you will have them for a very long time!
A few tips and tricks will keep you stamping perfect images each time. You will be creating cards and projects that you are proud to give. There is nothing like giving or receiving a card someone made especially for you!
Kimberly Skinner is the Owner and CEO of Stamping Imperfection. You can get more stamping lessons with video tutorials on her blog at http://stampingimperfection.com. Sign up for her mailing list to get 3 video tutorials just for subscribers. You can also find ideas, inspirations and beautiful handmade paper crafting projects on her website. You can also purchase stamping and paper crafting supplies through her online Stampin’ Up! store at http://stampingimperfection.stampinup.net.
Lesson 3: Clear Mount VS Wood Mount Stamps
When you start stamping, you will need to decide whether you want to used clear mount stamps or wood mount stamps. There are positives and negatives to each. You will decide, as you stamp, which you prefer.
I personally prefer clear mount stamps. They are less expensive than wood mount stamps. Once I made the initial investment in purchasing the set of clear blocks in all sizes, I now purchase only clear mount stamps whenever I have a choice. I like being able to see where the stamp is when I’m placing it on my paper. I also think the biggest advantage is stamp storage. These take up so much less storage space than wood mount stamps!! I really like how Stampin’ Up! stores them in the DVD style cases with the full size images on the front of the case and the images on the side of the case so I can see what I’m looking for without pulling everything out.
Some people prefer wood mount stamps. I’ve asked people why that is and here is what I’ve heard: They are ready to go. You don’t have to search for the right block to use to stamp the image. Many people also said they prefer the wood mount for large background stamps and teeny tiny sentiments. They find the larger and very small stamps easier to use when they are permanently mounted.
Here is a Stampin’ Up! Video on the benefits of each:
How to Use Clear Stamps:
Here is a video on using wood mount stamps:
Lesson 4: Kinds of Inks: (Originally published on ezine.com)
Here is the printable version: Stamping 101_Types of Inks
Stamping 101: 5 Basic Types of Ink For Rubber Stamping
There are 5 basic types of ink pads that you have available when you are rubber stamping. Here is a rundown of each type of ink, their uses and tips on selecting the right ink for our project.
- Dye Ink: Dye ink is fabulous because it dries quickly on all types of paper and they work well on glossy card stock and vellum. Because they dry quickly, you can stamp one image and then immediately stamp another or add an embellishment to your project without smudging the ink. These are great ink pads to use when stamping with children because the are washable and non-toxic. A little soapy water will take the ink off your table and off small hands! Dye inks do tend to fade over time, so you should not use them for scrapbook projects unless they specifically say they are archival dye ink pads. You would also avoid using a dye ink pad when embossing because they dry too quickly to hold embossing powder. I would also not recommend using them if you plan to color in your image with markers or watercolors because the images tend to smear if they get wet. Tip: Store dye ink pads upside down so the dye flows to the top of the form or felt of the pad.
- Pigment Ink: These are thick, slow drying inks. They are color-fast and do not fade when exposed to light. They tend to hold their vivid colors and resist fading so they are great for scrapbook projects. These are great for embossing because they stay wet long enough to hold the powders. They won’t dry on glossy paper or velum unless you emboss and heat set them. These are perfect inks for tile, glass and wood projects. You can heat set them with a heat gun for faster drying.
- Permanent solvent inks: Solvent inks are opaque and quick-drying. They are great for use on plastics, metal, glass, ceramics, laminated or coated paper and leather. They are not recommended for fabric. These inks will stain clothing and furniture. They should be used in a well ventilated room and are not recommended for use with children. These are fabulous inks for stamping on tiles. They also work great for water coloring or coloring with markers since they do not smudge when they get wet. They do stain your stamp, so you will want to purchase a stamp cleaner made just for solvent inks.
- Embossing Ink or Watermark Ink: These create a translucent image excellent for background designs on any color paper! They are child-safe and acid free so they are great for archival projects like scrapbooks. They are also perfect for embossing because they stay wet long enough to hold the embossing powder to be heat set to the paper. They are slow drying inks.
- Fabric Dyes: These are specific for fabrics. Check the label to make sure that you get one that is non-toxic. You can stamp the fabric and then heat set the ink in the dryer or with a dry hot iron. They also work well on acetate and shrink plastics.
Most inks are available in a wide variety of colors, with the exception of permanent inks. There are a variety of different sizes of ink pads. Larger ink pads tend to give your rubber stamp better ink coverage with less effort on your part. Most ink pads come as a single color pad, but there are palette pads available that come with several colors of ink on one pad.
If you are just starting out, I recommend that you get one or two ink pads in good basic colors like black, gray or dark brown. You can add color to your images with markers, chalks, and colored pencils! Overall, the project you are working on should determine the kind of ink pad you choose to use.
Kimberly Skinner is trying to get you hooked on rubber stamping and paper crafting. You can learn more by visiting her blog at http://stampingimperfection.com. Sign up for the mailing list to get more tips and tutorials. You will find video and printable tutorials just for beginning stampers, as well as tutorials on more advanced stamping projects and techniques. It’s all free! Get inspired and find great card making and scrapbook project ideas on her blog. You can also purchase stamping and paper crafting supplies through her online Stampin’ Up! store at http://stampingimperfection.stampinup.net.
Lesson 5: Keep Your Stamps Clean for Crisp, Clear Images!
Keeping your stamps clean is a must to get clear, crisp images every single time you use your stamps. Your stamps will also last longer if you care for them properly. Stampin’ Up! has 2 tools for keeping your stamps clean. You can use their Stampin’ Scrub (#126200) and their Stampin’ Mist (#102394 for the spray bottle size and #101022 for the refill size).
Simply spray some of the Stampin’ Mist on the rain drop side of your Stampin’ Scrub pad and the scrub your stamp back and forth on the wet side of the Stampin’ Scrub. You then scrub it on the dry side of the Stampin’ Scrub to dry it off!
The clear blocks should be kept clean as well. You can clean them the same way you clean your stamps. I also periodically run them under the faucet and dry them off to get them really clean. Keeping the blocks clean allows the stamps to stick better. If you are having trouble with a stamp that isn’t sticking to your block, just clean and dry your block off and it should be fine!
Here is a video to show you how to clean your stamps!
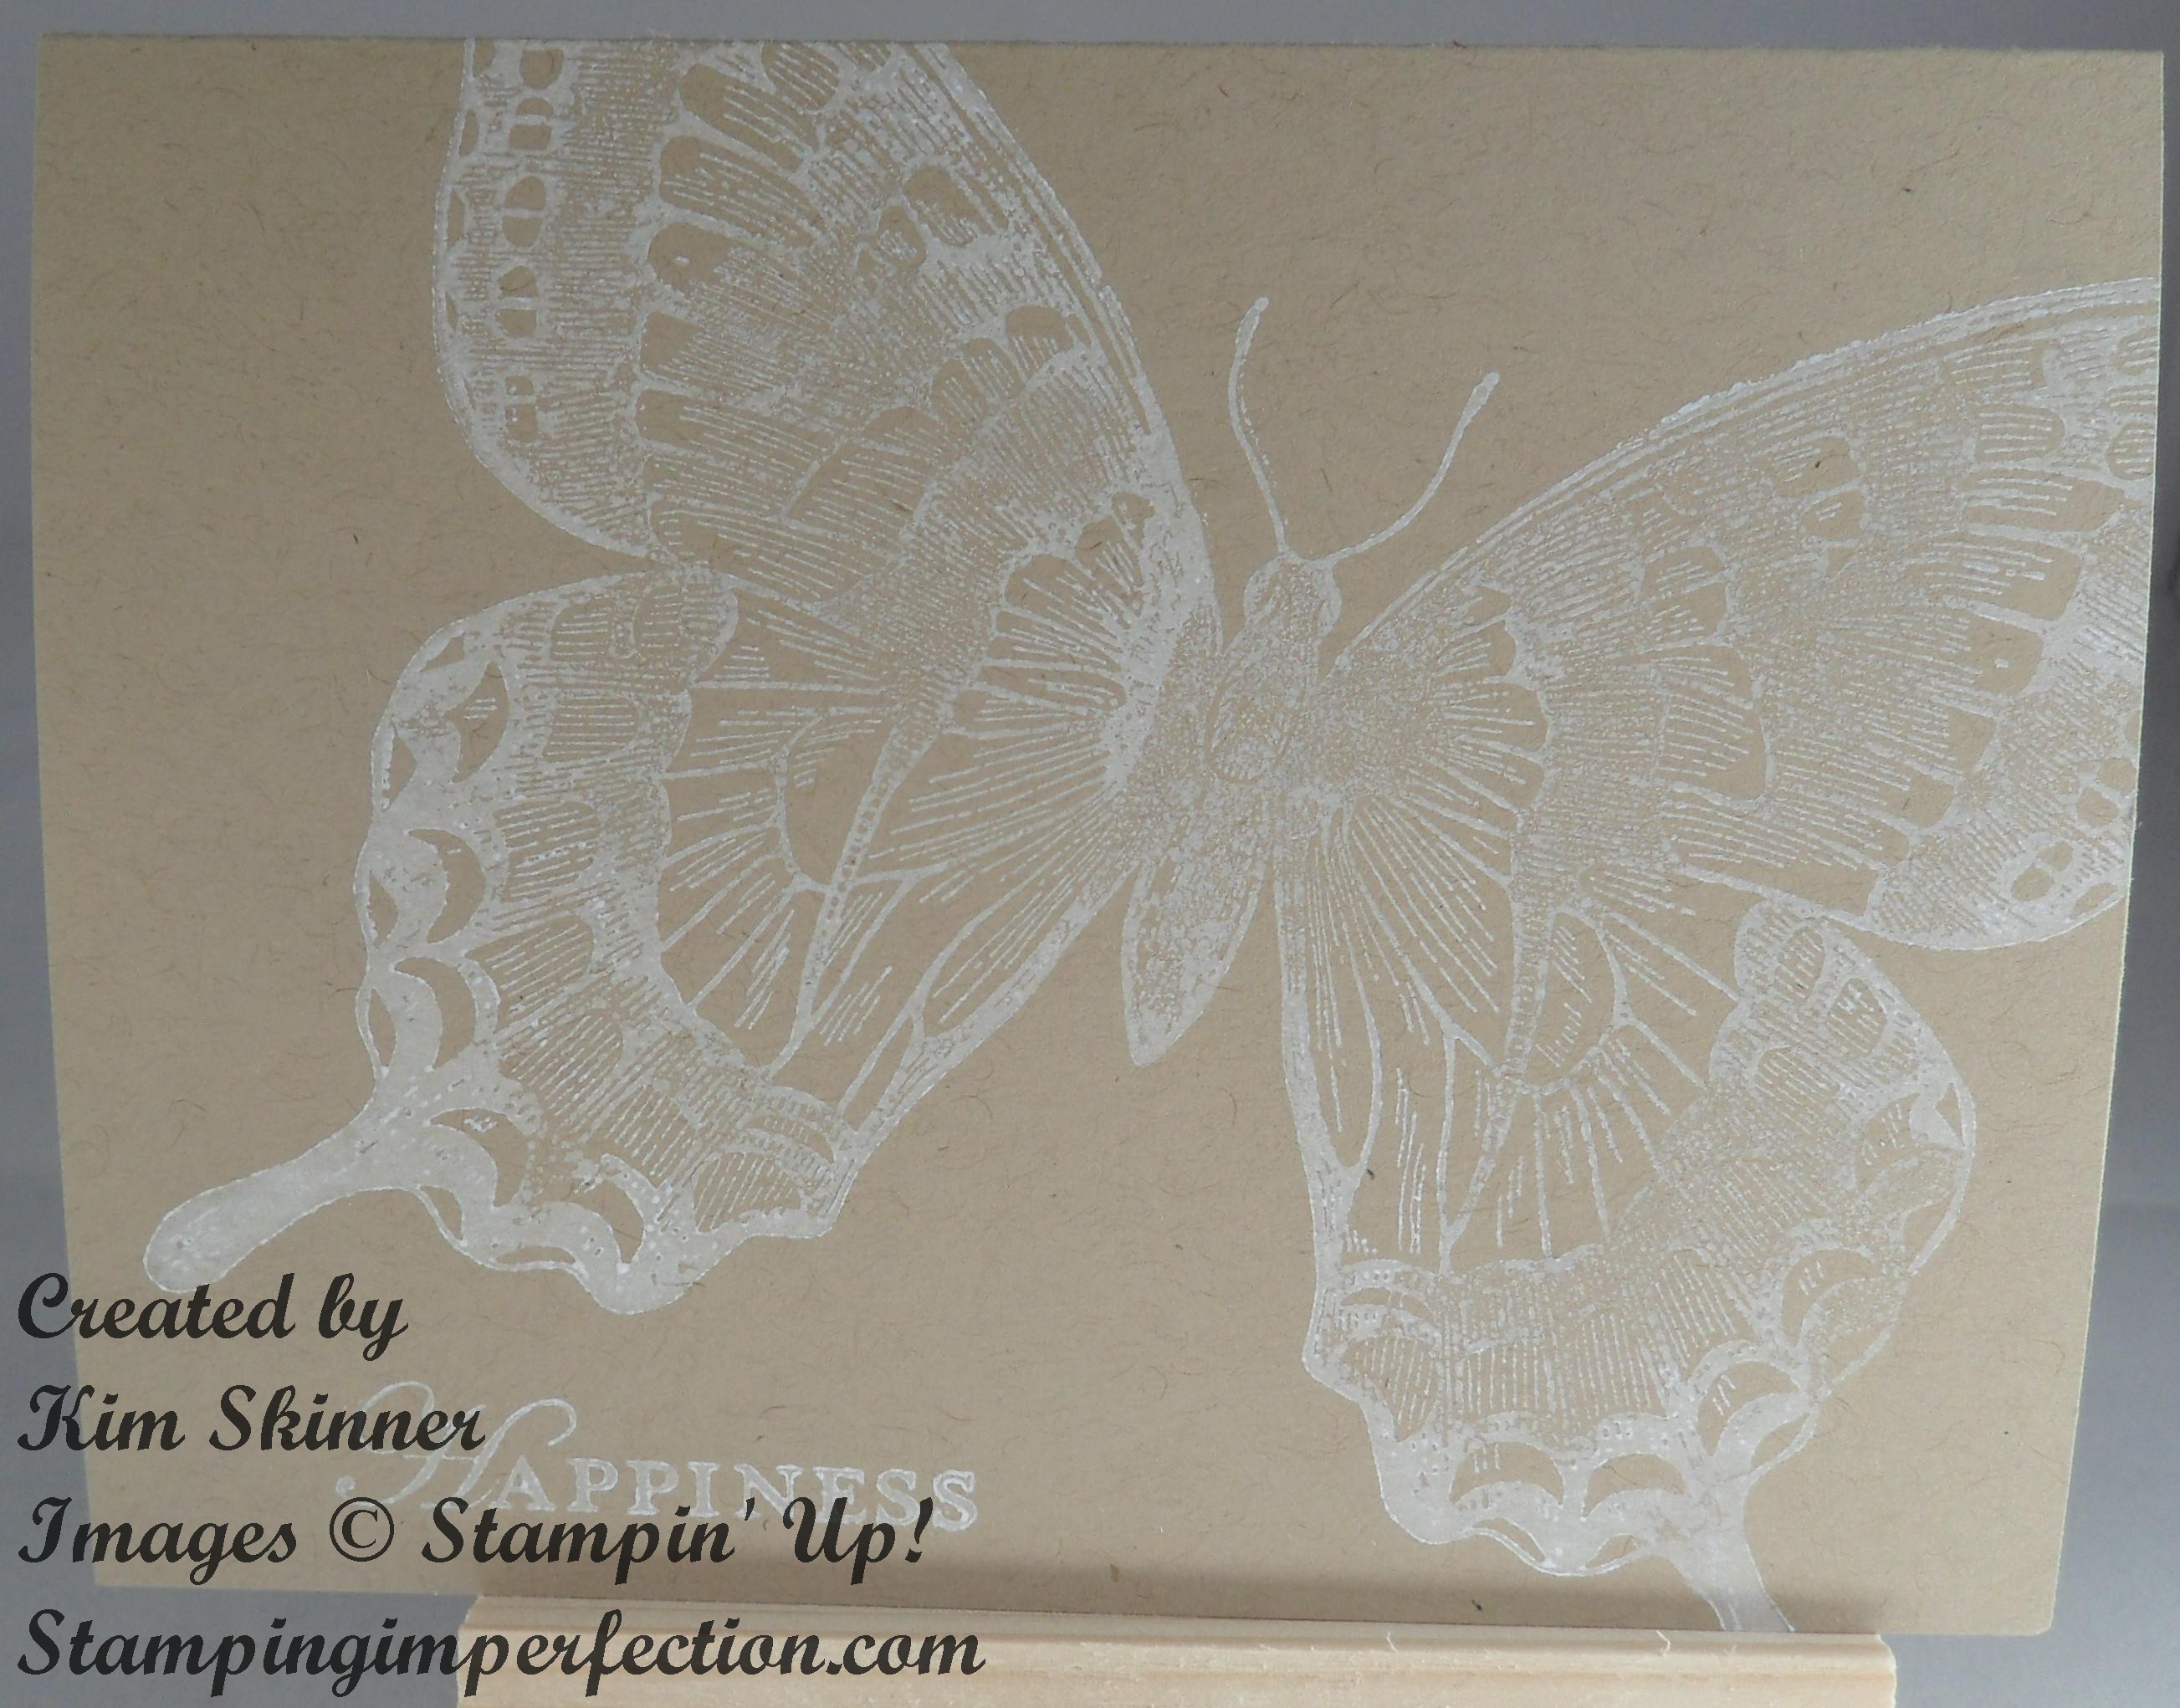
Quick Beginner Card: Swallowtail! Here’s the video tutorial!
Stamping Techniques All Stampers Should Know!
1. Heat Embossing
Lesson 6: How to Create Card Layers
Here is the printable tutorial: Stamping_101_card_layers
Stamping 101: Card Layers
Basic Cards are generally 4-1/4 x 5-1/2 after they have been cut, scored and folded. There are two ways to get this card size. For both, you will start with a piece of card stock that is 8-1/2 x 11”.
Landscape orientation:
For this card, you will cut the card stock in half with the long side (11”) against the top of the trimmer. Line up your card stock with the 5-1/2” line and cut. This gives you two pieces cut at 5-1/2 x 8-1/2”. Turn it 90 degrees and score it at 4-1/4”. When you fold it, you will have a card that is 4-1/4 x 5-1/2”!
To create a mat, I generally like to cut it at 4 x 5-1/4”. When centered on the card, this gives me a 1/8” border peeking around all 4 sides. I cut the mat ¼” smaller than the length and ¼” smaller than the width of the card.
To create a mat with less border around it, cut the mat 1/4” smaller than the card front. Cut the mat at 4-1/8” x 5-3/8” for a small amount of border peeking around the edge of the mat.
Upright Orientation:
For this card, you will cut the card stock in half with the short side (8-1/2”) lined up against the top of the trimmer. Line the paper edge with the 4-1/4” line on the trimmer and cut the paper in half lengthwise. This will give you two pieces of card stock cut at 4-1/4 x 11”. Turn the card stock 90 degrees in your trimmer and line the edge up with the 5-1/2” mark. Score the card at 5-1/2”. When you fold the card, you will have a card that is 4-1/4 x 5-1/2”. This is the same size as the landscape orientation, buy it opens differently.
To create the mat, you will cut the mat at 4 x 5-1/4” for a 1/8” border or for less border you will cut the mat at 4-1/8” x 5-3/8” as described on page 1. This is really a matter of personal preference!
Keep in mind that the same idea and technique applies if you want to make several layers on your card, or if you want to create a mat for your image or your designer series patterned paper. If you want a tiny border, cut the mat 1/8” larger in width and length than the piece you are making the mat for. If you want more border, cut the mat ¼” larger in width and length.
You can also create a much larger border as well. Just adjust your measurements for the length and the width by the same amount. If you want a ½” border, the mat should be 1” less in length and in width so you have the same amount of border around the entire mat!

Thank you so much for these videos, I learned so much, that I did not know and I so love your sense of humor too! and the little pop up messages! awesome!
I’m so glad you’re finding them helpful!!! I will be posting more over the next few weeks!
I new, just starting out. Thank you for Stamping 101. Its a good basic starting point, now I’ll just practice what you’ve showing me.
Thank you again.
I’m glad that you found it helpful! I will be adding more to it soon!
You are amazing. I have been stamping for a few years. I finally got a coumpter, and although I am not good with iti can yet I managed somehow to find your postings. I simply enjoy watching you at work. I print everything, so that I can go into my scrapping room and create—is it creating if yolu copy??–but I do try to change some of it. I havelearned some tips in the two days or times I watched you. OK off to write some checks for bills. I promised myself I WOULD get them done today. Elaine Happy 4th~~~~
Elaine,
What a lovely comment!!! I’m so glad you found my blog! It is absolutely creating even when you copy a card or scrapbook page. I always hope that the projects I create inspire other people to create either my project or their version of it!!! Thank you for your comment!
Hello….#I am really loving your little videos and how to-to’s. I have learned things from these and have tried them out a little. I am waiting for my swallowtail stamp to come and really look forward to that, as I so want to have a go at embossing it and then adding some gentle colours like pearlised pastels (mica powder) to the wings to add shimmer and maybe a little bling!
Thank you so much for the how to ink. I wondered why I kept getting the print of the edges aarrghh
xx
I’m so glad you are finding my videos helpful! Have fun with the Swallowtail stamp!!!
Hi Kim:
I am looking to start a new hobby and I love sending cards and I do a lot of sending card as one of my duties as a support group leader for the illness that my daughter has. I would love to be able to make my own. I haven’t had a chance to really watch your video’s but I will.
I love your desk. What I want to know is what is the green mat called that is on your desk? I have watched other stampingup videos by demonstrators making cards and they have a mat to.
Thank you so much. I have also subscribed to your youtube channel to learn more.
Hugs:o)
Jane
I have a photopolymer stamp, wonderous wreath, and I am not having much luck. The image is not clean and it is not even through out the stamp. any ideas. I used a foam pad under the paper and that helps a little, but it is still not crisp and clean.
You will need to “rough up” the stamp. I found that rubbing it on my pant leg a few times allowed the ink to stick better. Others have suggested that the first time you stamp with it, use Versa Mark ink and it will hold the dye based ink better.
I have some supplies that I have been looking to learn to utilize properly, and in searching the web for beginner stamping I found you! Exactly what I have been looking for – thank you for this info!
So glad you found me!
How do you avoid getting a border around your image? I am personalizing some things for our wedding using a rubber stamp and some have come out perfect, while others have a weird border!
Hi Katie! You have to be careful to stamp straight up and down. Be careful not to rock the block as you are stamping. I also find that it helps to stamp on a foam pad like the piercing mat or a craft mat. I also keep a damp cloth next to me so I can wipe any excess ink off the sides of the block or the rubber and then huff on the inked stamp to re-moisten the image before stamping.
I am a stamper or yesterday as I necessarily took about 10 years off from my hobby. In returning, I have found things to be VERY different and way more challenging than way back when! Do you have any intermediate stamping videos for ‘newbies’ with some experience??
Thanks for your help!!
Rhonda
Rhonda,
There are so many more companies and products now than there were 10 years ago. I am working on a Technique-A-Week video series that I hope to get going next week that will be perfect for intermediate crafters. I have a lot of technique videos on my YouTube channel, but this series will also have a page on my website like the Stamping 101 series on my blog. Enjoy getting back in to stamping!
kim
Very helpful tips for new and returning papercrafters – thank you!
There’s a typo in the last paragraph of the section about card layers – for a layer (mat) attached to a card base to have a 1/2 inch border around it, the layer has to be 1 inch shorter and narrower than the card base. To put this in general terms, when attaching a layer to a card, decide what size of border you want a given layer to have (e.g., 1/16th of an inch, 1/8th of an inch, etc.). Then double that, and determine the layer’s width and length by subtracting the doubled amount from the width and length of the card. (When adding more than 1 layer, subtract the doubled size of each new layer’s desired border from the previous layer’s width and length.)
Thank you for catching that typo and letting me know! I appreciate it!