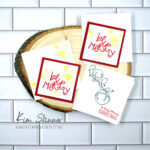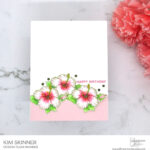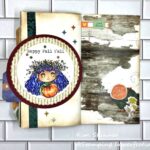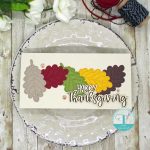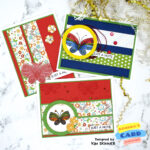
You can create 8 gift cards and a gift bag out of two 12 x12″ sheets of paper! I challenged myself to see how little I really need to create a set of gift tags and a bag. Of course when I was done, I just had to step up my cards by adding some buttons, bows and rhinestones.
What I did learn is that you can create a nice variety of cute cards for very little. Here are my cards and bag before my embellishments were added:

Must have materials to complete this project:
- 1 piece of plain 12 x12″ card stock. I used Whisper White (124302).
- 1 piece of Designer Series Paper which means patterned paper, two sided is best. I used International Bazaar (#126920).
- At least one marker or ink pad. I used 3 different colors of Stampin’ Write Markers: Pacific Point, Rich Razzleberry and Lucky Limeade.
- At least one stamp. I used the My Little Greeting stamp set (#129111) because it has one small flower stamp and two sentiments.
- Scissors, a ruler and adhesive are also necessary. I used SNAIL adhesive (#104332) which is two sided tape on a tape runner. It is easy to use and not messy!
Additional materials that make your crafting life easier for even the simple projects:
A paper trimmer (#126889) and a Scoring Tool like my Simply Scored Scoring Tool (#122334) and bling! Ribbon, string, buttons, brads or anything you can use to embellish your project make fabulous additions and help to add that WOW! factor.
Directions for the cards: (I have created a video tutorial for this project, which is below!)

- Cut your plain card stock into 8 pieces 3 x 6″. Fold them in half to form your card.
- Cut your patterned paper in half to get two 6 x 12″ pieces. One half will be used to create the bag. The other half will be used to decorate the bag and the cards. You need to cut this piece into 6 pieces that are 3 x 3″.
- Cut 3 of the squares in half lengthwise and one in half diagonally. Attach each one of these paper pieces to each of your cards with adhesive. Use both sides of the patterned paper to give yourself more variety in your cards.
- Using your stamp pad or marker, ink up your stamp and stamp each card with an image or sentiment.
- You should have two 3 x 3″ squares left. Cut one into a 2 x 2″ square and then cut the smaller piece into a 1 x1″ square. These are going to decorate your bag.
Directions to create the bag:

- Score (which means to create fold lines) the second 6 x 12″ of patterned paper at 1″, 3″, 7″, and 9″ parallel to the 6″ side of the paper. Fold along each score line.
- Turn the paper 90 degrees and score 1-1/2″ parallel to the 12″ side of the paper.
- Snip the paper from the edge along each scored line up to the 1-1/2″ scored line. See my picture above. We do this to form the bottom of the box.
- Fold the box. Use adhesive along the 1″ flap and adhere this under the side of the box. Fold all bottom flaps in and add adhesive to the top flap to hold the bottom of the box closed.
- Decorate your bag by layering the squares you created when you created the cards. I adhered the 3″ square, the 2″ square and finally, the 1″ square.

Now you can embellish your bag and cards with any materials you have in your craft stash! Enjoy!
If you are shopping for your stamping and paper craft supplies on a budget, check out my Virtual Stamp Club by clicking here! It is an easy way to treat yourself and get what you need to create beautiful projects a little each month. As my thank you to you for being a member of my Virtual Club and ordering supplies in my online store, I will give you my Studio Virtual Club Project Online Classes for FREE each month you are a member of my club! That will give you a minimum of 4 card and project ideas each month! When you purchase your stamping supplies, you should use them! I will provide you ideas and inspiration! Check out the first January club project by clicking here!
Thank you for visiting my blog today! Come again tomorrow for more inspiration!
Shop online by clicking here!
Happy crafting!

Sign up for my mailing list to get monthly newsletters with full project tutorials. Receive 3 exclusive video tutorials just for my subscribers!

