Stampin’ Up! is excited to announce that one of our most exciting new products, Stampin’ Blendabilities Markers, are now available for order as of July 1!
These exclusive alcohol-based marker sets, come in a 3-pack of light, medium and dark shades (of the same color ), and provide your projects a more saturated look with blended colors.
We recommend using Stampin’ Up! Whisper White Cardstock with your Stampin’ Up! Blendabilities, but any one of our cardstocks would work just as well. And since traditional alcohol markers require a bit of training and aren’t as accessible, we’ve developed videos to ensure that Blendabilities are easy-to-use for everyone!
On July 1 , you will be able to order the Blendabilities items below.
- Cherry Cobbler (Item #130995 – $11.95)
- Coastal Cabana (Item #131000 – $11.95)
- Daffodil Delight (Item #130998 – $11.95)
- Old Olive (Item #130999 – $11.95)
- Pumpkin Pie (Item #130997 – $11.95)
- Rich Razzleberry (Item #131003 – $11.95)
- Skin Tone Assortment (Item #129370 – $22.95)
In addition, the following Blendabilities products will also be available:
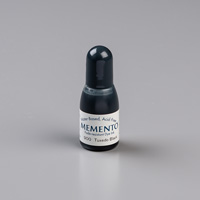
- Memento Ink Pad (Item #132708 – $5.95)
- Memento Ink Refill (Item #133456 – $4.95)
- Color Lifter (Item #129369 – $4.95)
What Sets Them Apart:
- The Stampin’ Up! rectangular barrel keeps your markers from rolling away!
- Flat storage helps to maintain the life of each marker.
- Each marker comes with a tip on each end: brush and fine.
- Marker tips are made of nylon, which is superior to polyester which can fray.
- Color coded caps.
- Stampin’ Up! markers coordinate wonderfully with our cardstock, and can be used with transparent sheets.
How to use Blendabilities:
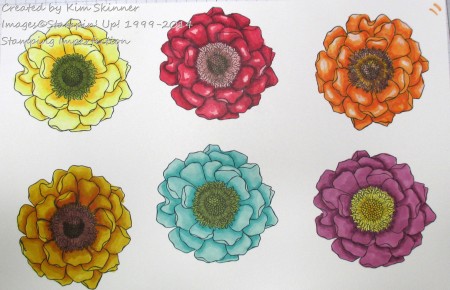
Here you can see my initial attempts using the Blendablities!
I can see why crafters enjoy the alcohol markers. I have to say, there aren’t many things more relaxing than coloring in an image whatever your color tool of choice.
Honestly, I would never select this as a technique to use to create all of the cards for my Christmas list. I would not want to put that much time into producing cards. I do like my cards to be quick and easy! This would not be quick!
I also think that this is a technique that requires practice. You can see that each bloom here is different in the coloring technique that I used. The cherry cobbler and pumpkin pie blossoms on top have a lot more light areas following the directions on the video.
The daffodil delight in the lower left is blended with some of the pumpkin pie and the skin tones. Why just stick to one color when you can blend them?
(The upper left is my one set of copics…I bought a set of yellows and the price at 50% off for the set kept me from falling in love with them. I required huge restraint on my part to not order one set of every color. I decided the kids needed their tuition paid more than I needed another obsession!)
I think with practice, you develop the method that you most prefer that will give you the look you are going for. The thing about crafting is that it is all about experimenting and finding your comfort level, your style and technique.
Enjoy experimenting!
Purchase your Blendabilities starting July 1 at mystampingstore.com!
Click the links below for more details:
Product List

