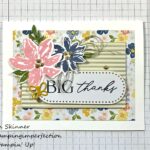
Making beautiful handmade cards begins with knowing how to cut the card to be the size that you want. Here are some quick and simple instructions on cutting card stock to create the basic card size and creating mats to layer on top!
Stamping 101: Card Layers
Basic Cards are generally 4-1/4 x 5-1/2 after they have been cut, scored and folded. There are two ways to get this card size. For both, you will start with a piece of card stock that is 8-1/2 x 11”.
Landscape orientation:
For this card, you will cut the card stock in half with the long side (11”) against the top of the trimmer. Line up your card stock with the 5-1/2” line and cut. This gives you two pieces cut at 5-1/2 x 8-1/2”. Turn it 90 degrees and score it at 4-1/4”. When you fold it, you will have a card that is 4-1/4 x 5-1/2”!
To create a mat, I generally like to cut it at 4 x 5-1/4”. When centered on the card, this gives me a 1/8” border peeking around all 4 sides. I cut the mat ¼” smaller than the length and ¼” smaller than the width of the card.
To create a mat with less border around it, cut the mat 1/8” smaller than the card front. Cut the mat at 4-1/8” x 5-3/8” for a small amount of border peeking around the edge of the mat.
Upright Orientation:
For this card, you will cut the card stock in half with the short side (8-1/2”) lined up against the top of the trimmer. Line the paper edge with the 4-1/4” line on the trimmer and cut the paper in half lengthwise. This will give you two pieces of card stock cut at 4-1/4 x 11”. Turn the card stock 90 degrees in your trimmer and line the edge up with the 5-1/2” mark. Score the card at 5-1/2”. When you fold the card, you will have a card that is 4-1/4 x 5-1/2”. This is the same size as the landscape orientation, buy it opens differently.
To create the mat, you will cut the mat at 4 x 5-1/4” for a 1/8” border or for less border you will cut the mat at 4-1/8” x 5-3/8” as described on page 1. This is really a matter of personal preference!
Keep in mind that the same idea and technique applies if you want to make several layers on your card, or if you want to create a mat for your image or your designer series patterned paper. If you want a tiny border, cut the mat 1/8” larger in width and length than the piece you are making the mat for. If you want more border, cut the mat ¼” larger in width and length.
You can also create a much larger border as well. Just adjust your measurements for the length and the width by the same amount. If you want a ½” border, the mat should be ½” less in length and in width so you have the same amount of border around the entire mat!
Here are printable instructions: Stamping_101_card_layers
Thank you for visiting!!! Make sure you are on my mailing list to receive project tutorials and tool tips.


Can you please tell me the weight of each the base the middle and top layer? I fear I waste too much money using to heavy of paper for middle and top layer.. Any help would be appreciated!!
Thank you
Hi Carrie,
For regular cards, scrapbooks and most projects, I use an 80 lb card stock. If I want to make a box or a sturdy project, then I use a 110 lb card stock. The 80 lb ultra smooth white card stock is generally my favorite paper. Ink blends well on it and it is light to send in the mail.
I have trouble with the cutting board or ruler reading the 1/8, 3/4, 7/8 why don’t they print them on for dummies like me I try everything.
I know. A nicely labeled cutter would be such a time saver too. I purchase only cutters that have lines every 1/4″ so that if I want 1/8″, I just park it in between two of the lines. Don’t hesitate to take a sharpie and mark your most commonly used measurements in bolder lines if you need to. That sometimes works well.
DOES ANYONE JUST SALE PRE CUT LAYERS? I HAVE SUCH A HARD TIME WITH LAYERS.
I’ve found pre-cut layers at my local craft store and also on eBay.