
Once again, I have been wowed by the Simon Says Monthly Card Kit!
As you know, I’m a sucker for a craft kit and this kit delivers every single month. The April Beautiful Day kit was no exception.
I received 2 of the new Distress Oxide ink pads, one of the Distress Blender Brushes, 12 sheets of Lawn Fawn Really Rainbow 6 x 6″ patterned paper, coordinating card stock, white card stock and envelopes, a sheet of Sparkling Silver Therm O Web from Gina K Designs, the Beautiful Day stamp set and the Simon Says Stamp Butterflies 6 x 6 stencil. The kits can be purchased as single kits at $34.99 and they sell out quickly. If you subscribe to the kits, you actually save $5 a month which essentially pays the shipping costs. You could not purchase these items separately for less than $30. Month after month, this kit has been a great value!
Well done, Simon Says Stamps!!
I was very happy to have time to play with the kit today. I enjoyed trying some stencil techniques along with the Distress Oxide ink techniques. I actually only intended to make one card and a quick video, but I made extra pieces and ended up with 3 cards.
This kit is truly designed for those of us living in the gloomy northeast. The cards are so bright and cheery! I was shocked by how bright and crisp the Distress Oxide inks were when I blended them using the stencil. WOW!
I also have to say that I love the Distress Blending Brush for stenciling. (I took a stenciling class in 1984 with a girlfriend from work. The instructor had a room in her basement that she used for teaching people how to stencil on walls. She just repainted it after each class. How crazy is that?! I stenciled every room in my house that year! My husband told me he had nightmares about waking up with his forehead stenciled. I still have the stencil brush I bought at that class and I still use it for stenciling to this day! She taught us how to clean and maintain our brushes and that was a lesson well learned! I know that I will use this brush for a long time as well.)
Check out my cards: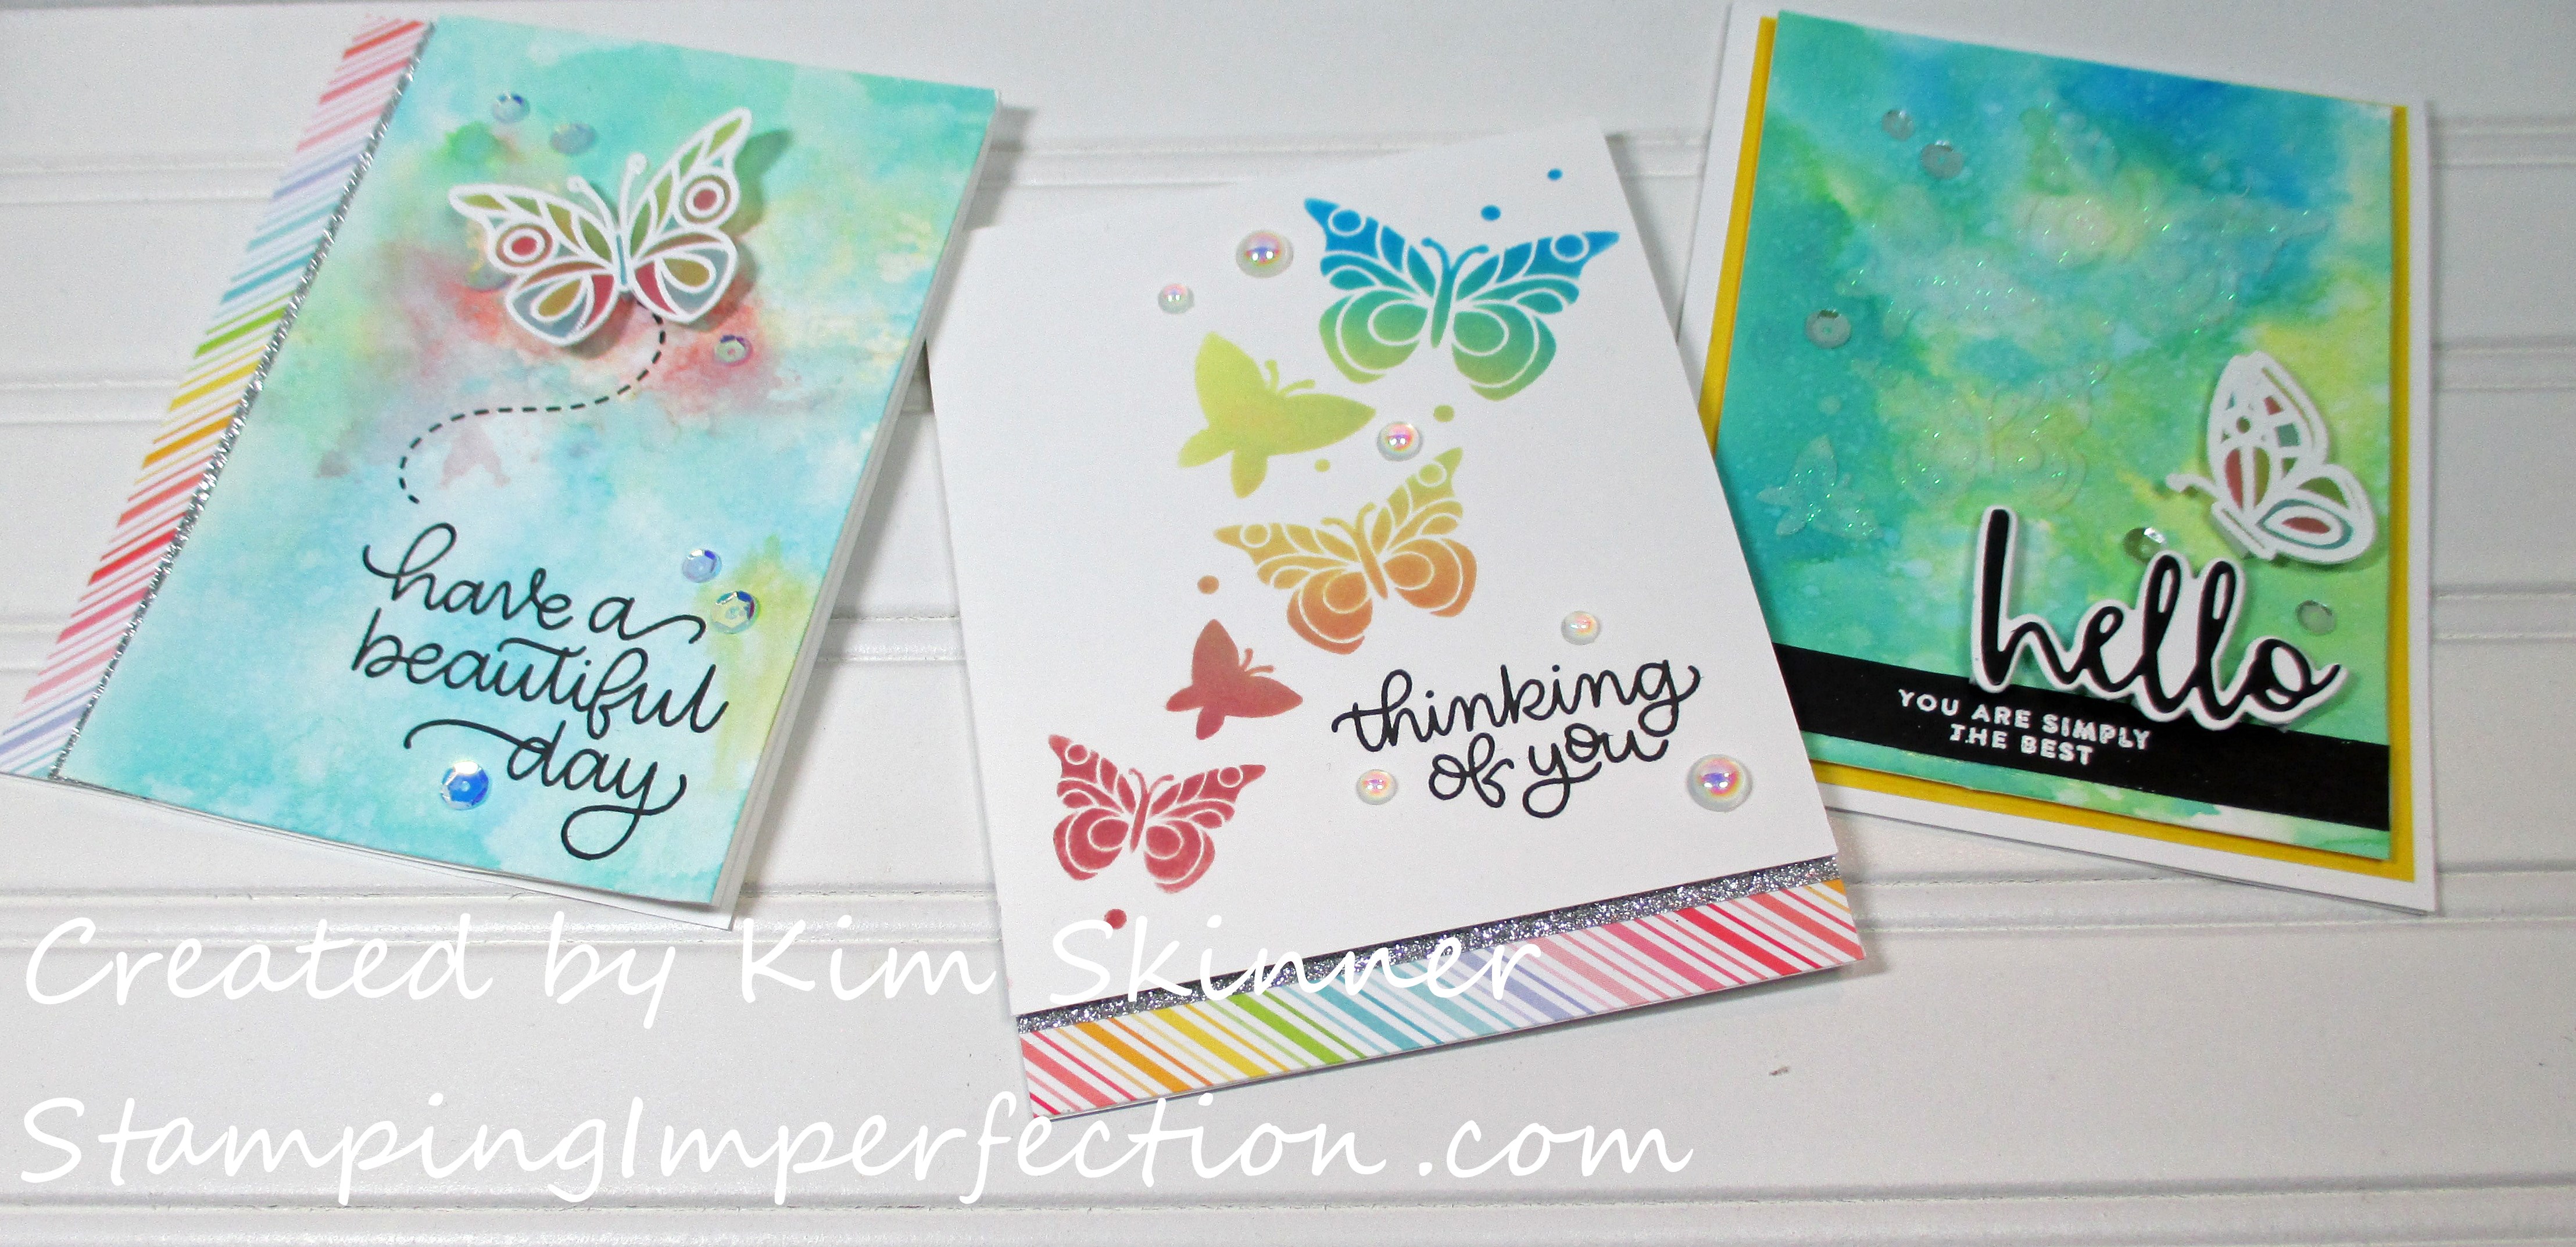
Aren’t the colors pretty? They just feel like spring!
For my first card, I used a watercolor smoosh technique. (That is what the instructor called it and it works for me!)
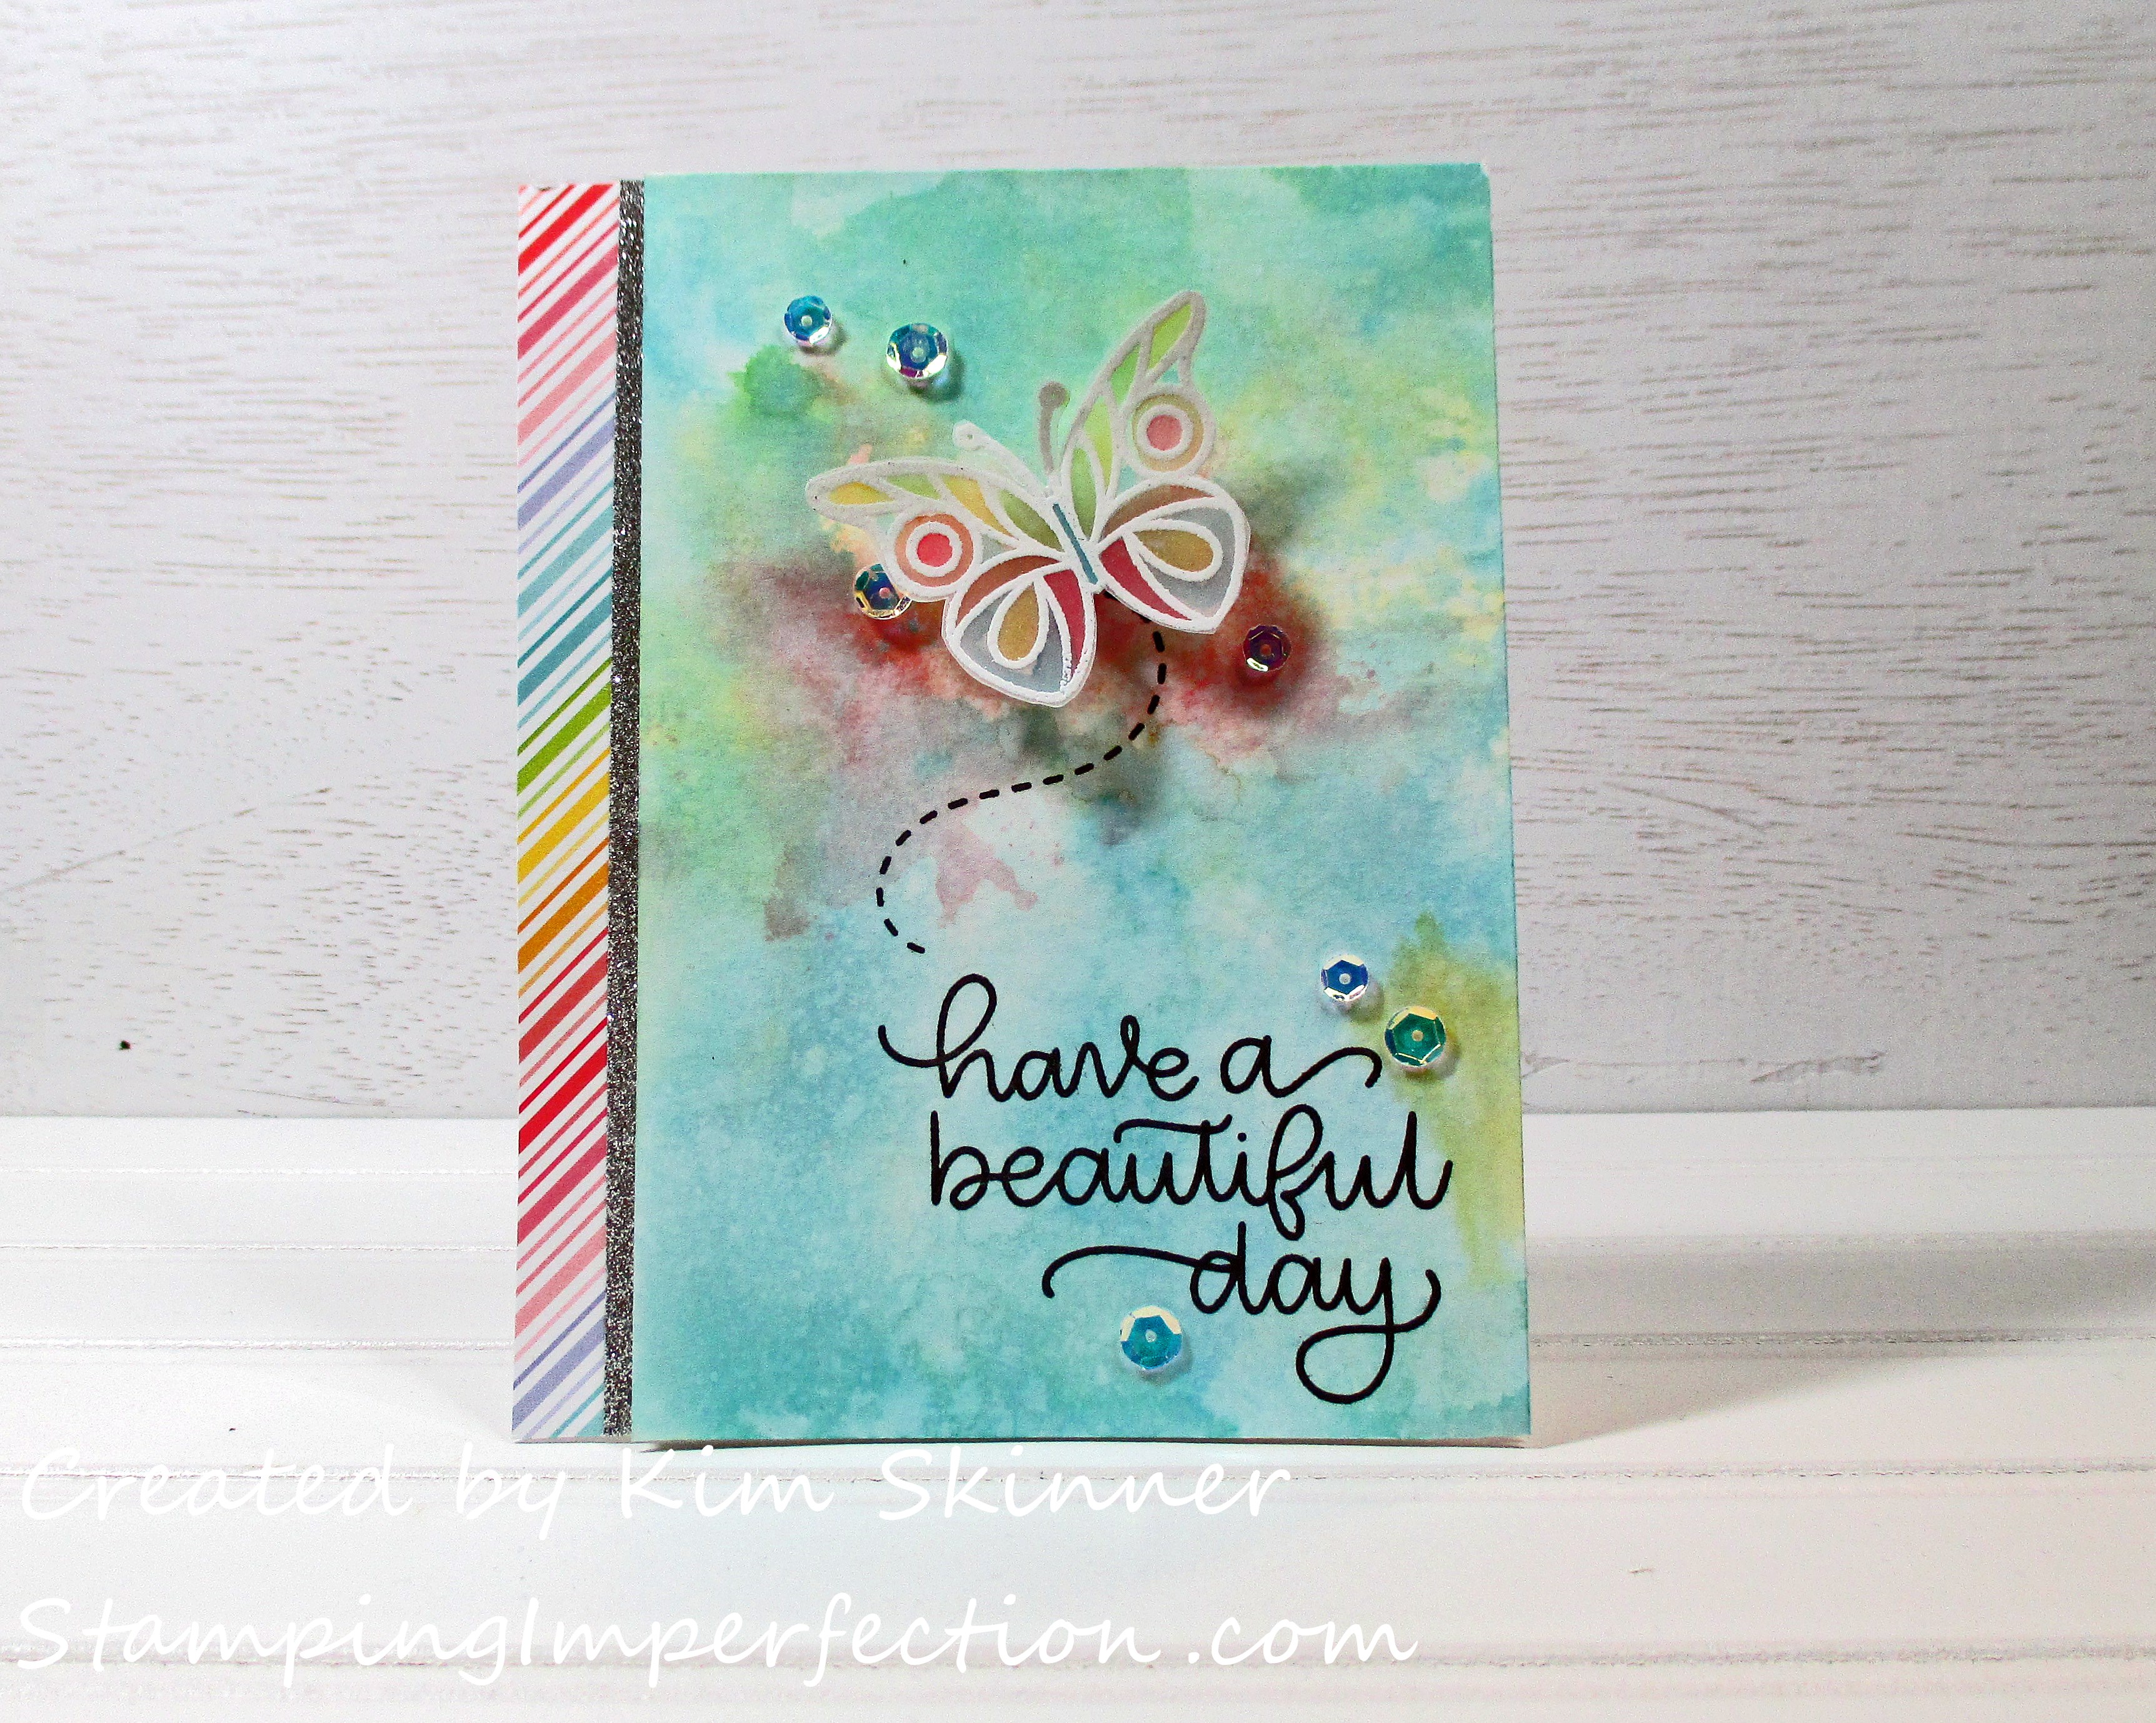
I used the Distress Oxide inks in Mermaid Lagoon and Squeezed Lemonade. Those came in the kit. I added Aged Mahogany from my stash to add some red. I love the way the background turned out.
Essentially, I squished the ink pads on to the craft sheet and spritzed them with water then smooshed the Bristol card stock into it over and over until it was covered. I dried it with my heat gun and then spritzed more water on to create the water drop effect. I dried it again and created the card!
Look how beautiful the ink is on the Bristol paper:
It is just so smooth. It almost looks like the card stock was created to be this blend of colors!
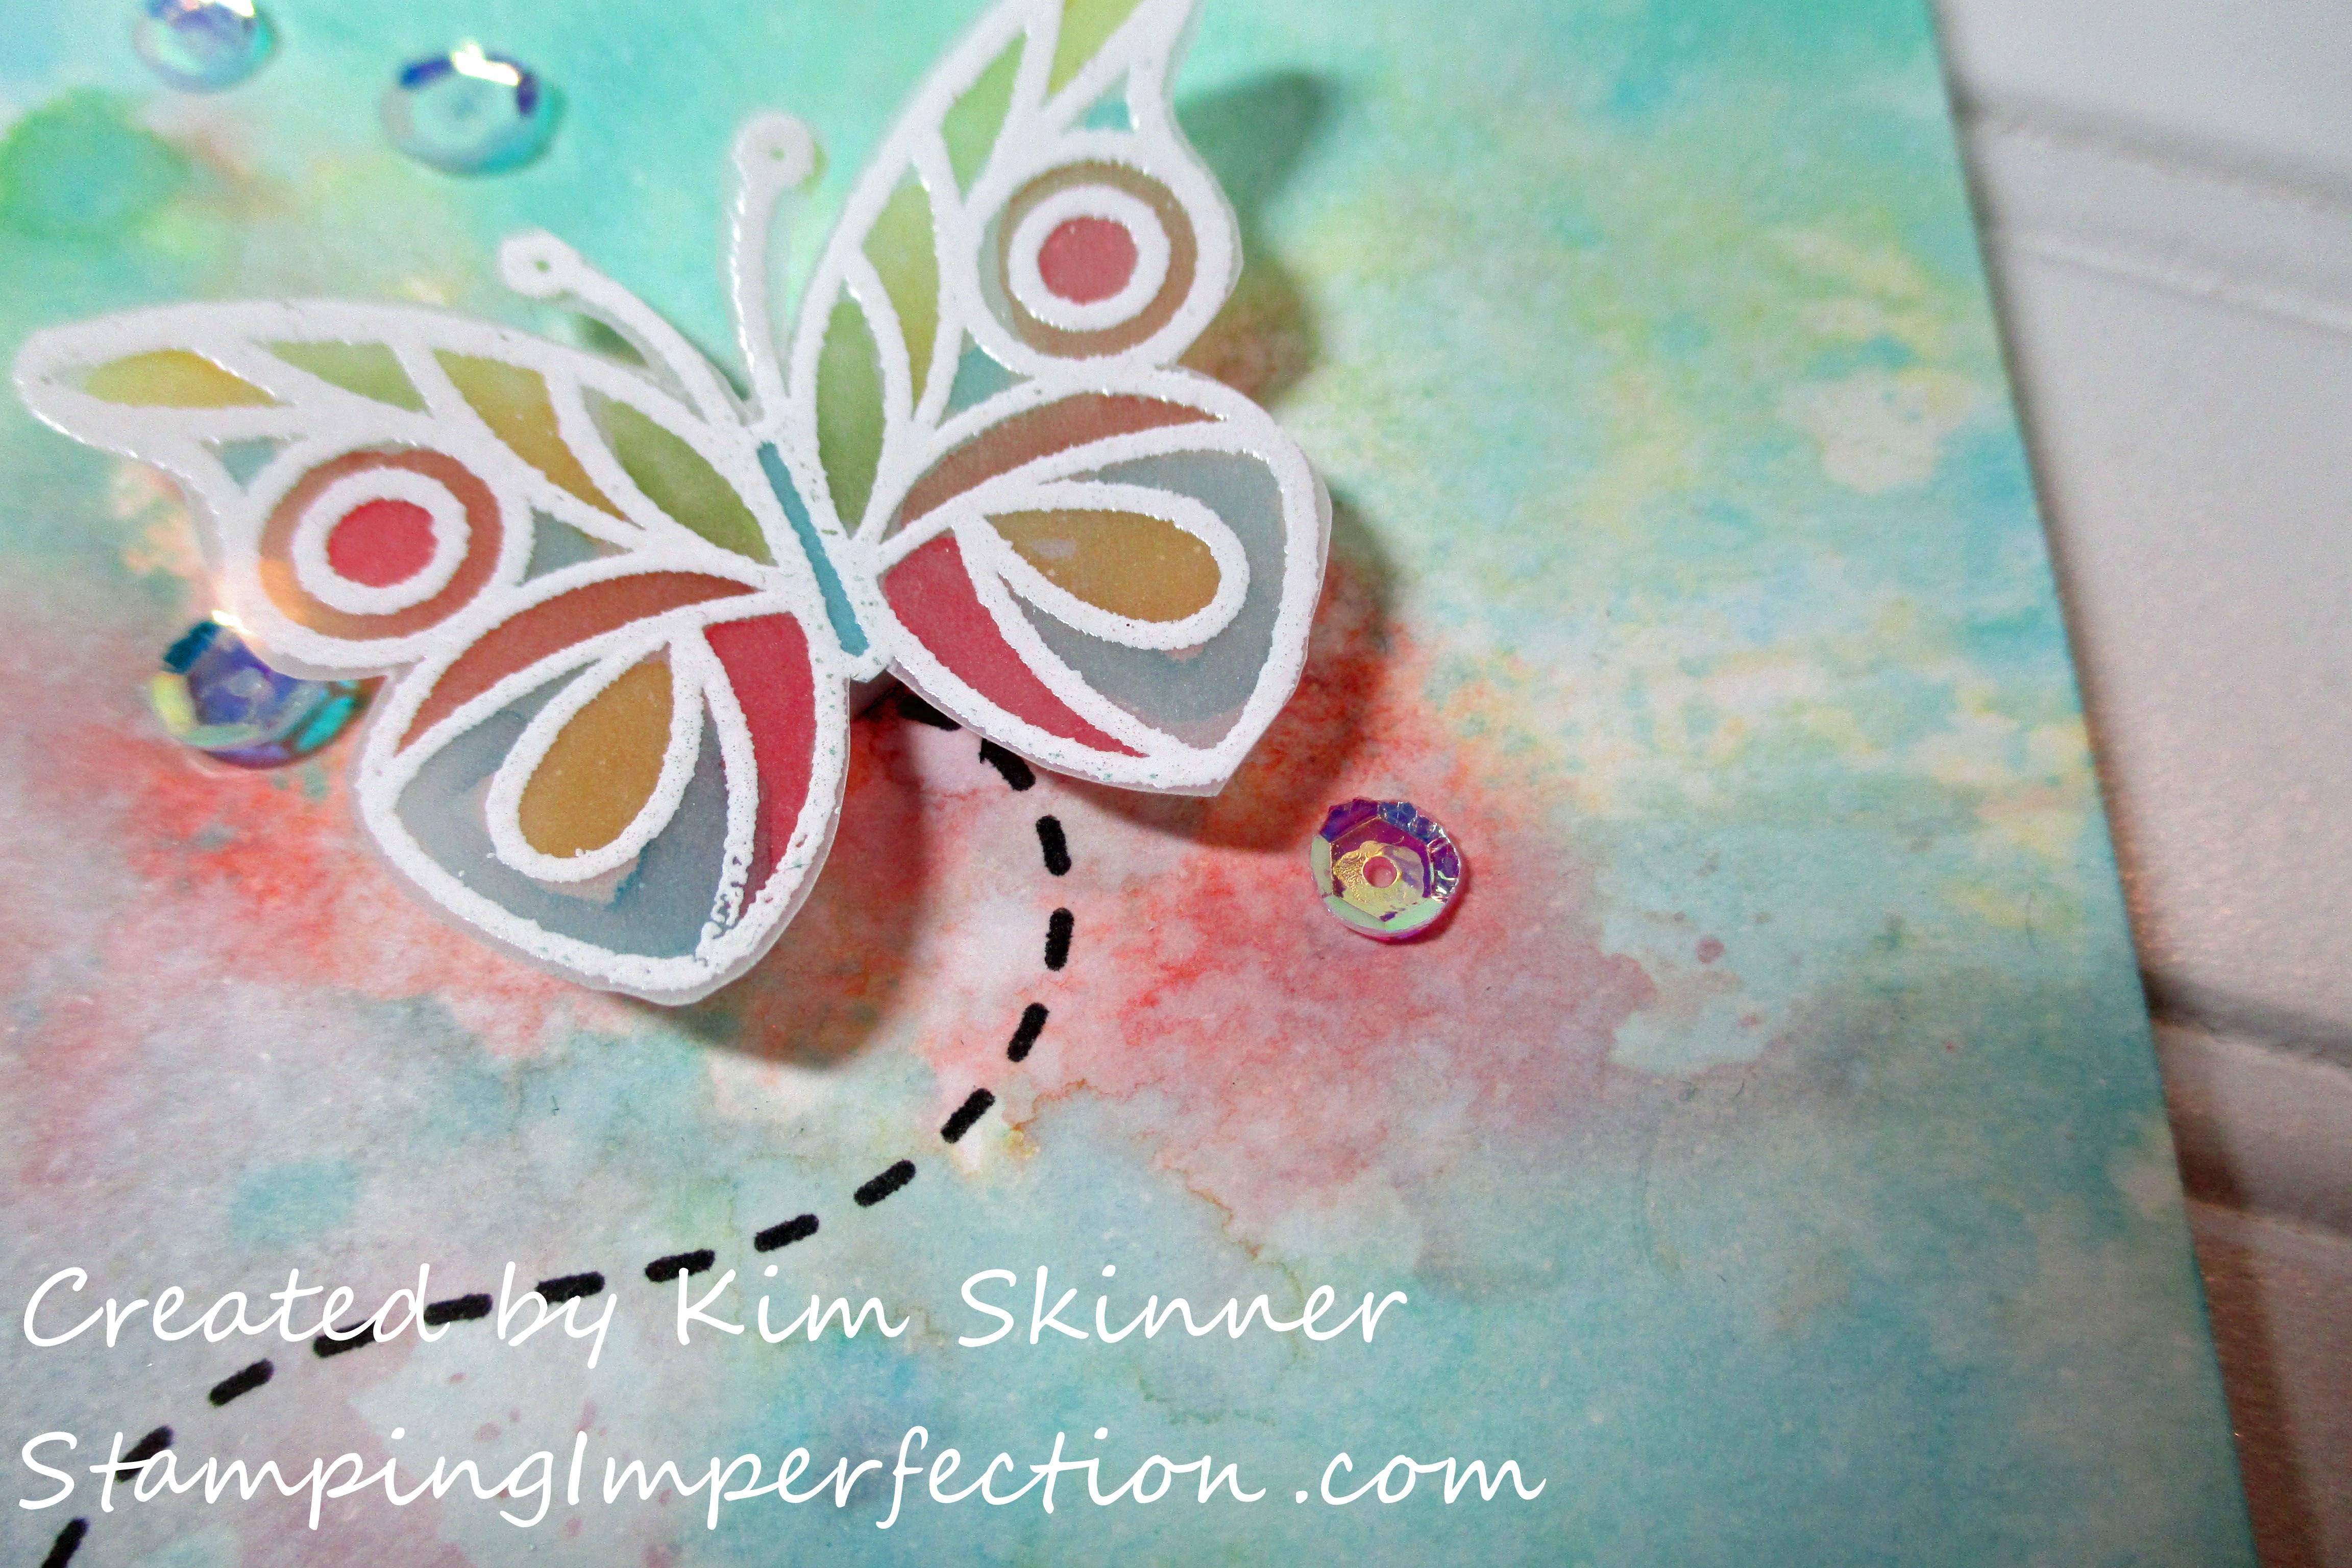
I used one of the butterfly images from the Beautiful Day stamp set and heat embossed it in white on to velum. I used my alcohol markers to color in the butterfly by coloring on the back of the velum. I love this technique because it always looks like stained glass.
I used my MISTI to stamp the sentiment and the butterfly trail in permanent black ink. I stamped it twice to get a nice crisp image. I love the MISTI just for this purpose. I think it makes a huge difference on a card when you have a perfectly stamped, dark, crisp image.
I’ve added some Neat & Tangled Like Magic sequins. I also added a strip of the Lawn Fawn Really Rainbow paper from the kit and a piece of silver glitter washi tape for my bling.
I love this card. What do you think?
My second card uses the stencil. That stencil is amazing! A stencil is a low cost tool that you can do countless techniques with. I have two to show you today.
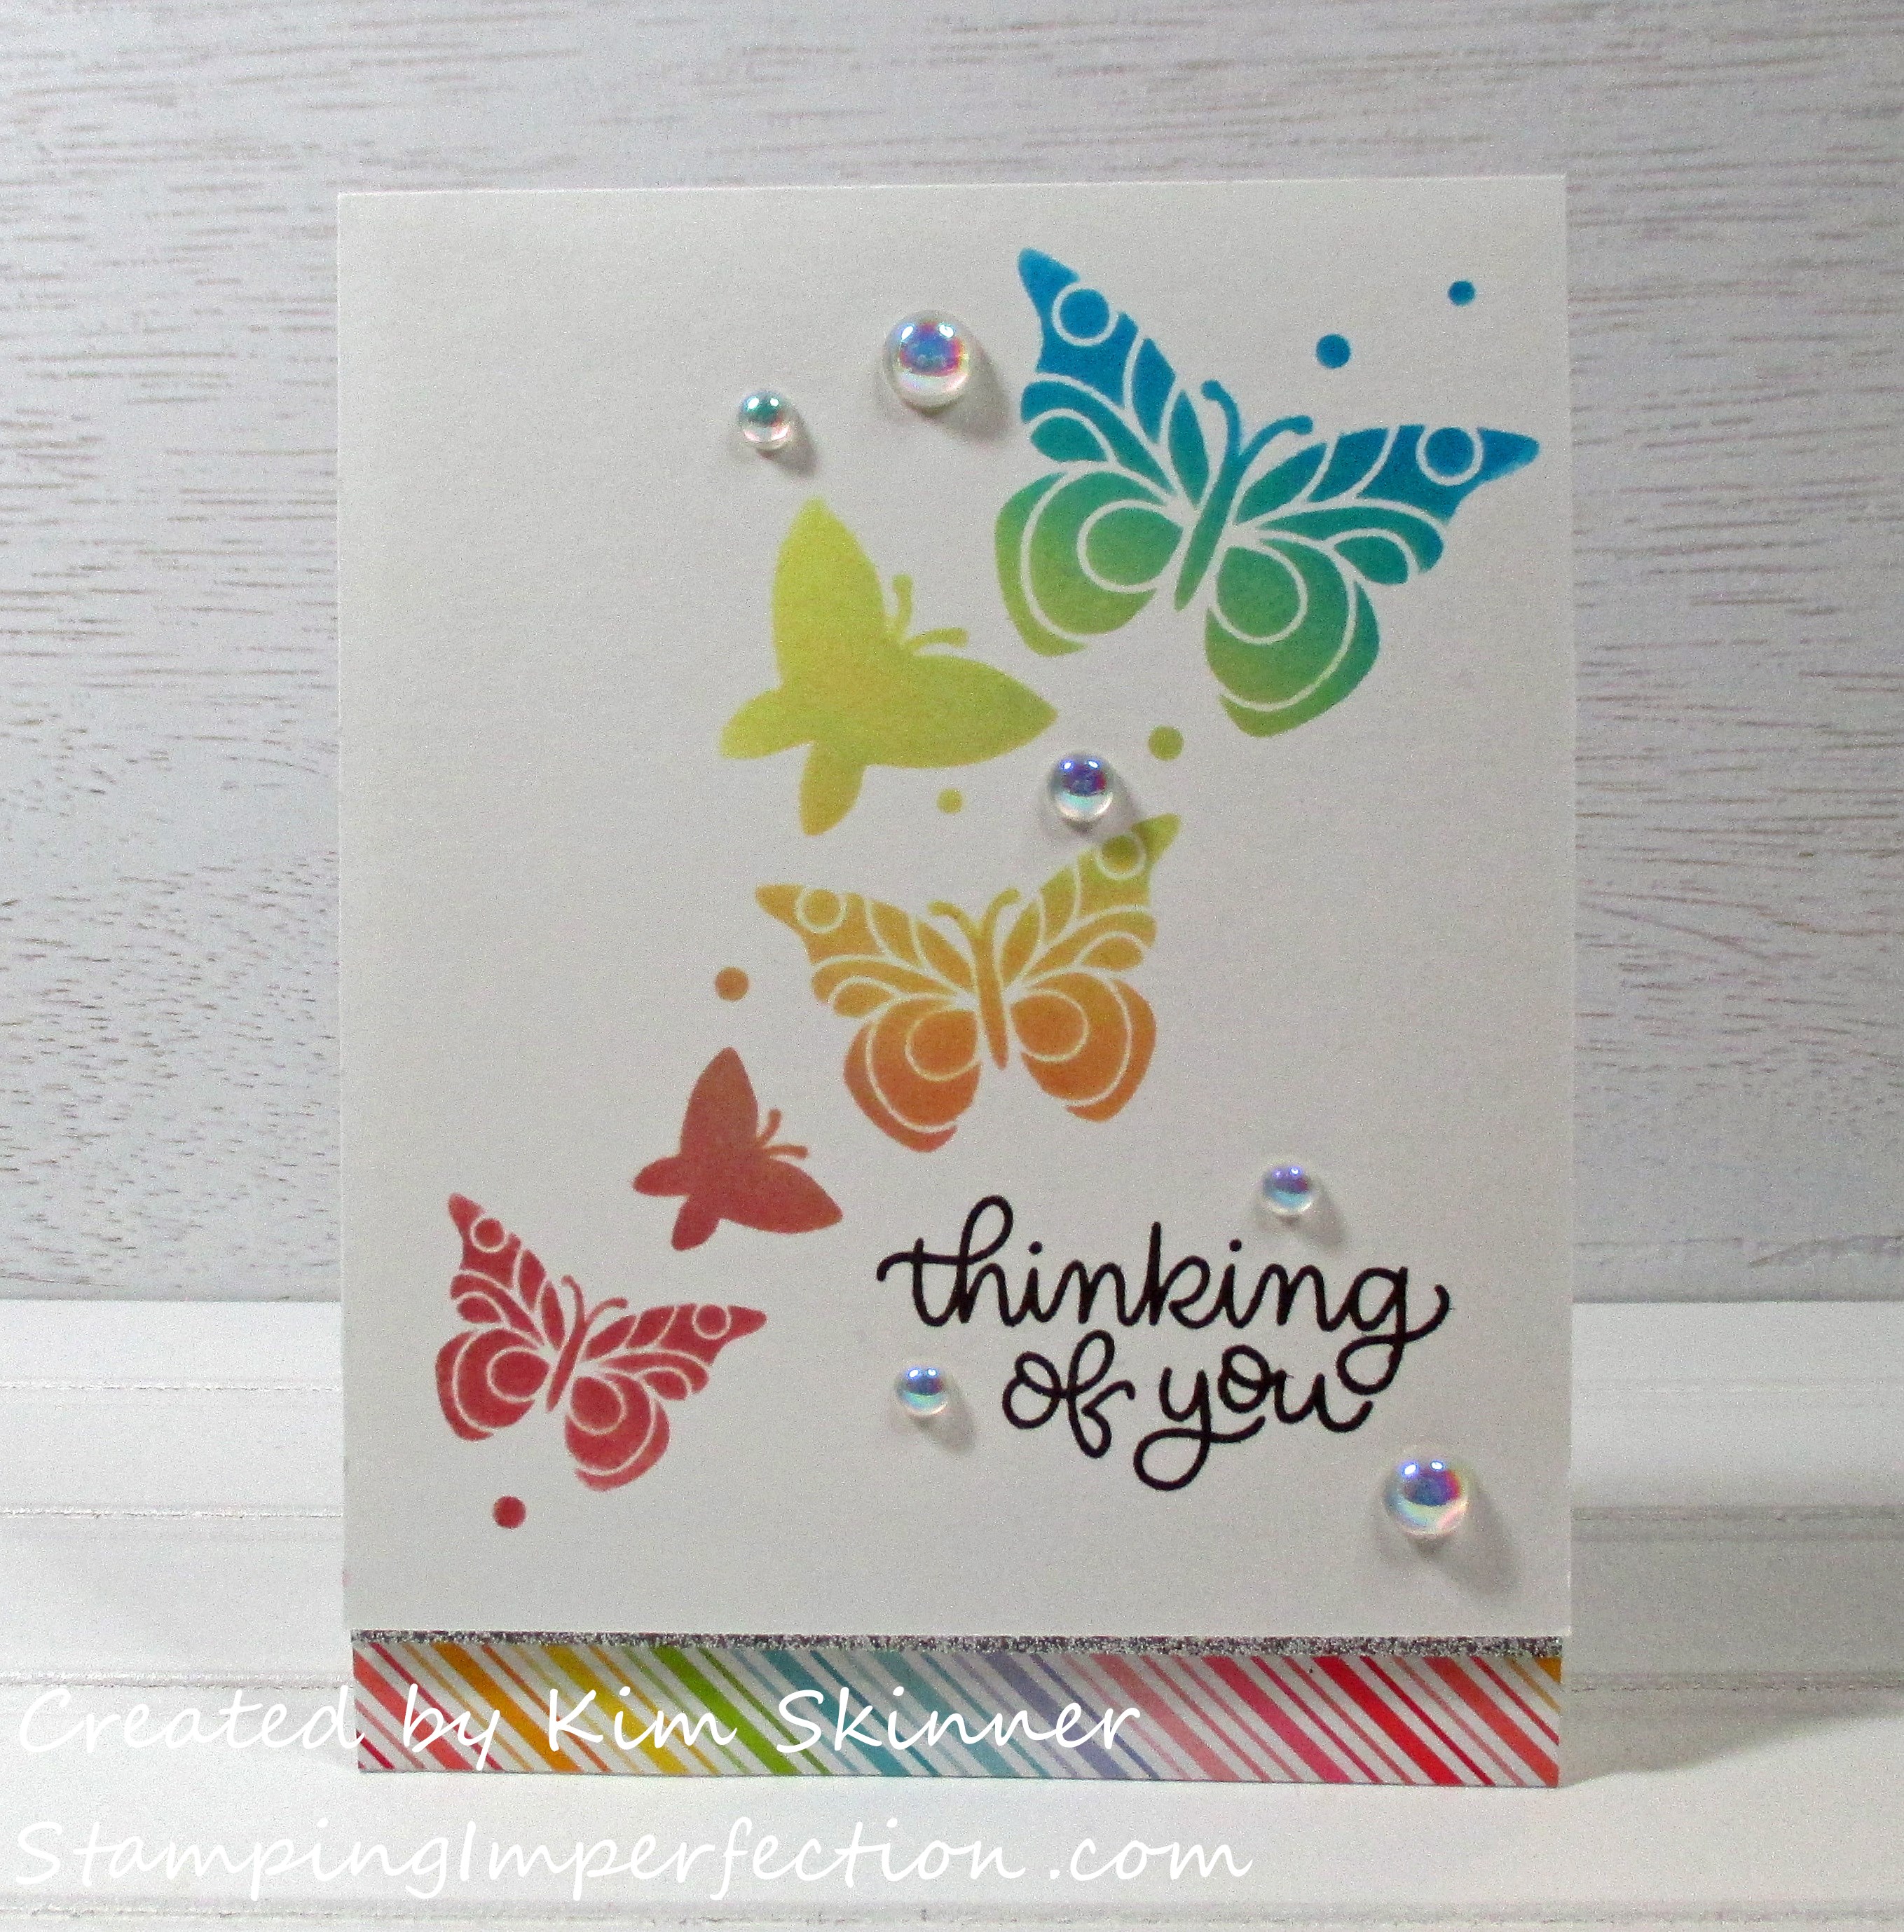
This is a beautiful clean and simple card. I used the Distress Blending brush to add the yellow. Then I used a couple of brushes of my own to add the blue and the red. I was careful to leave space to blend the blue and yellow to create that green and the red and yellow to create the orange. 3 ink pads can give you a rainbow! One stencil can give you a family of butterflies!
I added another sentiment from the same stamp set and a strip of the same paper and silver washi tape. I’ve also added some Studio Katia iridescent bubbles for fun.
Here is a close up of some of the blending:
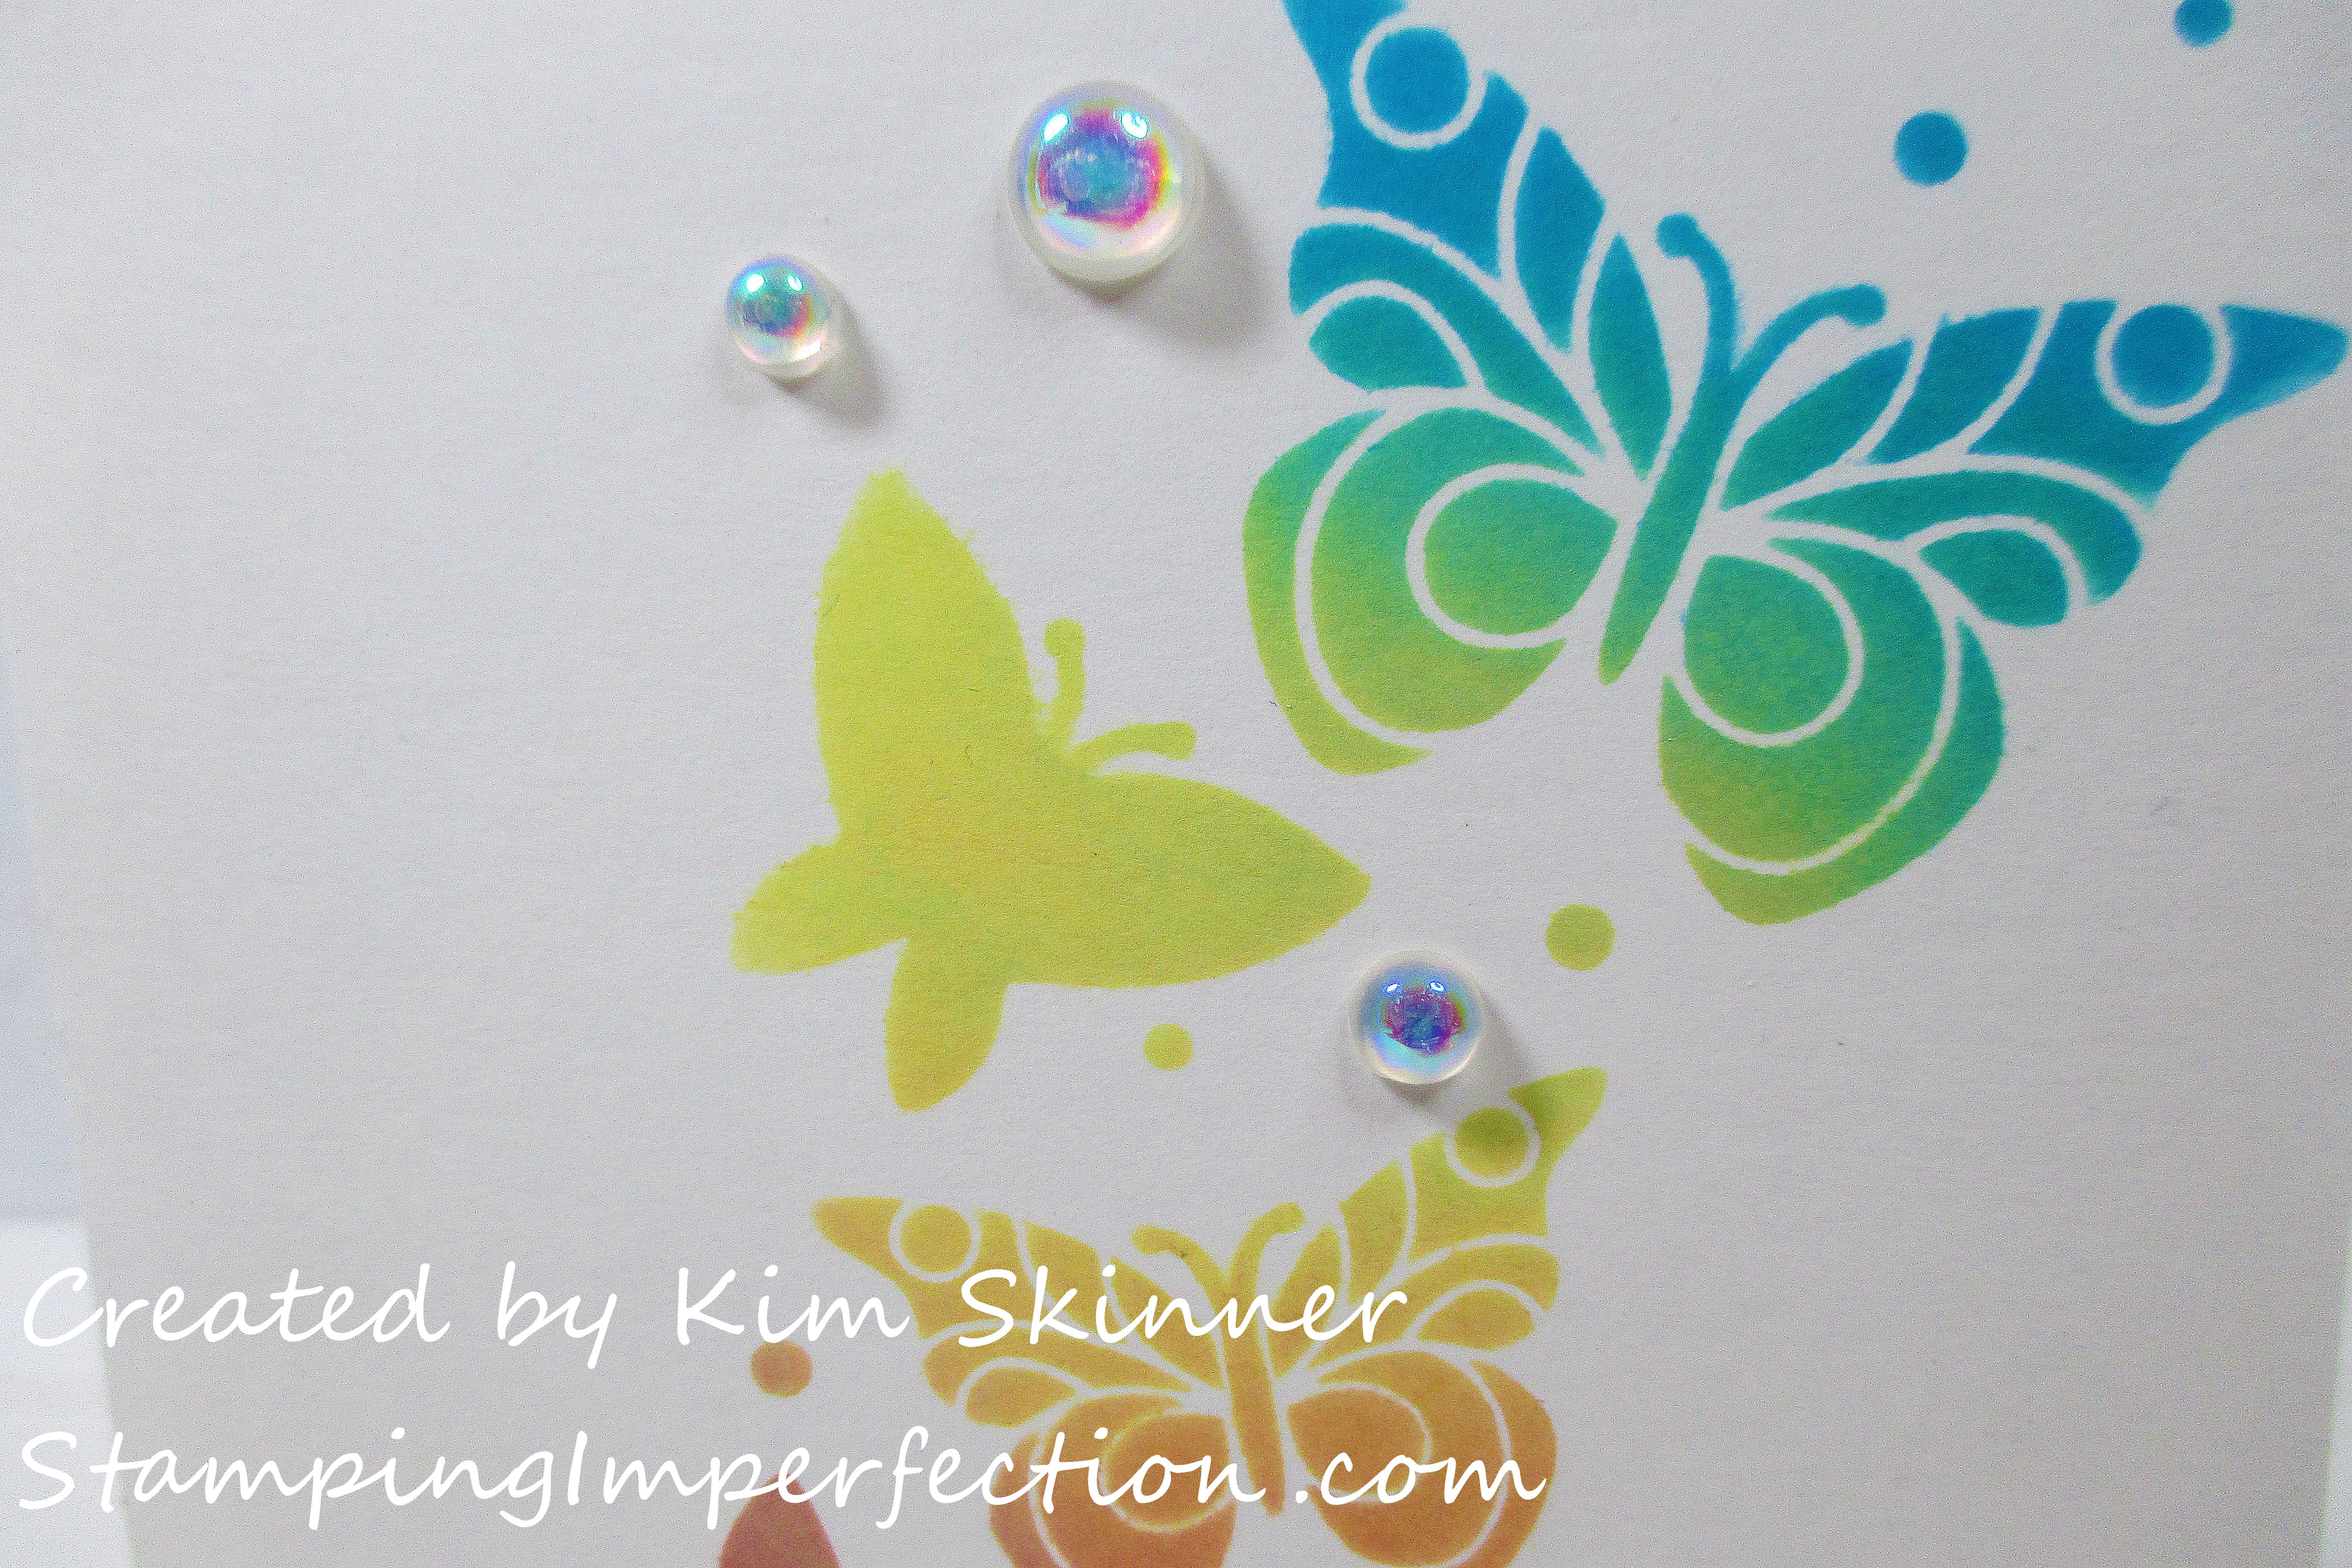
I was actually stunned by how vibrant these colors came out. They also have a matte finish. It almost looks like a chalk ink, but it is permanent and it inks so easily. It also blended beautifully. LOVE!
My last card uses the smoosh watercolor technique again. I wanted a card with more yellow and I wanted to use that stencil again!
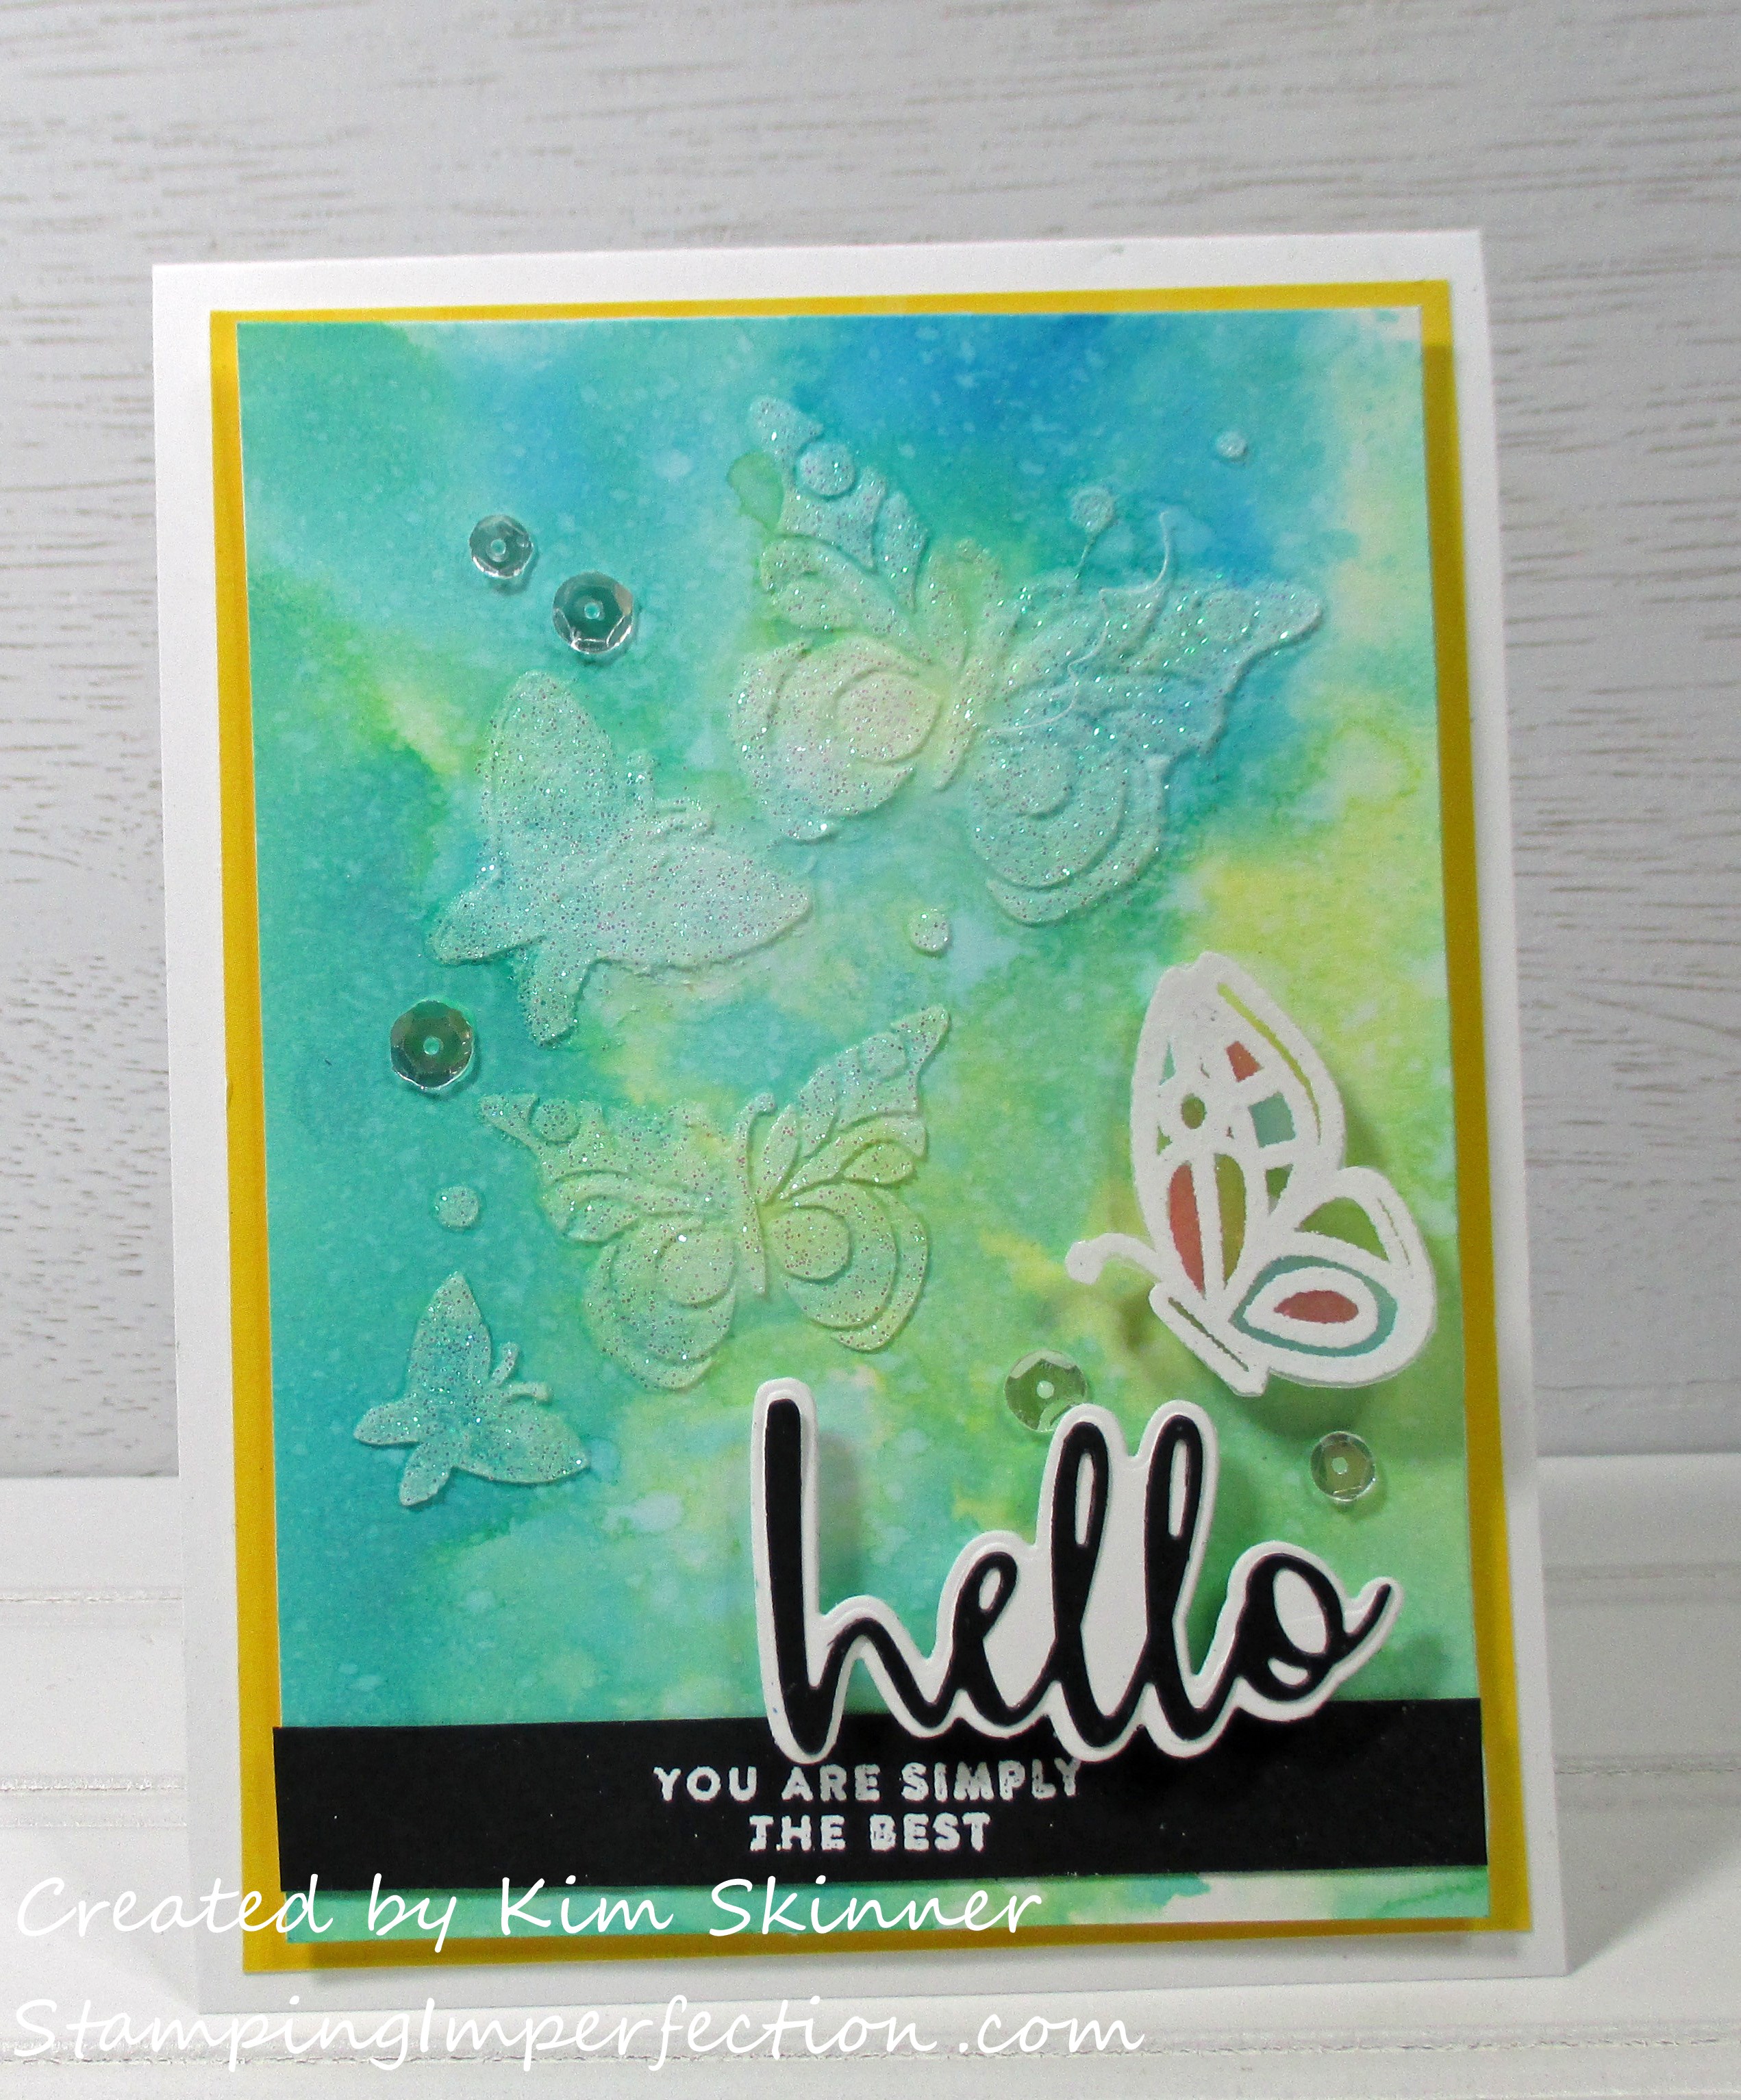
I’ve used my stencil with shimmery white embossing paste to create the subtle, but sparkly butterflies on the background. I used another of the velum embossed butterflies as well. The hello script die set is from Simon Says Stamps. I love this die set. It is a set of 2 and you have a background hello along with the upper layer which could be used on its own. I chose to use a black on white for the script hello and then I heat embossed one of the smaller sentiments in the kit in white on black.
I layered this on the yellow Lawn Fawn paper from the kit and added Neat & Tangled Snowfall sequins. The butterfly, hello and watercolor panel are all added with foam tape for dimension. 
Here you can see the embossing paste stenciled butterfly once it has dried. It took about an hour to dry and just this moment I realized that there is a thread on top of it! Oops…at least it isn’t stuck in the paste! Embracing the imperfections, right?!
You can also see the water spots from the spritzing that I gave the background after I dried it the first time. I love that look. I also love how subtle the butterflies are on the background…and that sparkle!
Can you tell that this kit was a hit for me?! I haven’t even used the foil or any of the foliage stamps. I have a bunch of sentiments and lots of patterned paper left to use as well.
I’m off to put my video together. If I’m lucky, I will get that on my YouTube channel for you tomorrow so you can see how I did the backgrounds. Stencils are really a great tool to have in your stash. There are so many techniques you can do with them.
A couple of weeks ago, I shared a watercolor wicking technique with a video that you can check out here if you missed it.
I am adding this to the Simon Says Stamps Monday Challenge and the Simon Says Stamps Blog Wednesday Challenge!
Thank you so much for stopping by! Please leave a comment and let me know which card is your favorite!
Here is the video: Hang in there with me! I’m learning a new video editing software and I clearly have not mastered it!


Gorgeous cards Kim 🙂 You showcased the card kit perfectly! the backgrounds are fabulous and the butterflies and stencilling are stunning!
thanks for joining us on the Simon Says Stamp Wednesday Challenge
Luv
Lols x x x
Thank you! This was another great card kit to play with!
Such fun inking on all of your cards! Thank you so much for playing along with us over at the Simon Says Stamp Monday Challenge Blog this week 🙂
Thank you for stopping by!
I have just purchased 2 of tim Holst blending brushes
I have read that you learned how to care for your blending brushes Are you willing to share that t knowledge.
Love your work as above
Thanks Raewyn
Yes I will! I will make a quick video on it as soon as I have time. I use a small squirt of Dawn dish soap in the palm of my hand and wet the brush, then I swirl the brush in the dish soap while running it under water until all the color comes out and then I keep rinsing until all of the soap is out. I use a rubber band around the wet brush to hold the bristles together and place the brush upright in a cup until the next time I use it. I don’t think I will do this with the Tim Holtz brushes though. My plan is to get 7 brushes and use one for each color family. According to Tim, you can use one brush for all your yellows and the colors will not transfer. He doesn’t clean them between uses other than to brush the excess ink off on a paper towel. I plan to use his brushes exactly that way. My really nice stencil brushes are the ones that I wash as I described above.