The name of the game is to USE YOUR STASH!
That’s right! Use what you have to create useful tools to help you on your creative journey.
My organizing project of the month for February was to swatch my distress oxide inks. I also needed to label the new ink oxide ink pads that I just got and I wanted to add a little swatch to the side of my ink pad so I could easily see the colors while the pads were in my ink storage unit from Stamp-n-Storage.
There are some nice ink swatching kits on the market these days, but they are pricey. Do I want to spend money on a kit when I have all the supplies I need to create an easy ink swatching ring all on my own?
Of course not!
I want to spend my hard earned cash on things that I don’t already have!
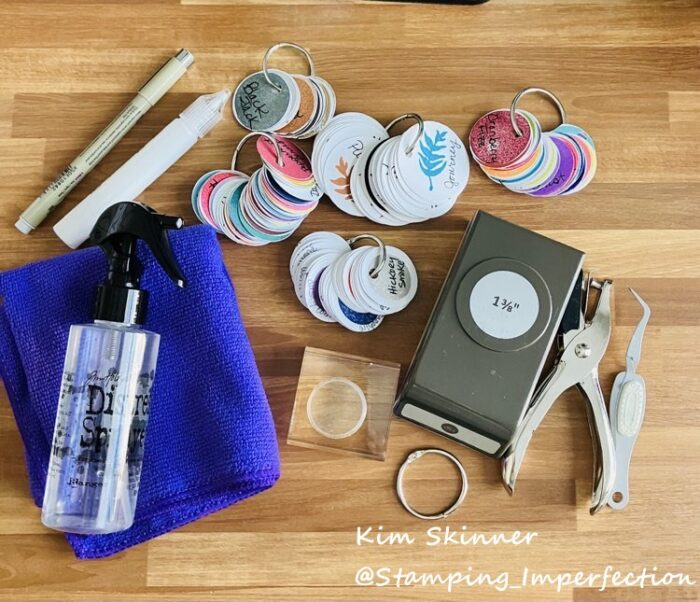
WHAT YOU NEED:
- White card stock
- Circle Punch (I used a 1-3/8″ punch.)
- Hole punch (A cheap dollar store one is fine!)
- Clear block and a stamp (I used a solid circle stamp.)
- Tweezers (I love my reverse tweezers!)
- Stamp cleaner (I used a microfiber cloth and water in my distress sprayer.)
- Ring to put your swatches on (Mine came in a pack of 10 or 12 from the dollar store.)
- Journaling pen
- Liquid glue
- Label maker (If you need to label your ink pads. I have an old and trusty Brother P-touch I’ve had for years.)
I accomplished several tasks as I did this for all 3 sets of ink pads that I use on an almost daily basis:
- Labeled my ink pads.
- Swatched my inks and created an ink swatch ring that I use for color selection and matching.
- Swatched my ink pads so I could see the actual color of the ink on the outside of my pad.
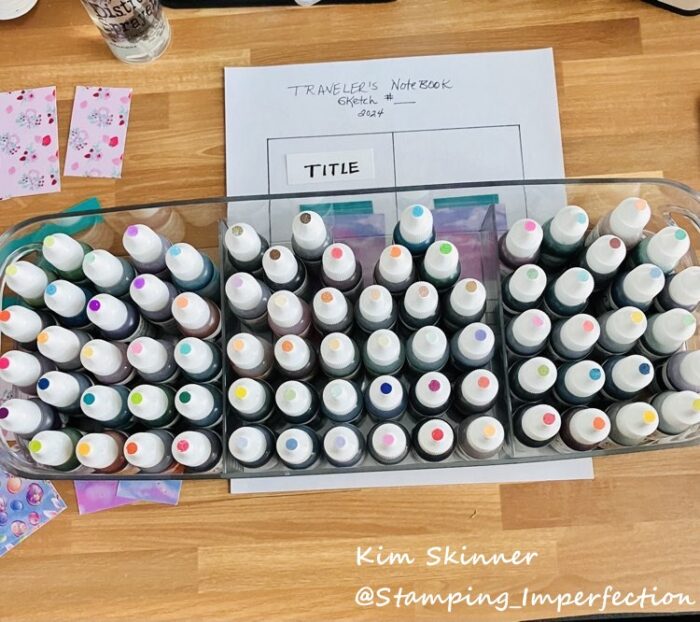
- Swatched my reinkers so I could find the color I needed in a bin full of other reinkers.
- Organized my ink pads and reinkers and cleaned up the ones that needed it.
Here is the video showing you my process to create ink swatches:
Ink Pad and Reinker Storage and Organization:
Every single time I open my craft cabinet, it makes me so happy. It is so organized!
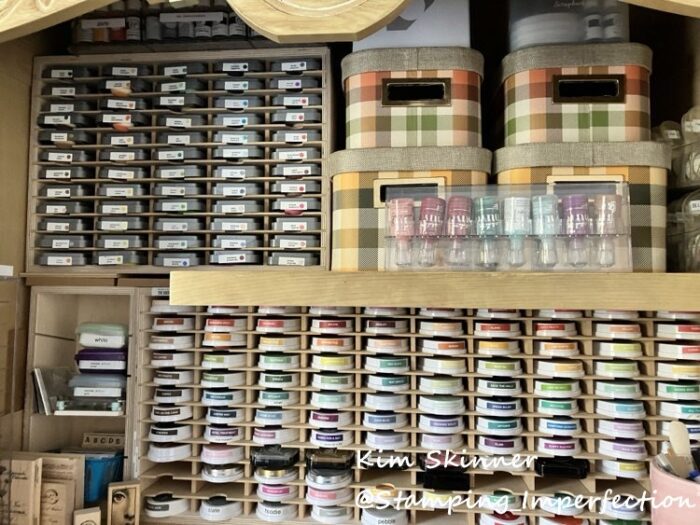
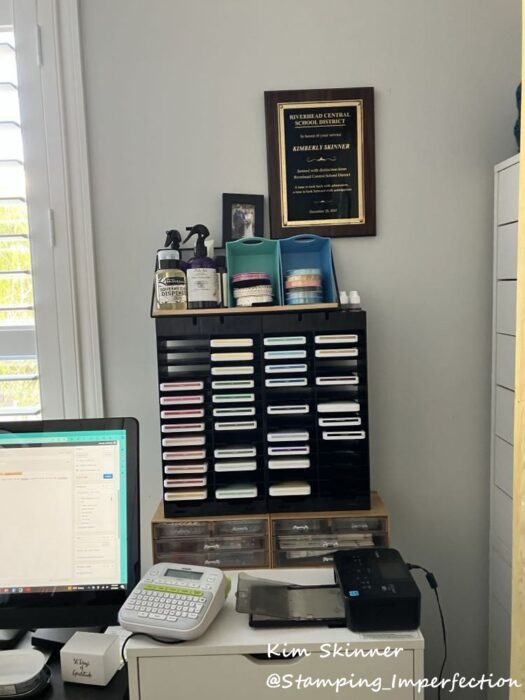
I purchase a 3 part TV/wardrobe cabinet from Facebook Marketplace for $150. It takes up 9 feet of a 12 foot wall! The center section had a TV shelf with a revolving platform, two smaller shelves, two small drawers and two large drawers. I added a large ink pad unit, the distress ink pad unit, and one of the pen storage pieces to the inside. I added the old shelf holding the rotating platform for the TV to the top of the large ink pad storage piece and placed 4 pretty boxes from Hobby Lobby on top. Those hold stamp sets and thin cuts. I have a couple of clear bins for my reinkers in there as well.
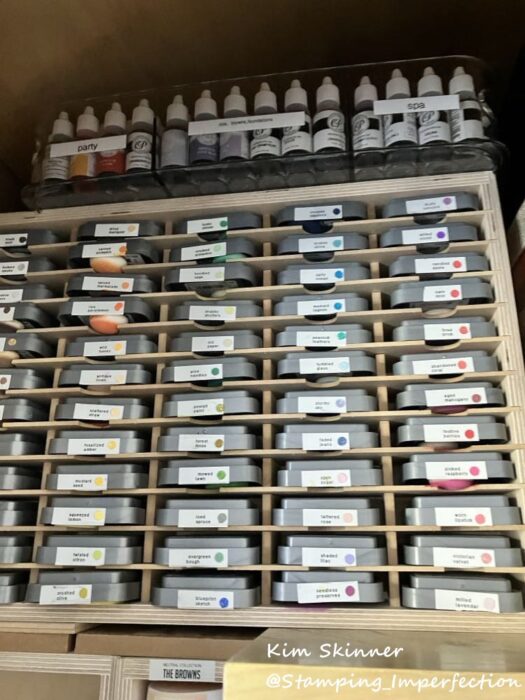
You can see all of these pads have labels and a color swatch the size of my hole punch. All of the reinkers in the bin have a swatch on top as well. You can see that the bin fits nicely on top of my ink pad holder.
You can see how easy it is to spot a specific color in the reinker box now. I LOVE it!
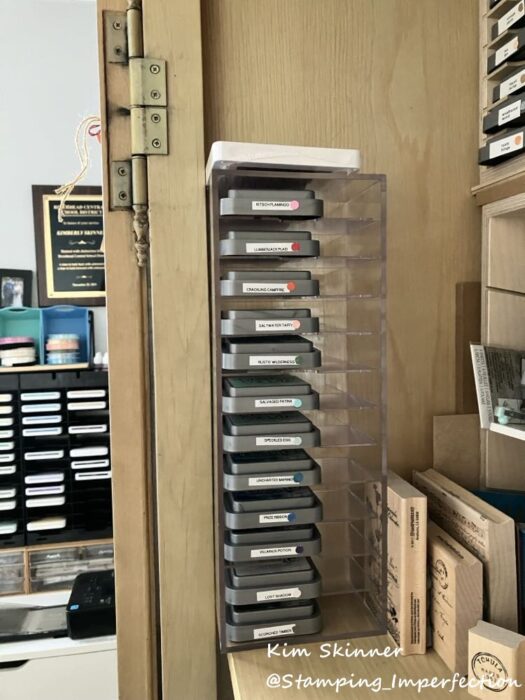
My Close to my Heart inks are in an ink storage unit I got from Scrapbook.Com. Originally, I bought it because it rotated and these two parts sat on the lazy susan unit back to back. I actually like it separated like this better!
I have several of the ink pads on my desk for the current projects that I’m working on. It so pretty to have them out in the open!! I reach for these the most often lately since I’ve been working with CTMH materials.
My favorite inks are still my Catherine Pooler inks. I just added new labels to all of them and swatched everything in November. The colors are gorgeous, the inks allow you to do all kinds of techniques flawlessly, and the foam ink pads are dreamy.
I use the distress oxides for techniques and anytime I’m trying for a chalky look or a vintage look. I don’t own the reinkers for these and I really love the versatility of techniques I can do with them.
The CTMH have soft pretty colors that blend perfectly with their papers and supplies. They have felt pads which I like, but they aren’t as dreamy to use as the CP inks. I like having them so I don’t have to try to figure out which CP inks will match the papers I am using when I scrapbook.
Otherwise…I pull out the Catherine Pooler (CP) inks and create happily!!
Catherine came out with some really nice labels for her ink pads and they are so pretty! Those inks are sorted by the collections that Catherine created them in.
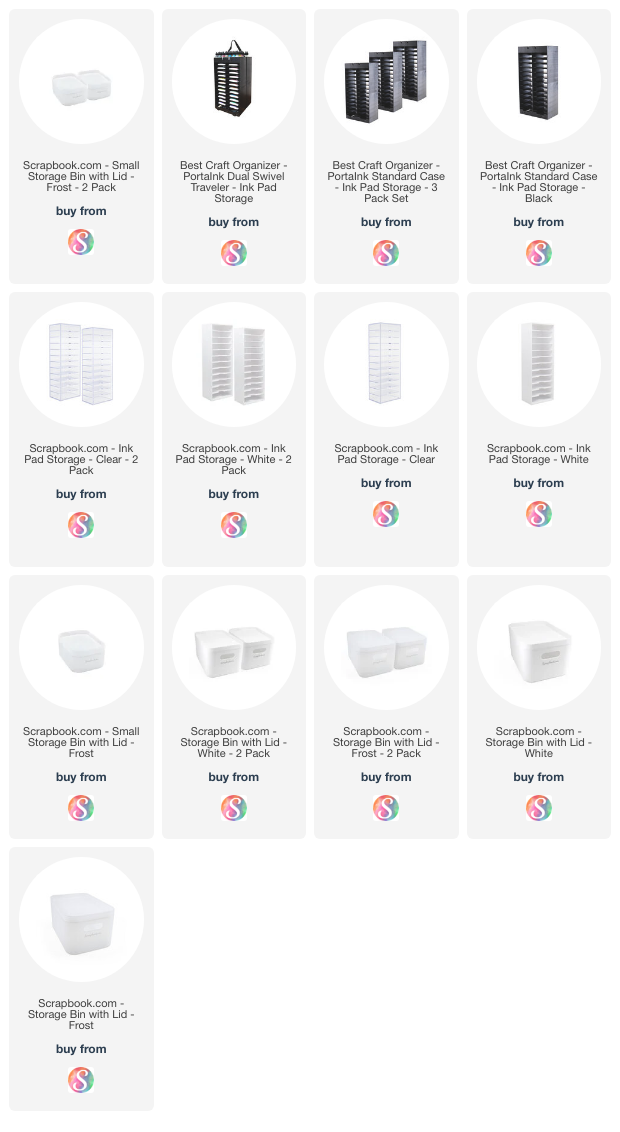
When I originally purchased my distress oxide ink organizer, there were only 48 inks. I had to get something to hold the last 12 that just came out. I went with a Scrapbook.com unit for less than $20 on sale and it tucked in the side of the ink shelf.
It took an afternoon to swatch a set of inks, so this took me two afternoons to do the Catherine Pooler inks and then the distress oxide inks. I swatched the CTMH inks and I purchased them over a period of time.
Next month…I tackle my paper organization. It won’t take long since it’s pretty organized already and I don’t have a huge stash of it. I keep enough to pull out what I need and then reorder a small amount as I run out.
I hope you found all this helpful!
Here are some links for you:
I hope you find this helpful! I also hope you find some time to be creative or to get more organized today!

