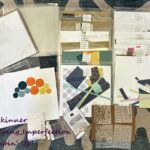
Find Video 3 of my Technique Album Series and the FREE Printables here on my blog today!
There are so many ink blending and masking techniques, that it would take me several videos to share with you. I’ve create one very long video to share my favorite 11 techniques for ink blending and masking that will help you make beautiful scene cards with gorgeous backgrounds for the fall and winter holidays. Create a Halloween moon or a night sky to serve as a background for your evergreen trees!
I have a video and printables to show you how to do each technique below.
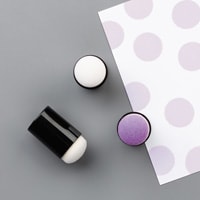
Technique 10. Sponge Dauber Dots
This is a simple technique to do with sponge daubers. Ink them up, push them down on your paper and twist! Perfect birthday card background!
Technique 11: Ink Blending
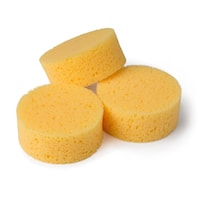
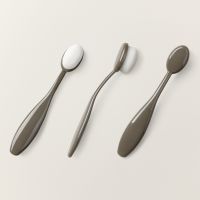
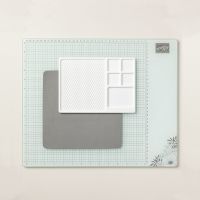
This is a quick summary of the highlights for ink blending! You can use Stampin’ Sponges, Sponge Daubers, the wooden handles and foam circles, or blending brushes. For best results you need super smooth paper like Stampin’ Up!’s Basic White card stock or Bristol mixed media paper. Ink up your blending tool, start off the paper on your craft mat and then run your tool across the paper in circular motion. Keep adding layers until you get a blend that you love.
If you are adding multiple colors, lighten the color where you plan to blend and add the new color lightly. Blend with the brushes from both colors to remove the harsh line.
Technique 12: Spritzing
Once you get your ink blended, spritz it with water using your Stampin’ Spritz tool or any spritz bottle you have. Let the ink react and blot the water up when you are ready for the reaction to stop. Let the panel dry before stamping on top of it.
Technique 13: Ombre
This is a beautiful blend of the color gradual decreasing in intensity to white. Blend from one end and allow the color to lighten as you work toward the opposite end.
Technique 14: Masking for Scene Building
This is a technique that allows you to create a scene with depth. You can create the layered look of one item appearing to be on top of or in front of another.
Use Stampin’ Masking Paper, Post-Its, low tack masking tape in a variety of widths, or 3M Removable Labelling Tape to create a mask over your images as you stamp layers.
First stamp the image you want to appear in front and create a mask for it. With the mask over the front image, stamp the next layer that will appear to be behind your front object. Keep masking and stamping the next layer until you have your scene complete.
This technique requires a little planning out of your scene, but it is well worth the effort!
Technique 15: Masking for Color Blocking
I used two strips of masking tape separated by about 1-1/2″ in this example, then I ink blended my favorite fall color combo between the tapes. When I removed the tapes, I had beautiful crisp edges to my color blocked blend. (Imaging doing this to create stripes or squares on your background!)
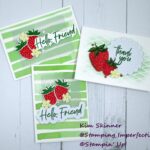
Stamp over the top!
Technique 16: Masking: Stamp Blocking
This technique is done the same way as technique 15 except instead of ink blending, you stamp images in between the tape lines. TIP: Make sure you stamp a few of the images off the sides and over the top of the tape to give the appearance that it is one small piece of a bigger picture. It looks more realistic this way!
Technique 17: Masking with a Stencil to Highlight and image
For this technique, I use a stencil with a shape like the square I used in my technique album sample. I stencil color into the shape, remove the stencil, and stamp on top of the color. This is a great way to highlight your focal image with a pretty background.
Technique 17: Masking with a shape mask
For this technique, I use the shape that was cut out to make the stencil. This is usually called a mask. I place the shape down and ink blend around it, leaving a circle the color of my card stock to highlight my image. I often use this technique to create a moon with an ink blended night sky.
Technique 19: Halloween Moon
I do this exactly like technique 18 with a circle mask. You can use any sized circle to create a moon for your background in the scene. Ink blend your blue. I used Stampin’ Up!’s Night of Navy here. I added Blackberry Bliss around the edges. You can also add some black or basic gray around the edges. Sometimes I add a little yellow around the moon or I add some purple-pink into the blue for a pretty effect.
Once I remove the mask, I use some light gray like Smoky Slate on a small blender brush and add it to 3-5 spots across the moon to give that cloudy effect. It really looks like a moon!!
Technique 20: Left-Over Ink Backgrounds
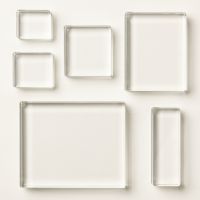
When I do my ink blending on my glass board or Teflon craft mat, I tend to have a lot of ink left to clean up at the end. Instead of wiping it up with a towel, I spritz it with water and sop it up with a piece of card stock. I get beautiful background pieces with that ink that remains on my mat when my crafty session is over. Let your colorful panels dry. Weight them down with clear blocks or a big book to flatten them and get rid of the warp from the water. You can also run them through your Cut & Emboss machine just like you would a thin die. Just place a sheet of copy paper on top of the color side of the panels so you don’t get ink on your cutting plates.
You will love having left-over background panels for a rainy day crafty session!
Video Tutorial of all 11 techniques:
FREE PRINTABLES FOR YOUR TECHNIQUE ALBUM:
Printable 1: Technique Album Series with Stamping Imperfection #10-13
Printable 2: Technique Album Series with Stamping Imperfection #14-17
Printable 3: Technique Album Series with Stamping Imperfection #18-21
Supply List:
Are you interested in the products I used? To make them easier for you to find, I have linked them below. (Affiliate disclosure ) As an Amazon Associate I earn from qualifying purchases. Your purchases help keep my blog running at no additional cost to you and I thank you for the support!
Product List
Thanks so much for stopping by! If you are making a technique album along with me, leave a comment and let me know how it’s going!
Happy crafting!


