
If you have been following my blog the last few months, you know that I am taking a ton of classes at Altenew Academy. You also know that I am enjoying them immensely and I believe they are transforming my crafting!
I recently completed a couple of scrapbook classes. I completed a class called “Stamps Meet Scrapbooks” and made some really fun layouts. From that class, I took away several great ideas.
I now make watercolor backgrounds using several different techniques on my 12 x 12″ background papers. I also create my own patterned papers and combine them to create my very own unique layouts with them. I also use my stamps to create background patterns on my 12 x 12″ sheets, not only stamping in colors, but using emboss resist techniques. I create my own die cuts and labels and I add a lot of sentiments combined from several stamp sets to create journaling on the page. You can see some of those layouts here if you missed them.
I’ve always used my stamps to create focal elements, titles and borders. I’ve also always loved to add marker details and sketchy elements and I truly believe you should write something in your own handwriting on every page you create. One of my most cherished albums is a collection of recipes my grandmother created for me when I first got married. She had such bad arthritis that she was quite crippled and in a wheel chair. To this day, I do not know how she held the pen long enough to copy all of her recipes and add them to an album. I love looking at that wobbly handwriting in that album. I feel so loved that she created that for me and it had to be a painful process. I also know that she loved to create handmade gifts for us and they were always created with love. I will probably never make that Funky Chicken because it isn’t really a healthy meal, but I cherish that album. Seeing her handwriting brings back a flood of memories every single time I look at it!
My favorite idea from the Stamps Meet Scrapbook class was to use a variety of sentiment sets to add journaling to your page. I also love that she added her sentiments in unique ways. She used the thin line sentiments as a border around a photo, for example. It was very clever!
The second class was called “Timeless Floral Layouts” and I’ve combined a few ideas from the sentiment lesson in the first class with the main ideas from the timeless class.
Scrapbooking is actually how I got started as a paper crafter. I love creating layouts with stamps, papers, die cuts and doodads. I bet I have 30 albums…at least! My kids enjoyed creating albums with me when they were younger and I bet my daughter will find her way to doing so again when she is not a busy grad student working on her research and thesis! She often gives us handmade gifts. For Christmas, she gave my husband and I a framed collage of photos from our summer visit to Michigan to visit her. We spent a couple of days in Mackinaw City and on Mackinaw Island. It was fabulous!
So what are the scrapbook layout techniques that I used here?
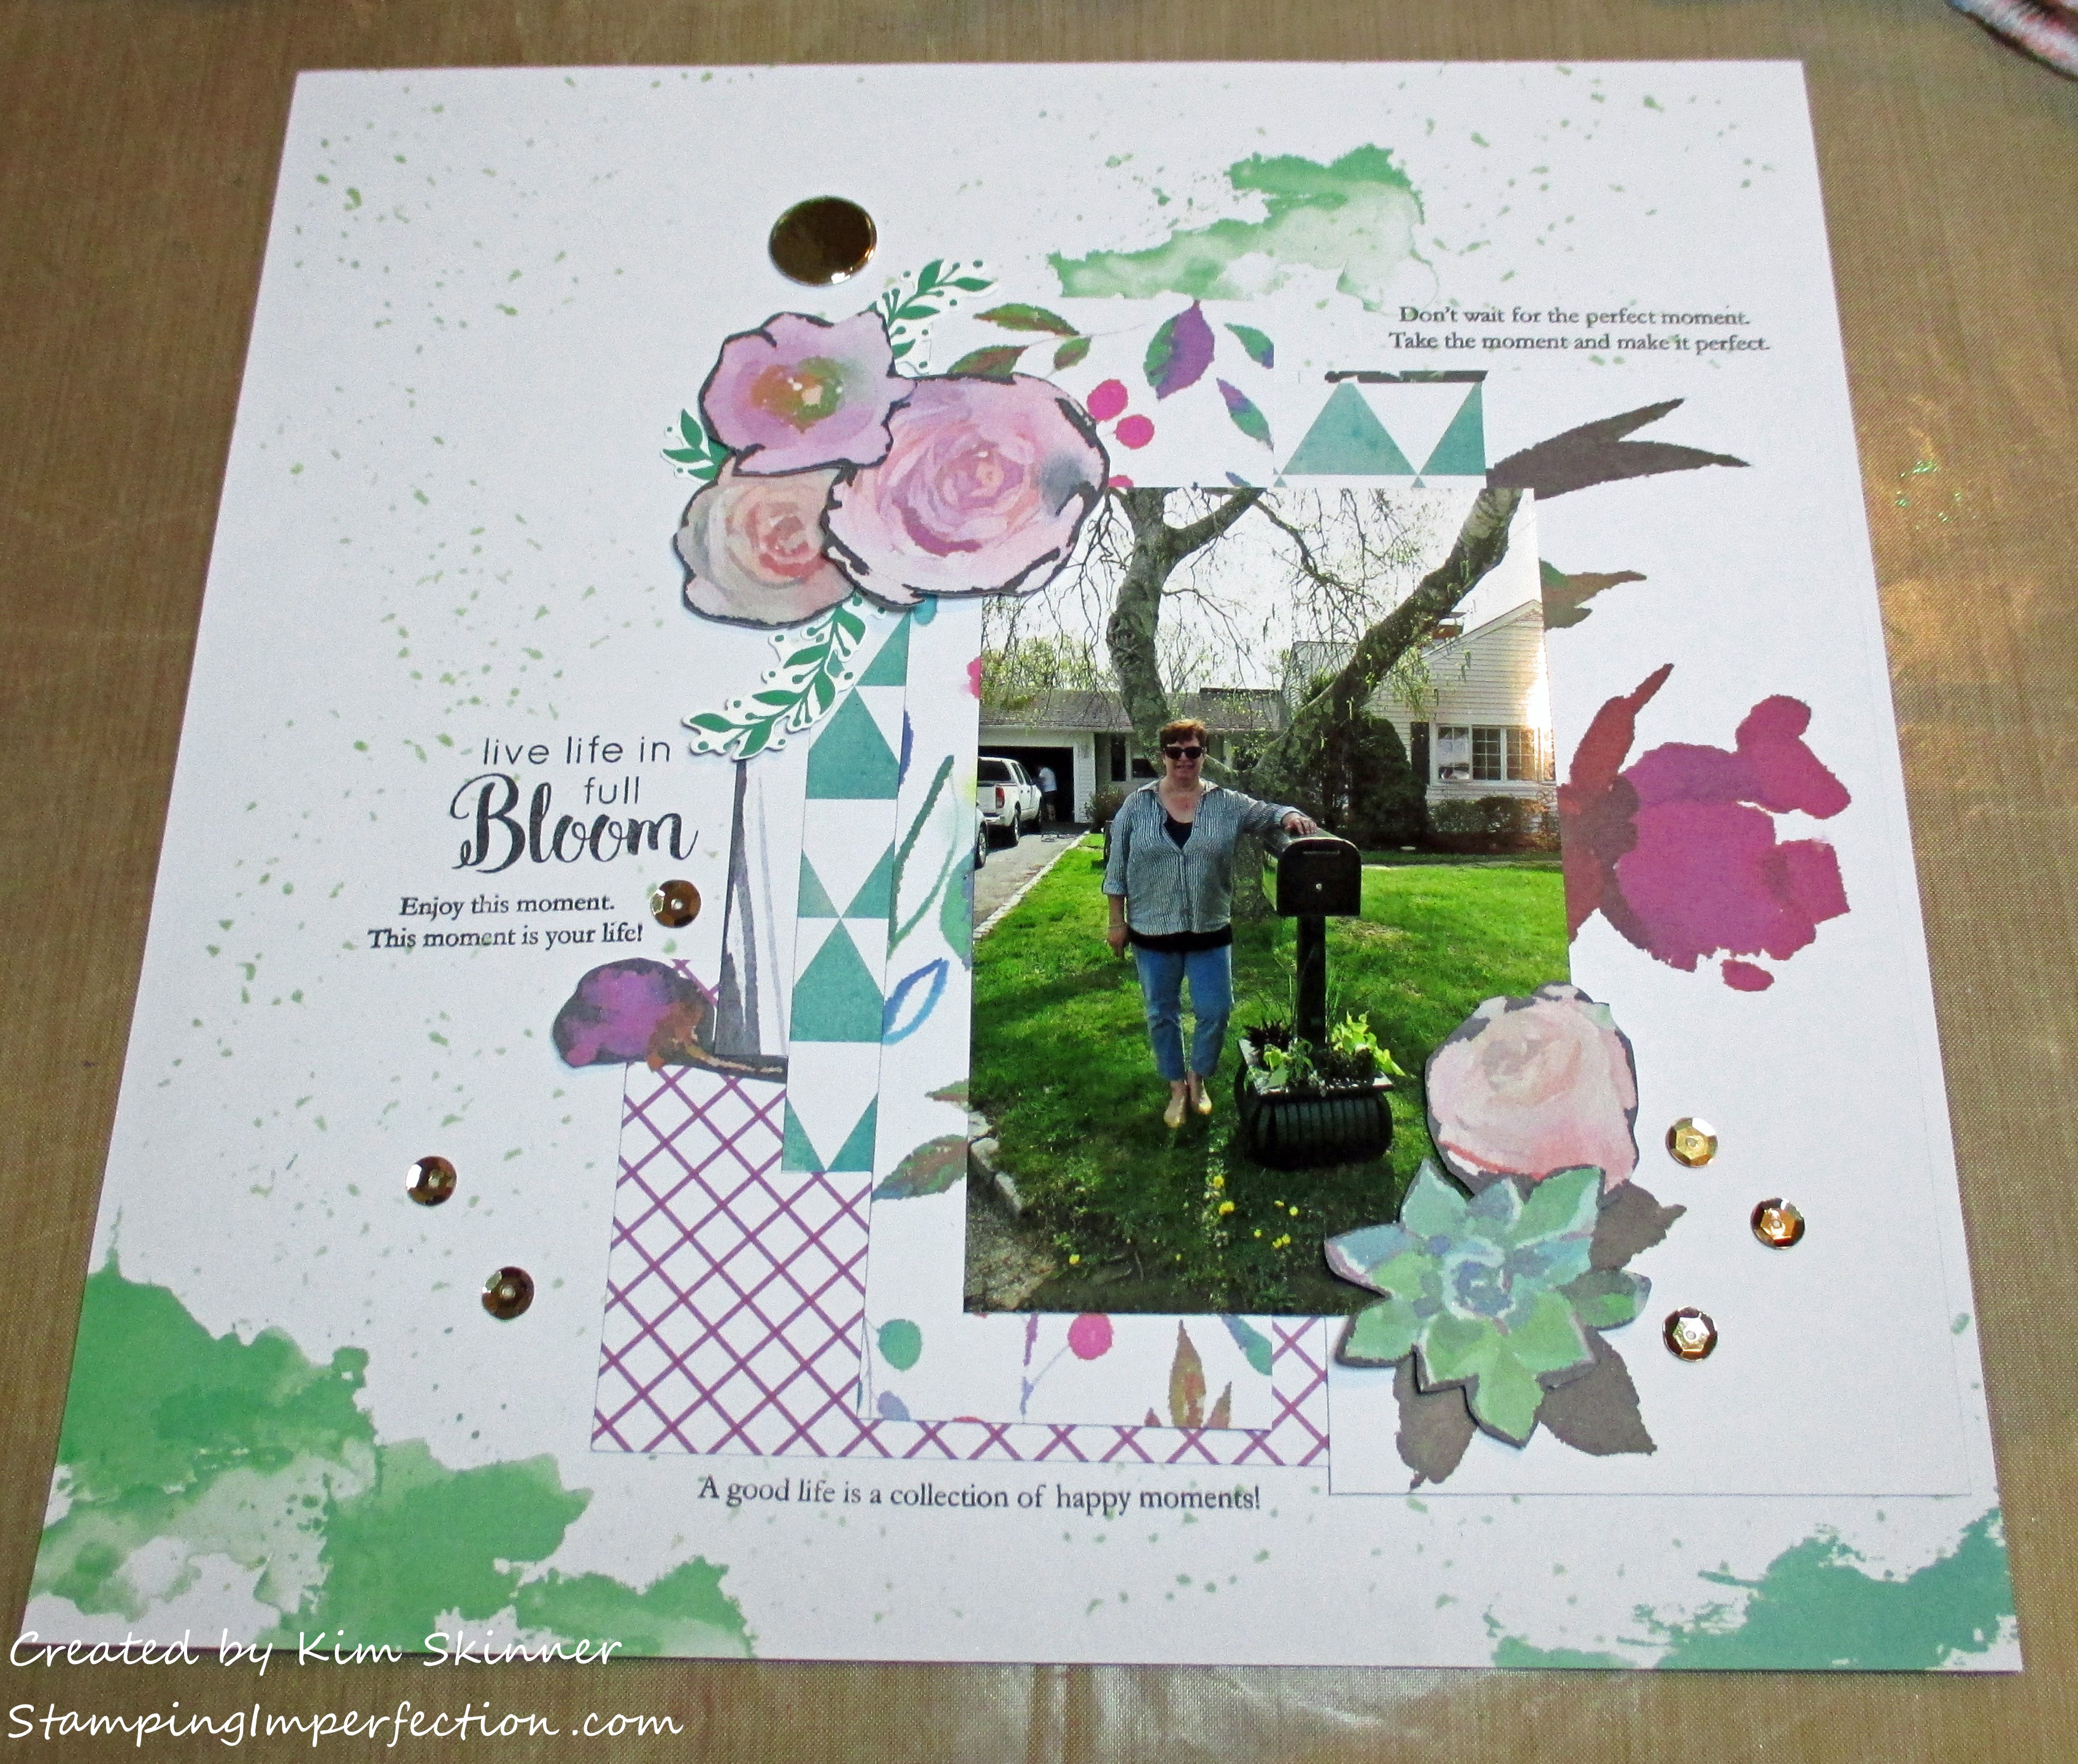
- I started with a wonderful background paper. I purchased the Our Family scrapbook paper set from Altenew and this is one of the papers in the kit. I selected this because I liked how the green complement all the greens in my photo. Idea 1 is to select papers that complement the colors and the story of your photo. I also selected other papers from the set that had greens, pinks and purples. I was trying to use florals since the class was called Timeless FLORAL layout and I had just painted the mailbox and planted it with potato vines and vinca vines. (The deer and rabbits promptly devoured the potato vines. It must have been delicious!) This is the house we just moved in to a couple of months before this picture was taken. It’s a real fixer upper!! I love this little house!)
- I cut down several of the papers I picked and arranged them in a way that was pleasing to my eye to make a backdrop for the photo. I wanted to get some purples and pinks in those papers because I love those colors with green and because it is spring in the photo.
- I selected a few coordinating embellishments and cut out some of the floral images from one of the papers that I used.
- I stapled my papers together when I had them arranged the way I like them. The staples held them together and it was a quick way to preserve my layout so I could adhere them with my Altenew Glue Tape Runner.
- To create my layout with the papers and embellishments, I tried to create visual triangles with similar types of embellishments and/or with colors. I had some deep purple/red colors and you can see that I have a giant triangle with these. I have a deep purple above the photo at the top of the layout, the larger flower to the right and the paper and flower on the left. You can also see that I added some gold to the project and I’ve created a giant triangle with the gold pieces as well as smaller triangles with the sequins. Notice that these triangles go around my photo. Additionally, I stamped my sentiments in a triangle around the entire layout as well.
- I have a lot of white space on my layout. The papers, sentiments and embellishments are all clustered together leaving plenty of white space.
- I added some of my embellishments with foam tape and dimensional foam adhesive to give dimension to my layout.
- I gave dimension to the flowers by fussy cutting them out of the paper and layering them on top of the photo with foam tape.
- I also love the watercolor effect that the background paper had. Notice the 3 main splashes of color are in a triangle and there is a splatter effect across the page in the same color. I really liked that about this paper and it was one of the reasons that I chose it. I was working to use the design triangles and the paper really added to that.
- My embellishments don’t have a symbolic meaning in this layout, but sometimes they do. I added the gold because I thought it needed a bit of sparkle and shine. Doesn’t every project need some sparkle and shine? I also felt that I had selected a triangle shape in one of the papers and the windows are very rectangular with lots of squares (I LOVE the windows on this house!), so I wanted some circles and I brought those in with the metallic gold elements that I’ve added.

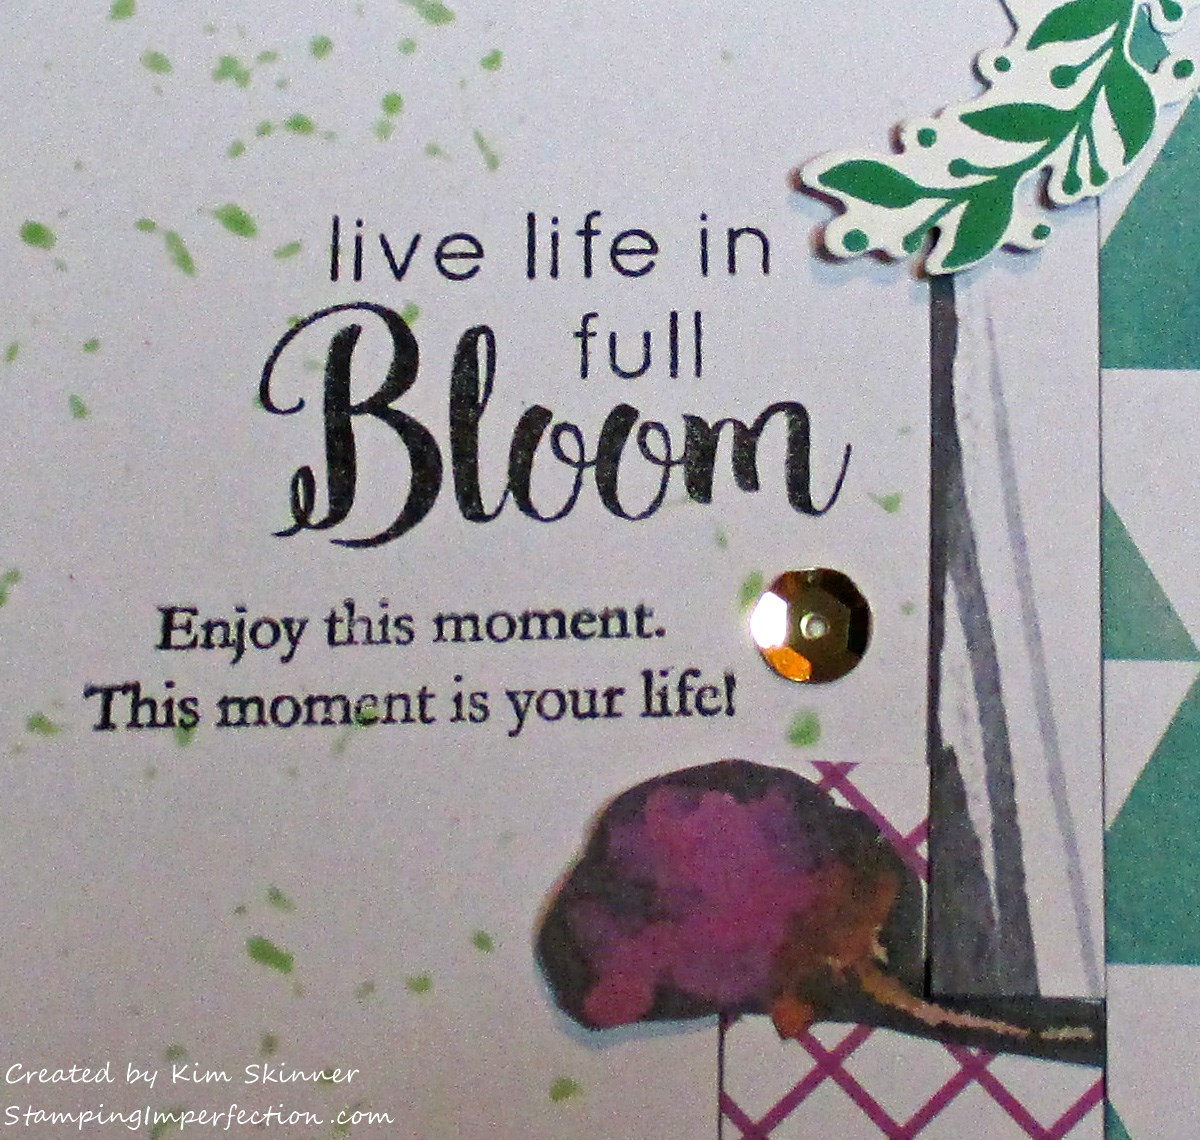
Here you can see that I’ve combined two sentiments. The top one is one of my faves from the Dahlia Blossoms stamp set. I love the script BLOOM and I absolutely love the message in this sentiment. The secondary sentiment below it comes from the Moments in Time stamp se as do the other ones that I used. I love this one. I had fun painting that beat up mail box and replacing the box with a new one. Then planting the vines made it feel more like home. My neighbor Nancy, who is in her 80’s and takes a long brisk walk every single day, stopped by to let me know how great it was to see a woman working outside this house! Honestly, every time she returns from her walks she always behaves as if she just came home from a wonderful adventure. She is amazingly funny! She really enjoys the moments!
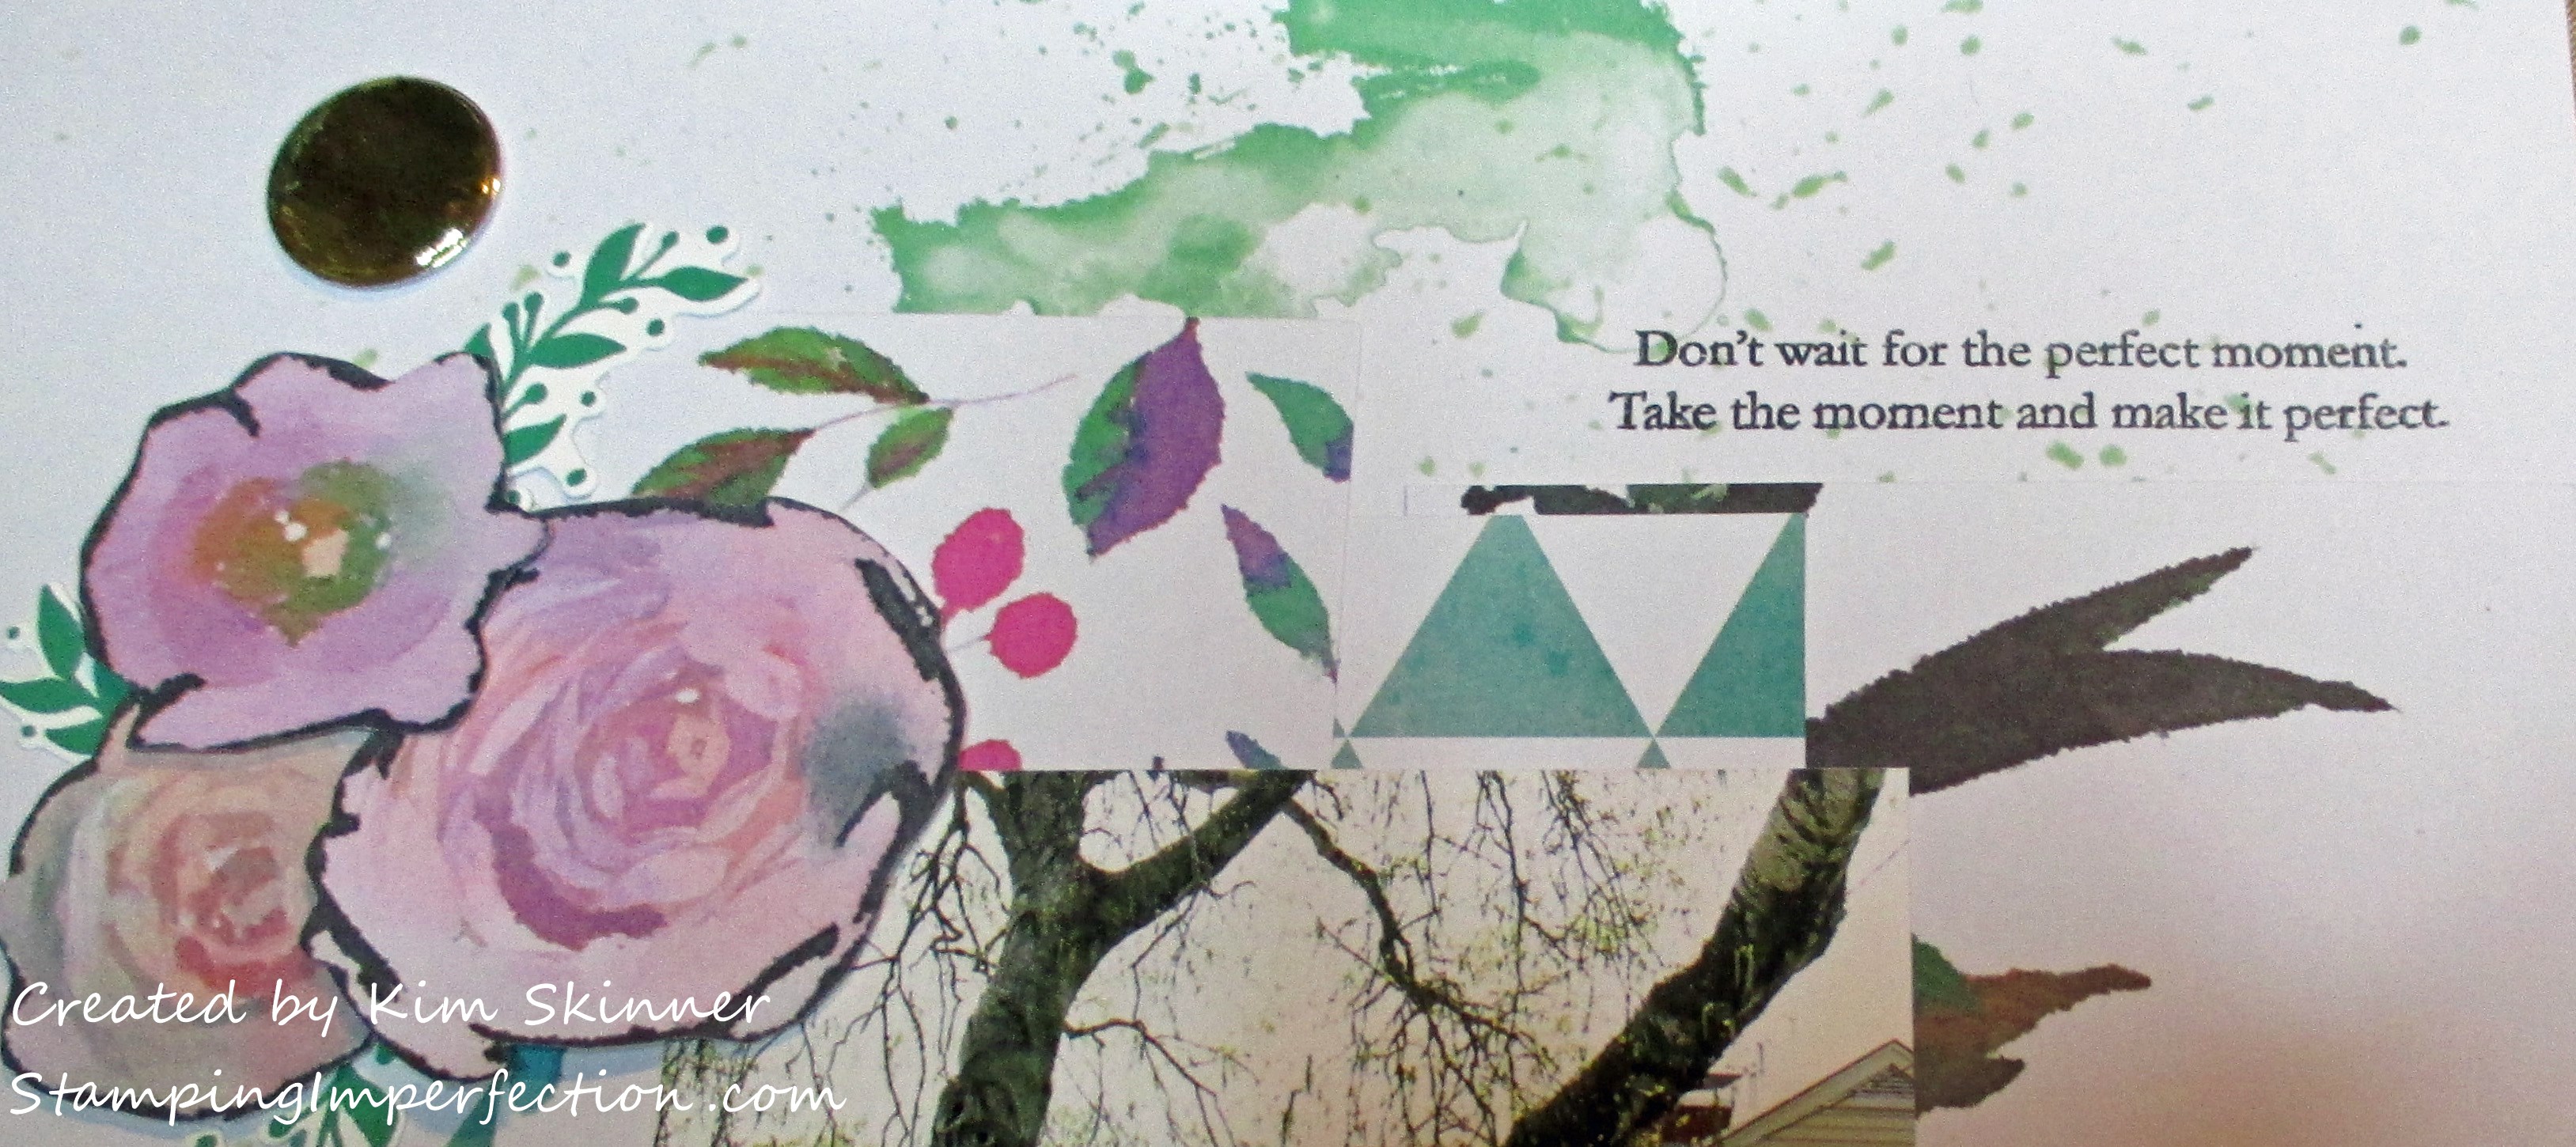
Another perfect sentiment. I’m telling you, Altenew has my favorite sentiment stamps. Nobody does sentiments like Altenew! I just feel like this conveys how I was feeling when my daughter snapped my picture that day. It was a beautiful spring day in our “new” home, my daughter was visiting and we were exploring the town later!
You might also notice that tucked below the pink roses I’ve added some die cuts from the Happy Dreams set. In the Stamps Meet Scrapbooks class, Lilith (our instructor) encouraged us to make a bunch of stamped die cuts like floral sprigs of leaves, arrows, labels, that gold circle shape, other shapes…you name it. I made a bunch one Friday evening and it was nice to be able to pull them out of the bowl and make a quick layout with ready made stuff that I created from my stash.
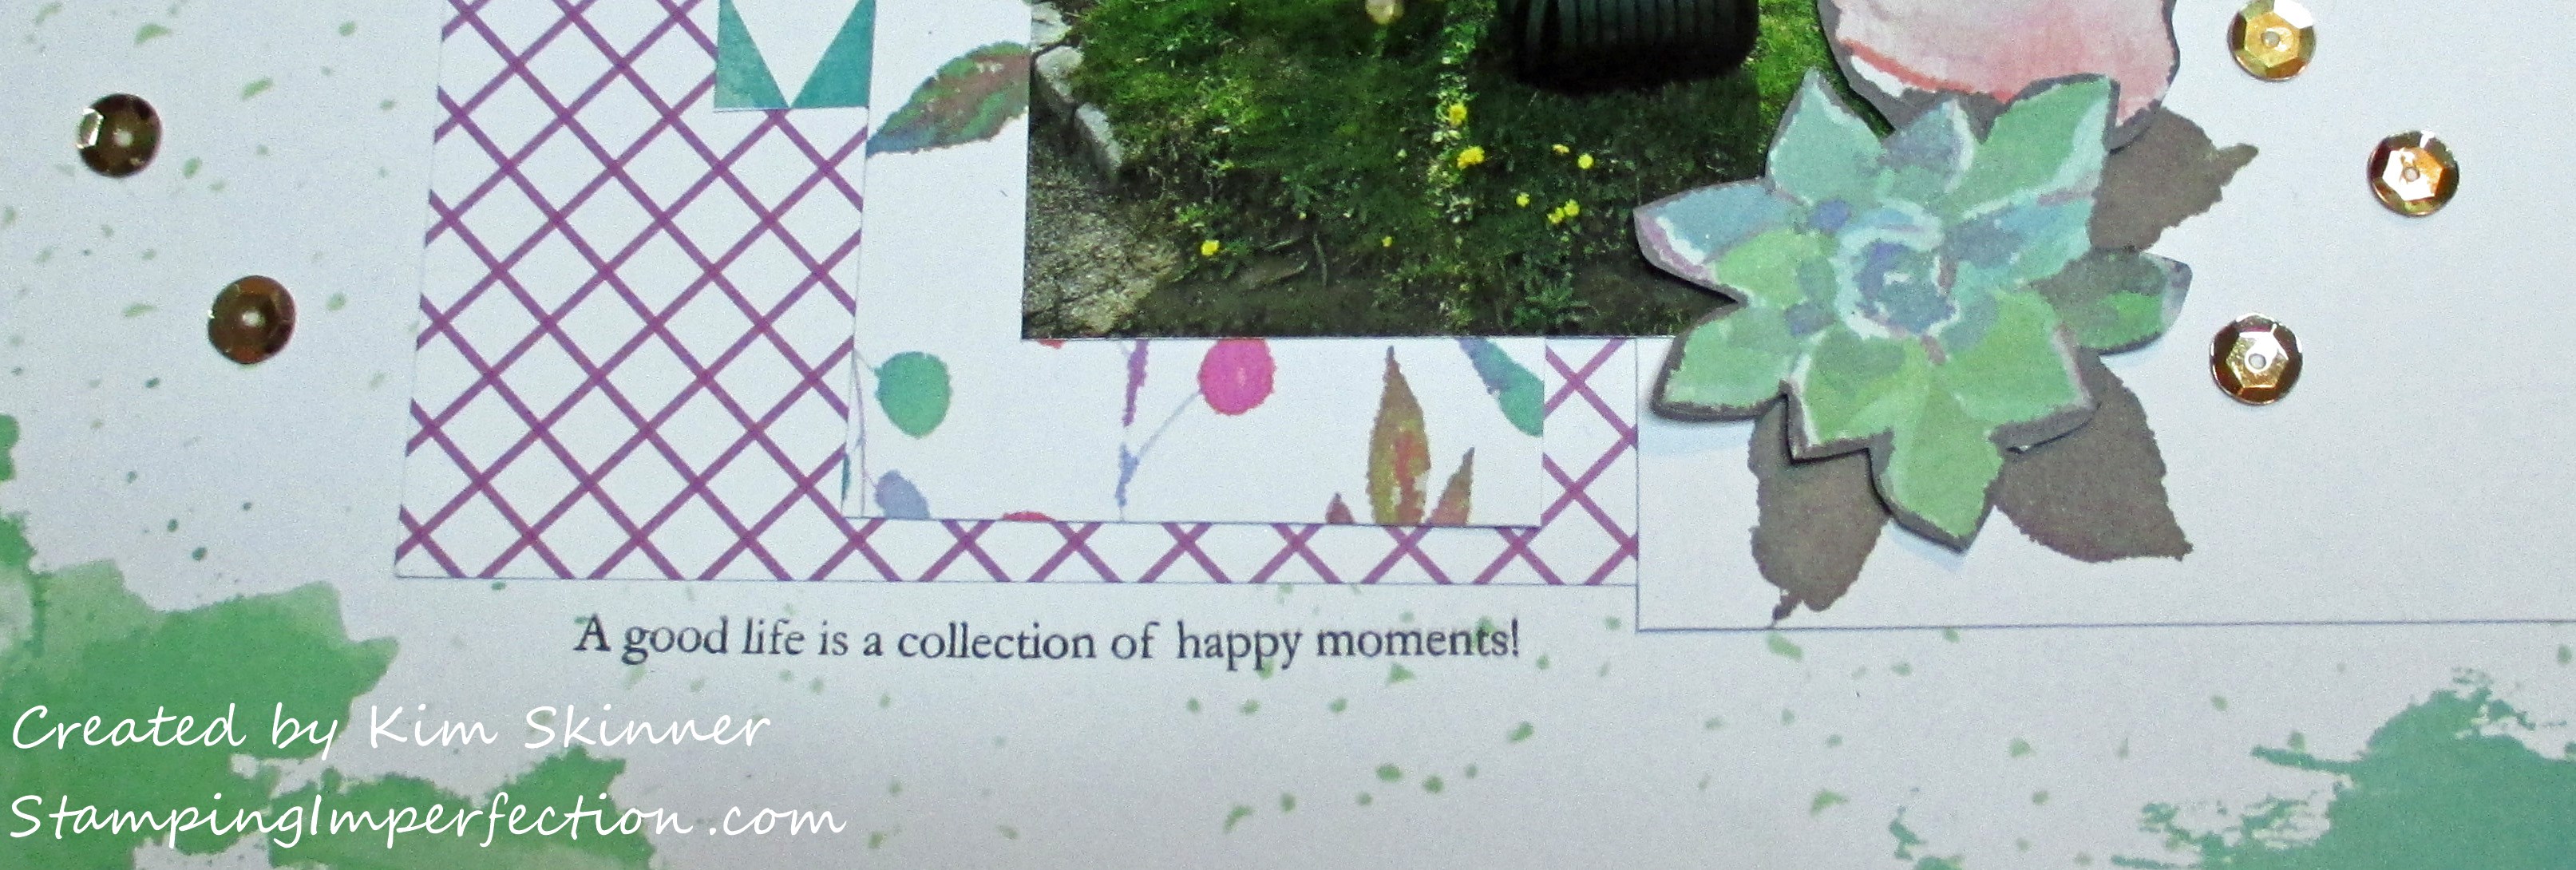
This is the final sentiment that I selected. Again, it is perfect! I love this set. There are so many more in the set and so many Altenew sets that have sentiments that you can put together on your layouts to say just what you are feeling in that moment!
After I took these photos, I added the date and location in my own handwriting using a purple fine tip sharpie.
I honestly tried the card method of memory keeping, but I really love making scrapbook layouts like this.
However you like to preserve your memories, I hope you can find some time to do so!
Thank you for stopping by!!!


Excellent write-up and details! Love your step by step run through! The layering and details are lovely! Hope this get you out of your comfort zone a bit!! GREAT to stretch your stamping skills, right!? Thank you for the AECP submission!
Thank you, Virginia! It is great to stretch the stamping skills and the stamping tools!!