One of the questions that I’m getting asked a lot lately is what do I look for when I’m choosing stamp sets. With so many different types and different materials, how do you decide which ones to buy? Plus, there are now so many stamp companies that have similar things, how do you choose?
My answer: It depends on what you plan to create, the skill level you are at now, and the skill level you hope to achieve.
One of the first things that I think you have to answer first is: Do you like to color images? This could be watercoloring, alcohol markers, paint markers or brushes, art crayons, or any other kind of medium.
If your answer is a resounding NO!, then you should consider sticking to solid image stamps. If you are thinking yes, then you might want more outline stamps.
The reason I think this is important, is because there are 3 basic categories of stamps: solid surface, outline, and hybrid layering stamps.
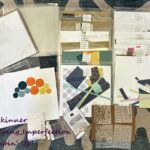
Column 1 on the left shows the solid surface stamps. The middle column shows the outline stamps and the right column shows what I call a hybrid stamp which is a layering stamp that has both the solid surface and the outline stamp.
A solid surface stamp is perfect for beginners or those of us who want to make some quick cards. Recently I’ve noticed that it’s hard to find solid surface stamps. Most companies are selling predominantly outline stamps because the watercoloring and Copic coloring techniques have really been dominating the market and the industry lately.
These solid surface stamps are great because you can select your ink pad colors, ink up your stamp, then stamp the image on your paper and it’s done. You’ve got a ton of color on your paper and the image appears before your eyes.
Catherine Pooler has a lot of these stamps in her store. If you love this type of stamping, you should check out her shop. I will have links below.
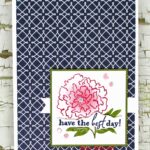
The card that I’m featuring here uses Catherine Pooler You’ve Got Flowers stamp set. I’ve done no special techniques at all to create this. I’ve used Sage, Skylight, Rose Petals, Midnight, and Shea Butter inks to create the images. I love the way you can create a card in 5 minutes with these stamps!
You can also do quite a variety of techniques with solid surface stamps to get colorful images and even shading on your images.
With these types of stamps, it is important that you condition your stamps before you use them for the first time. Below you can see a picture of what a stamp that you forget to condition stamps like! Conditioning takes off the chemical residue from the manufacturing process that can sometimes prevent the ink from covering the whole stamp surface leaving white spots on your stamped image. It behaves like oil and repels the ink (which is a dye in and water based).
The Outline stamps are great if you love coloring techniques. Keep in mind that when you stamp it, you get only the outline of the image and any detail the artist put into the image.
I actually like to leave these stamps just black and white sometimes just because I love the look!
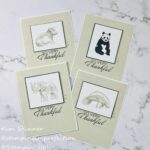
This is the Be Strong Stamp Set from Altenew. The only color I added was some shading in blue below the stamped image. I used a blender pen and an ink pad and kept it simple. I added some line and dot details to create the “boutique card look”. I really like that card!
If you don’t like that look and you want to use outline images, you need to add some color. On the card below, I’ve used the Altenew Alcohol Markers (Set A + 1 gray marker from set E) to add color to the images.
If you are like me, you may have put off jumping on the alcohol marker bandwagon. It’s expensive and how do you know which colors to buy and which colors go together? Plus, there are like 2500 markers or something in the Copic line!
You end up needing to either take classes, do a lot of experimenting on your own, or watch a lot of YouTube videos and then practice a lot to get good at it. It’s always a little daunting when you take a class and they start off talking about the light source and the shadows.
Why?
It should be fun. This is our hobby! I don’t want formal art lessons. I didn’t start off teaching basic physics with a lesson using multivariable calculus for crying out loud!
Keep it simple! I bought my first alcohol markers when Altenew came out with their artist markers. The are affordable, they are refillable, the brush nibs are replaceable, and they had a class for less than $10 showing how to color a beautiful image with them that never mentioned light source and shadows.
Someday, I will have room in my brain for that stuff and I will get better. For now, I’m still decompressing from 31 years of teaching physics and I don’t have it. I just want to enjoy my little process. Besides…isn’t this little guy adorable? He’s got light and dark spots!
You can also watercolor these images:
I didn’t design this card. I actually participated in the Altenew Virtual Workshop yesterday and this is one of the cards that we created with this set! This has a watercolor wash background and then we used the coordinating dies to cut out the watercolored images that we created on another piece of watercolor cardstock and attach them to our background. Super cute!
We also created this card:
I thought this was clever!! Adding the color makes a difference, but there are numerous techniques to do it and none of these that I’ve shared today are difficult. Keep it simple!
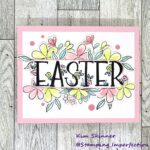
Finally, the last kind of stamp set has both the solid and the outline stamp. You can use them separately or you can layer them together. You can stamp that outline stamp and color it in with your favorite medium, or you can use the solid stamp and get that color on there fast!
Pretty! You don’t even have to line them up perfectly and it still looks nice!
I love the options that I have with this stamp set and other in my stash like it. This is Catherine Pooler’s Great Wings stamp set and I’ve used the same colors that I used on the first card.
Other things that I look for in a stamp set:
- sentiments…does it have sentiments I like and that I will actually use?
- smaller stamps…does it have small images like the dots on the card above? Those little images can add a lot of punch to a card.
- cost…stamp sets are getting pricier and my budget for them got smaller after I stopped working. Price matters, so I really look at the images and sentiments and think about how much am I really going to use that set before I purchase it.
- Sales, coupons, special deals, freebies, free shipping, clearance…seriously! I wait for sales and combine it with coupons. I create a wish list and wait until I have qualifying orders for free shipping and freebies.
- Do I already have something like it in my craft stash? Is it different enough from my other sets that I will really get my money out of it?
- Am I going to need special materials to actually use it? If I need more than just that stamp set, then it might not be as cost effective as I’d like it to be.
- Do I LOVE it?
- Is it seasonal, or can it be used all year long?
- What else can I create with it? Tags, book marks, journal pages…you see where I’m going with this.
I created a video to share with you:
Supply List:
Are you interested in the products I used? To make them easier for you to find, I have linked them below. (Affiliate disclosure ) Your purchases help keep my blog running at no additional cost to you and I thank you for the support!
Tombow Sanded Eraser to Remove Ink Marks: https://amzn.to/3joPiAm
Pentel Hi Polymer Eraser to Condition Stamps: https://amzn.to/32xaJII
Stamp Storage Plastic Sleeves: https://amzn.to/3hGZVxR
I’m so delighted that you stopped by! I hope you found this video helpful. I would love to know what advice you would share with other papercrafters about what you look for in the stamp sets that you purchase! Please leave a comment below and let me know!


