
Certainly, the first Altenew stamp set that I ever saw was the Vintage Rose set. A crafty colleague at work took a card making class at a local craft store and brought in her goodies to share with me. Her card was stunning. It looked like she spent a great deal of time creating it.
Then she told me about how the stamp set used several stamps that you stamped in different colors or shades to create the fabulous detail in the image by layering the stamps.
She also introduced me to the MISTI and the Lawn Fawn stamp shammy.
She opened a whole new world for me! After that I took a card class using Altenew stamps.
Altenew actually has a series of paper crafting classes on their website and the All About Layering class is actually free. It is extremely helpful to take the class when you are just getting started with these amazing stamp sets. You get a lot of great tips and ideas that will help you along the way.
One of the things that I really love is that you can download layering guides for the various stamp sets from the Altenew website. Many of the newer sets actually come with the layering guide on the package that the stamp set comes with. I always keep that in the clear stamp pockets from Avery Elle that I use to store the sets in. I also store the coordinating die set with it as well. Convenience is everything!
This card is for my final project for the All About Layering 1 class for the Altenew Educator Certification Program.
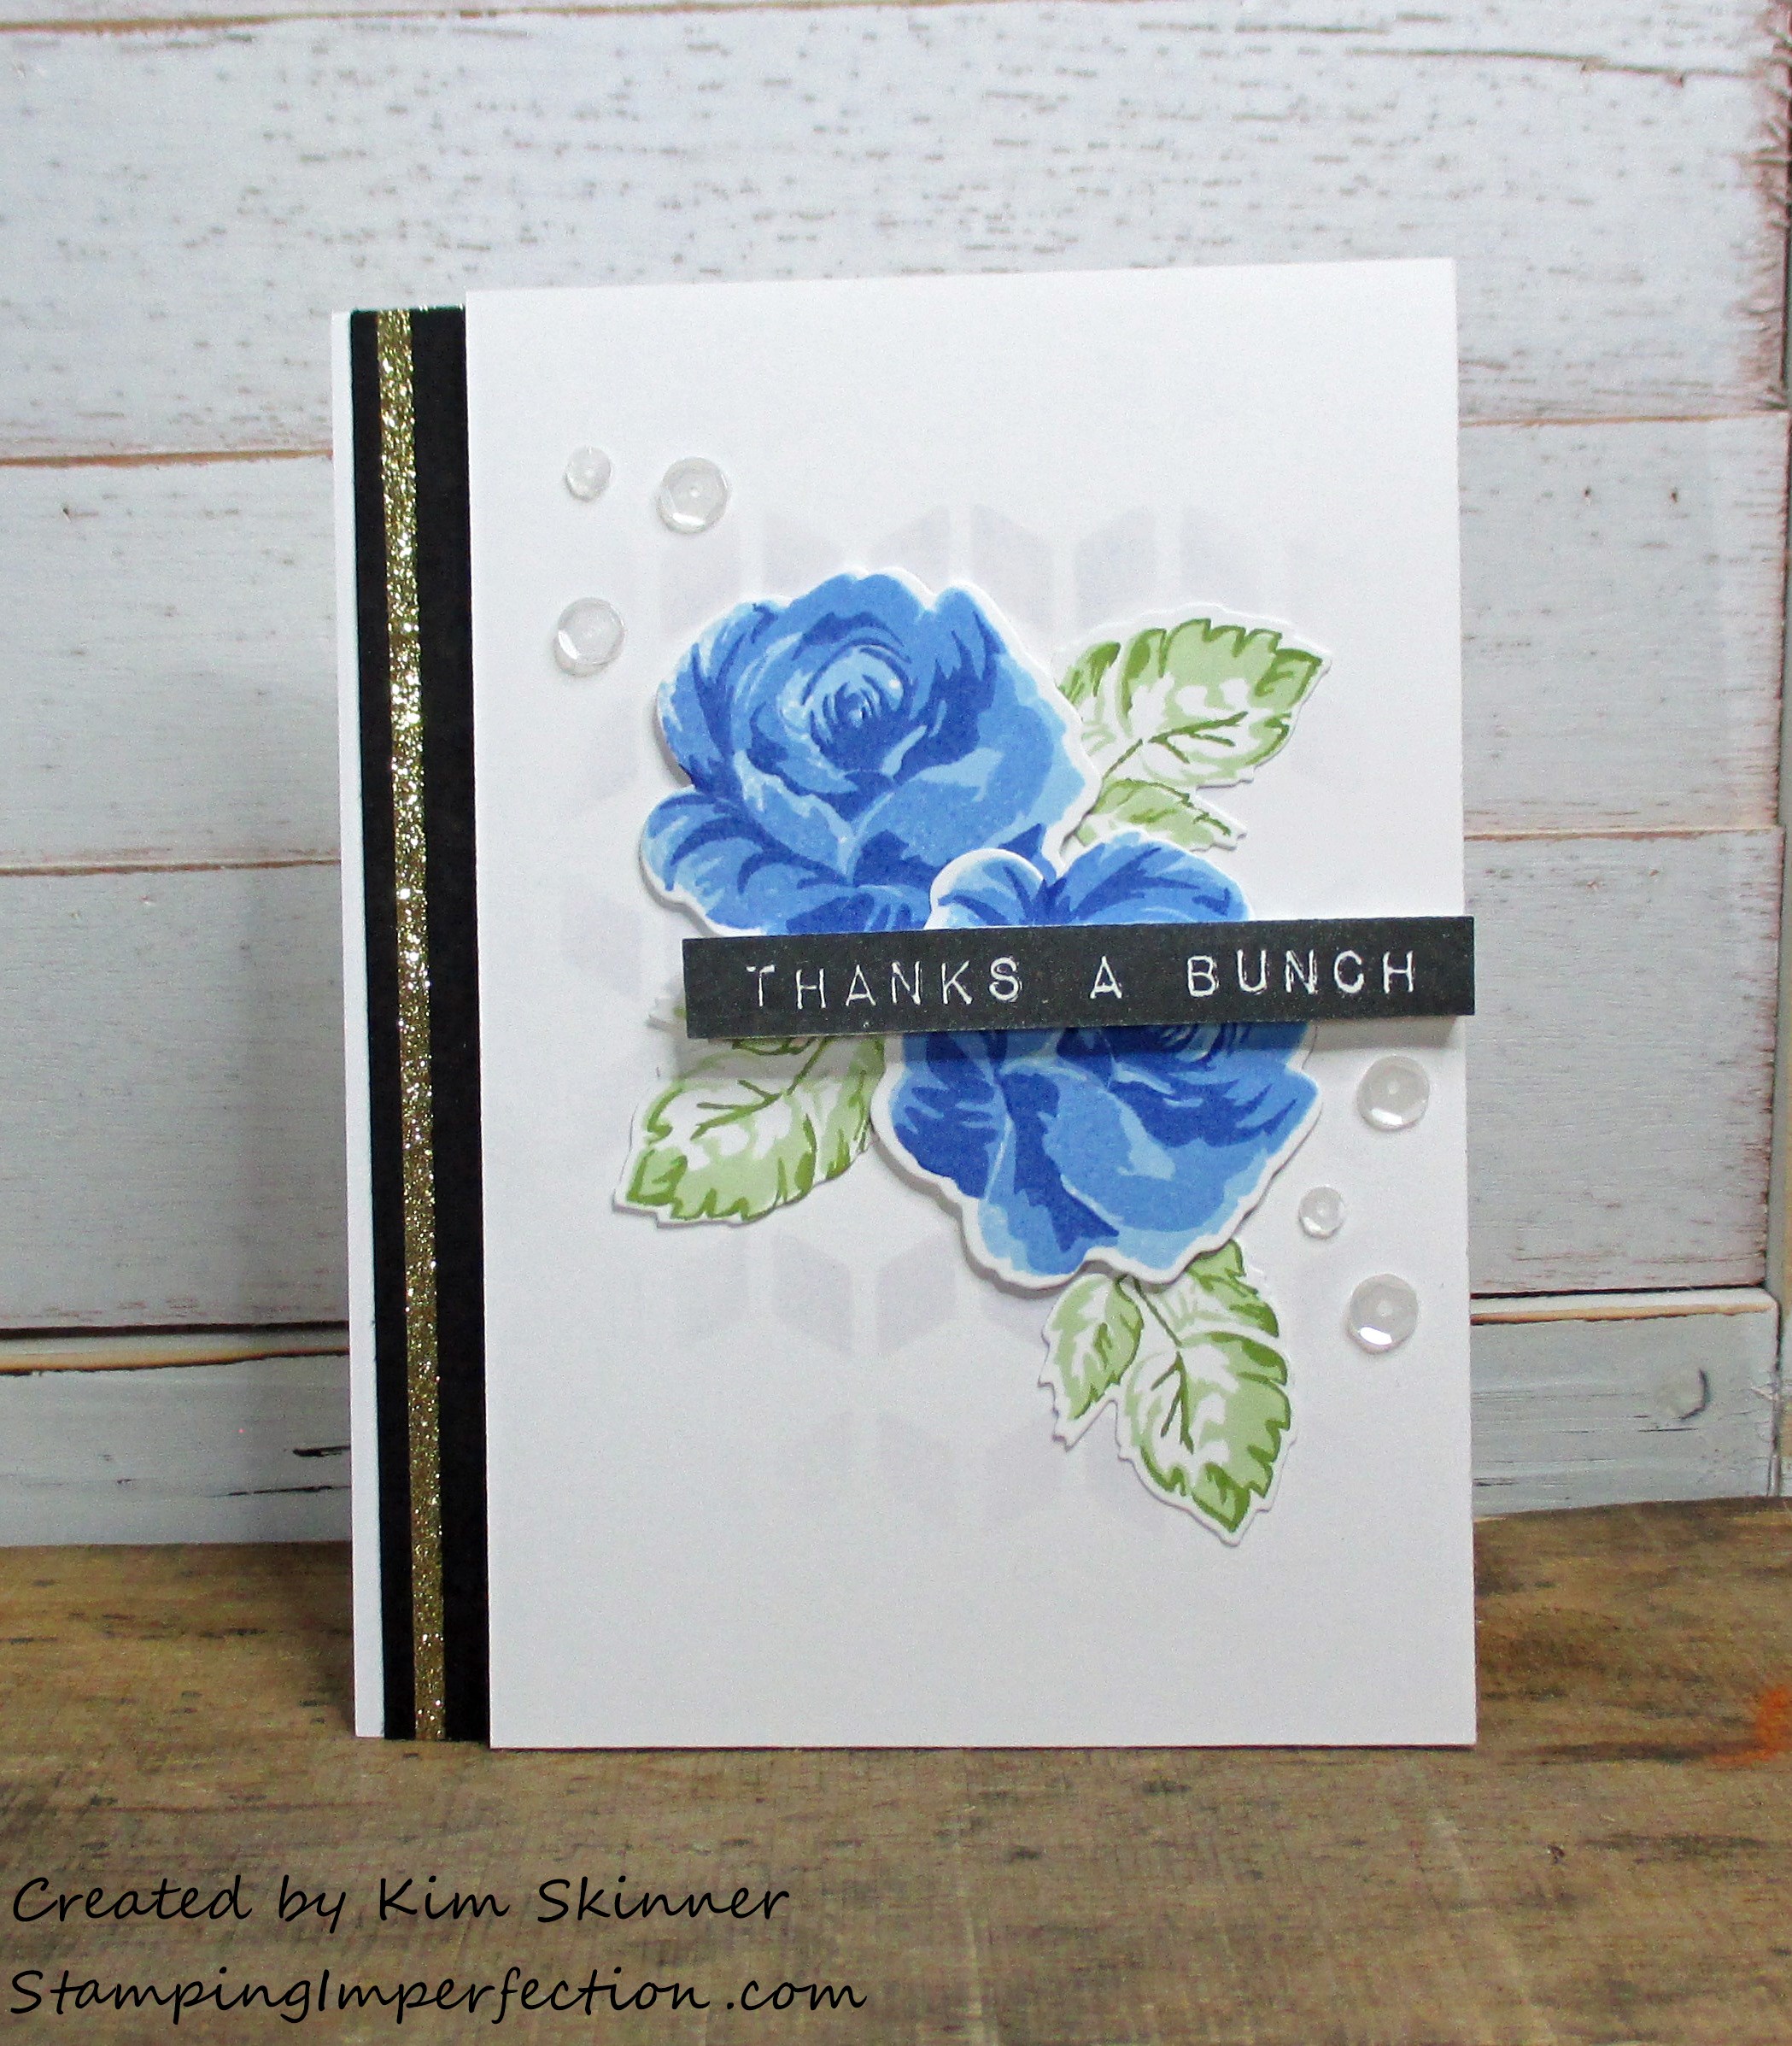
I used the Vintage Flowers set and the Label Love set for the sentiment. I was happy with the way my layering came out. I actually watched the videos about a month ago and I’ve been playing with the layering and colors ever since.
Isn’t the blue pretty?
Altenew sells their inks in several ways. You can purchase the entire collection all at once, one ink pad at a time, or in sets of 4. You can buy the full sized oval ink pads or you can buy the smaller cube ink pads to get started. I purchased a few colors in the sets of 4 because they are designed to be used together when you create the layers. I found it challenging to try to coordinate colors from the ink pads that I had to create the beautiful layered look.
For this card, I used the blue set that I got with that first class I took at the local craft shop. The set includes Arctic, Caribbean Sky, Persian Blue and Sapphire. I also have two sets of greens. I used Moss and Frayed Leaf for the leaves in this image. Altenew’s Permanent Black Ink was used for the sentiment.
I used a stencil and ink technique to create a background on my white card mat. I created my own stencil using heavy weight white card stock and the Cube Cover Die. I then used an ink blending tool to add a touch of the Arctic blue to the center of the card. It’s very subtle, but I love the way it looks. It gives the card a bit more dimension and if feels like it anchors the flowers.
I added two strips of black card stock to the side and a strip of the gold glitter washi tape. I love that little metallic detail on a card. Who doesn’t love a little card bling?
The flowers were added with some foam tape and then the leaves were tucked beneath them in a triangular pattern using liquid glue. The sentiment was cut right around the edge leaving no white. This was also attached with dimensional tape. The entire panel was placed on a piece of craft foam and glued to the front of the white card base.
For my final touch, I added some Marshmallow Sequins in two sizes. Notice that I also created a triangle pattern and place the two triangles diagonally across the main image. I love that tip from one of the instructors! I have always wondered if there is a trick to placing sequins and that triangle pattern going diagonally across the main image is it. LOVE it!
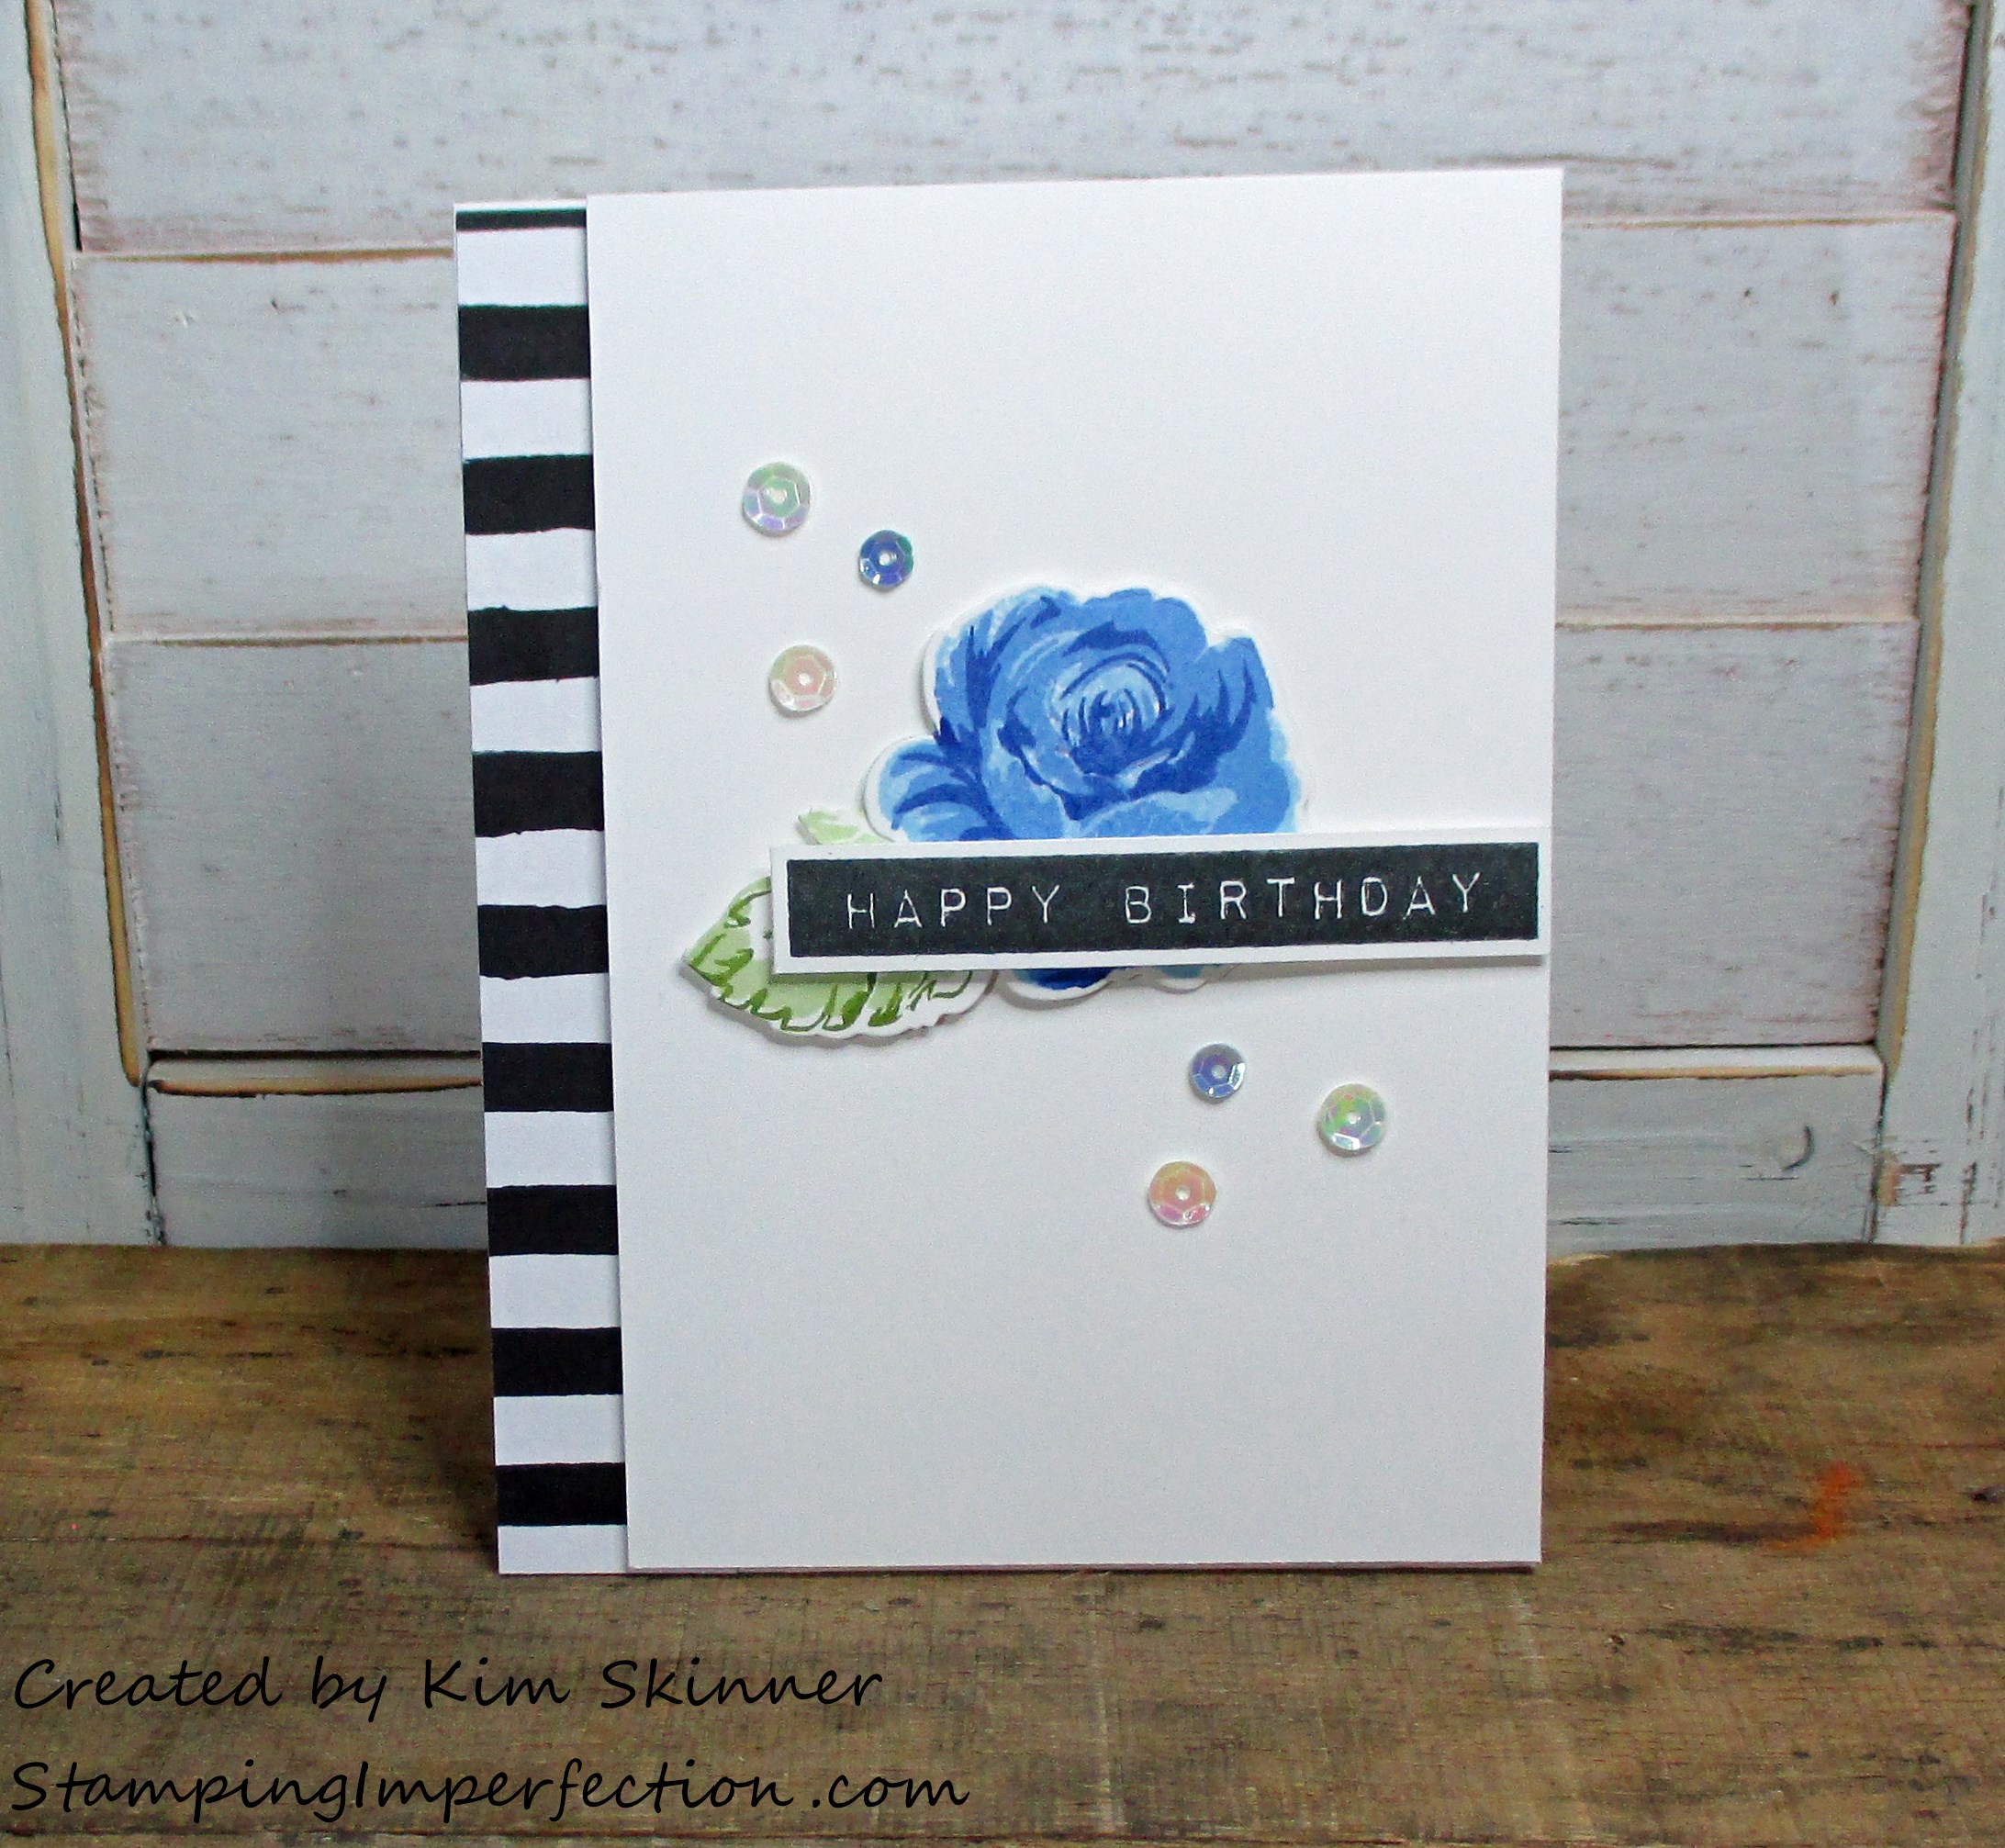
I created a second card with my left over die pieces. Did I mention that the stamp set has a coordinating die? No fussy cutting!
I kept this card simple, using a scrap piece of black and white patterned paper for the side of the card and sequins in my stash from some unknown craft kit! You can see that I left some white around the sentiment to give it a border on this card.
I hope you enjoyed the cards today! I certainly enjoyed making them and taking the class. I highly recommend checking out the classes available on Altenew’s website!
Thank you for stopping by today! Make sure you embrace the imperfections!


Kim I just love these cards. My favorite color is blue so I am a fan. I recently saw this stamp set and decided that is a definite for my wish list. I read that is layers easily and the misti is a great tool to do so. Have a great weekend.
I definitely think the MISTI is a great tool for getting the layers lined up correctly. I’ve been practicing with the quite a bit with and without the MISTI and I’m finally feeling like I’m getting the hang of it both ways. I did these without the MISTI tool and I was happy with the results. Thank you for stopping by Anita! I really appreciate your feedback!
Love your attentions to details for placement and colors, Kim!! AWESOME work!
Thank you, Virginia!!