
The final Altenew Academy class that I have taken for the Level 2 Certification Program is called Magical Marker Techniques.
Alcohol markers are pretty amazing tools. You can use them on so many different surfaces. I’ve experimented with these markers on metals, velum, enamel dots, rhinestones and pearls, window sheets…the list goes on. You can use them for all kinds of different techniques like spritzing then using isopropyl alcohol and a mister or splattering them with alcohol and a brush. You can create interesting backgrounds and so many details with them that they are always worth the investment.
Altenew has 3 sets of alcohol based markers that have both a brush tip and a fine tip. I love using alcohol markers in my scrapbooks. You can use them with stencils and die cuts to create your own unique backgrounds, patterned paper and embellishments. I love adding little sketch artistic details to create borders around my pages and pictures.
For my project for this class, I used them on a card to create an ombre blended die cut using and inlaid die cut technique called the Eclipse technique. It’s really trendy right now and fun to create. I shared a card using a Panda stamp set when I was the guest designer for What Will You Stamp’s Challenge Blog a couple of month’s ago. I loved how that card turned out and you can see it here if you missed it.
My card today is a fairly simple one, although I did have to die cut the “Happy” die 3 times! Altenew’s dies are high quality dies and they cut beautifully. I didn’t have to fuss with the die cut to get it out of the die.
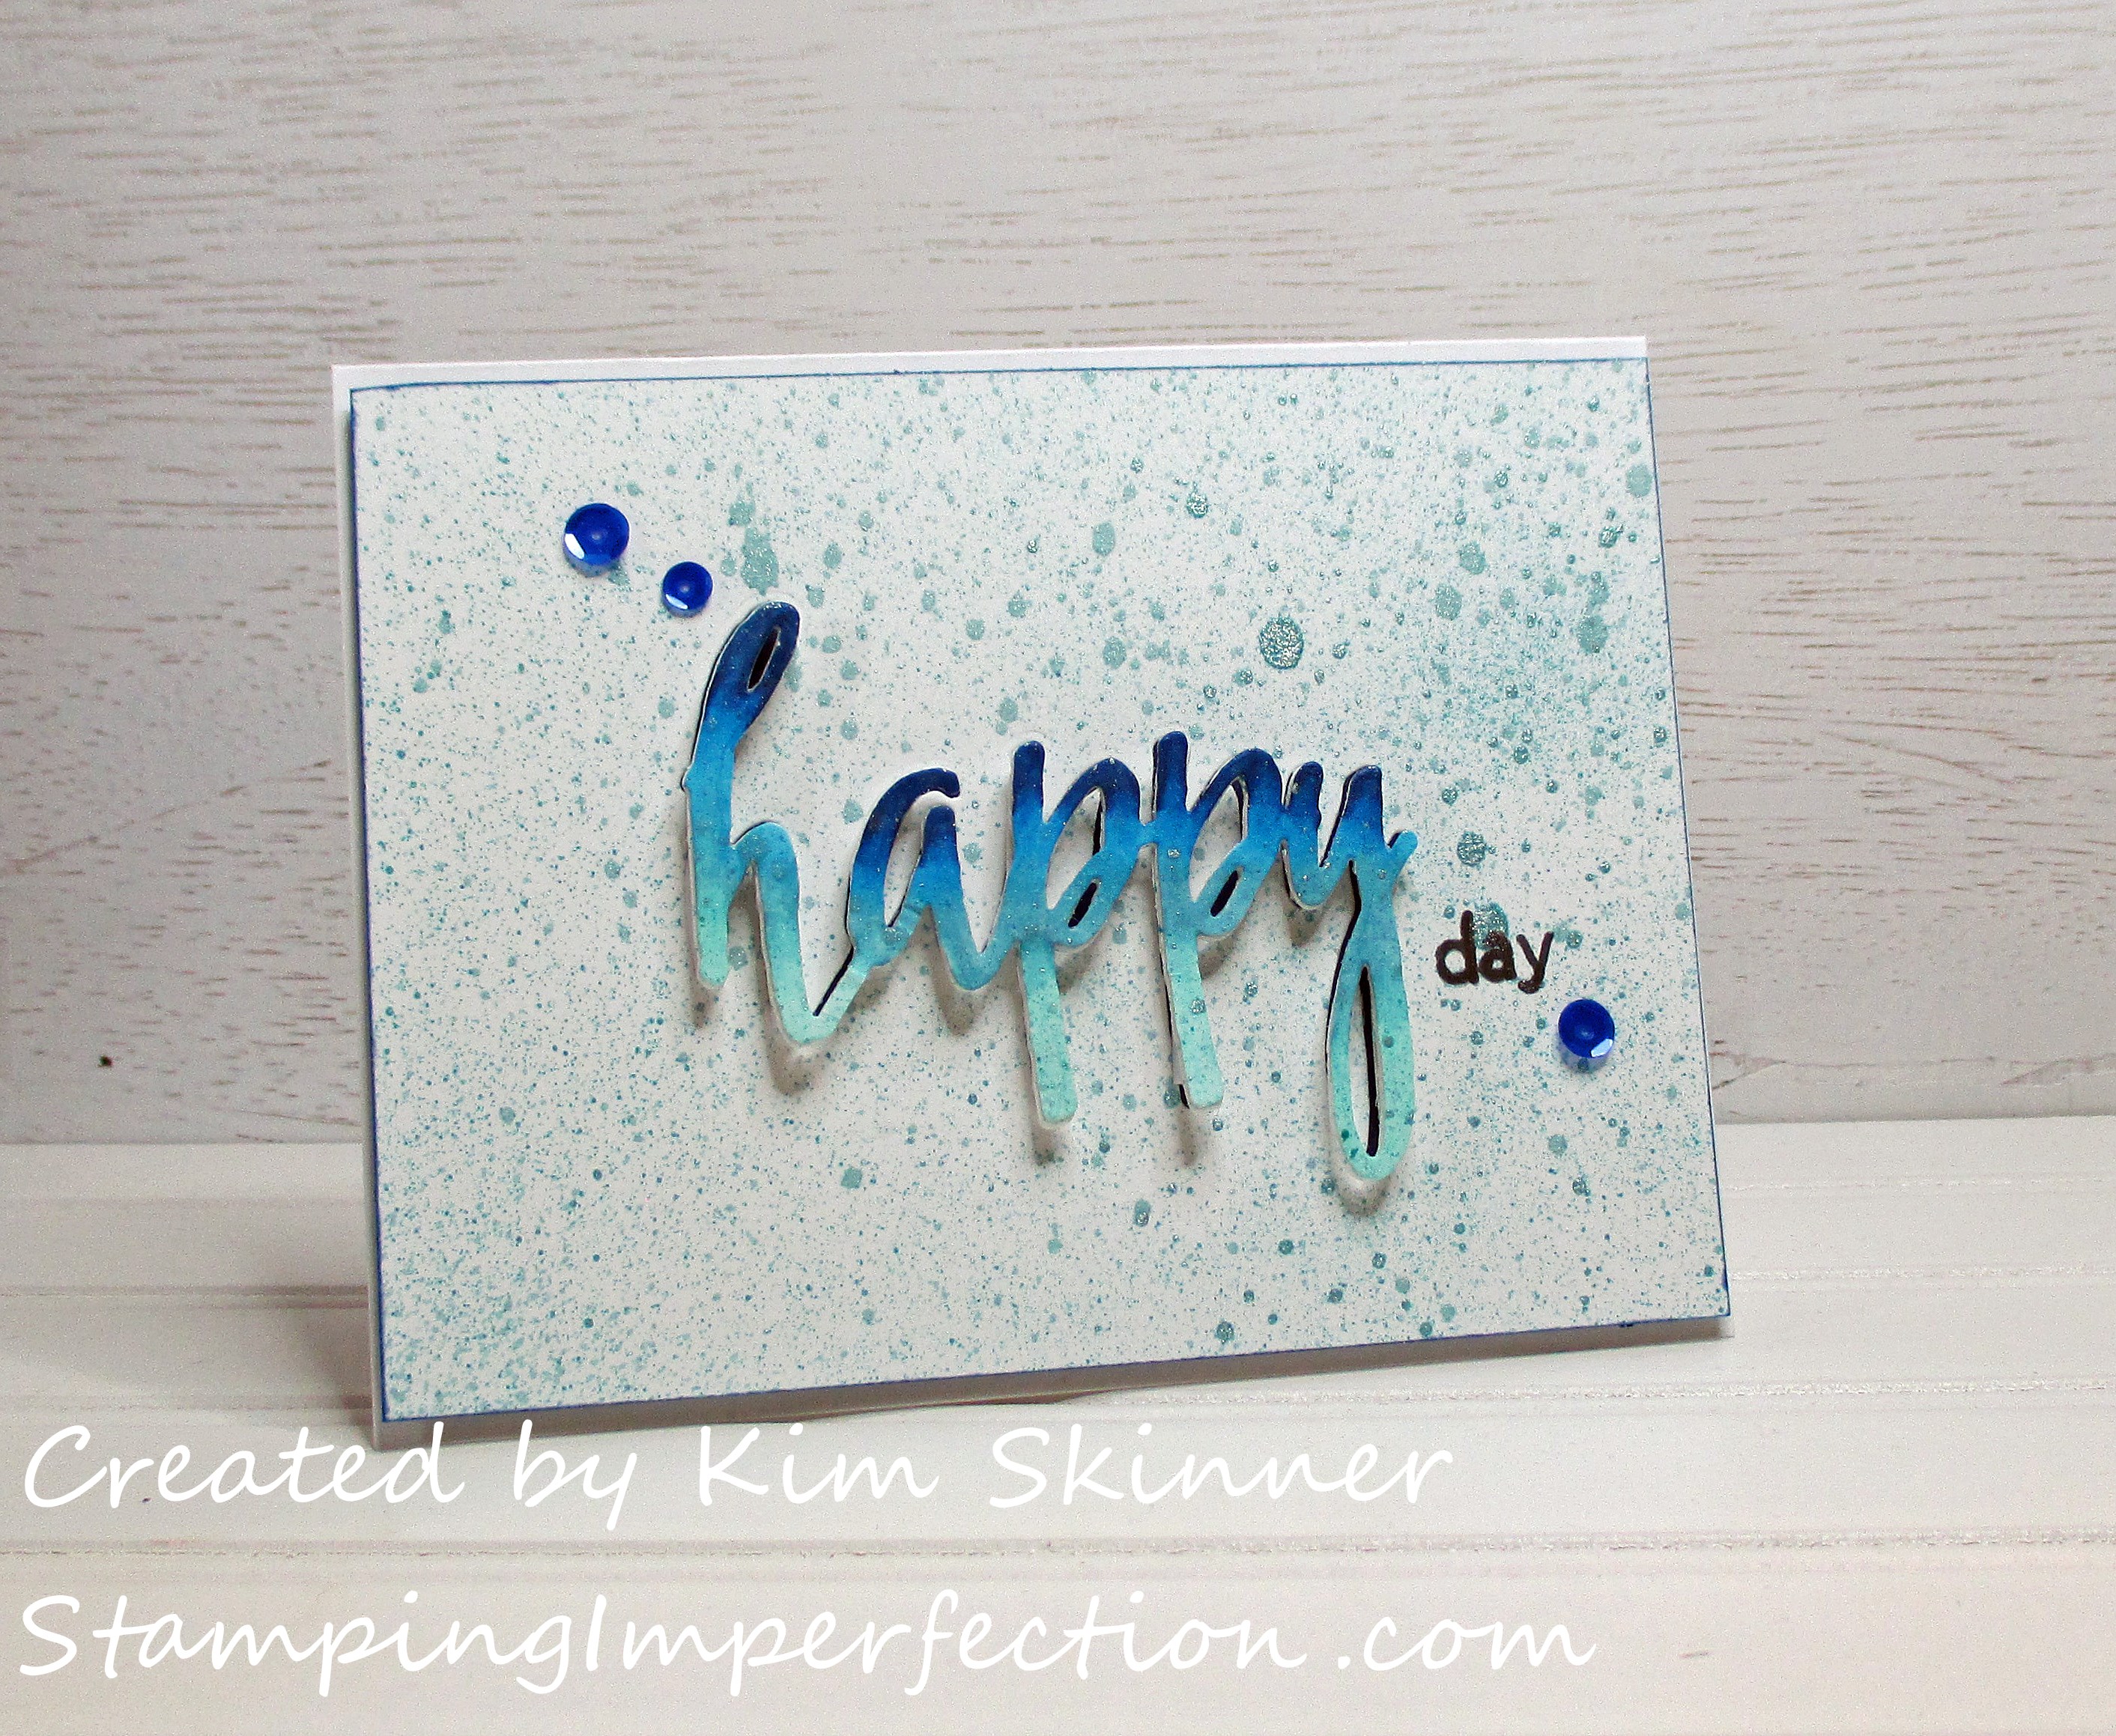
I used the Altenew Artist Markers Set A for this card. This set includes the Cool Summer Night set of blue markers. I love that this set has 4 shades of blue that coordinate and blend easily to give me this fabulous Ombre effect. Another marker detail that I added was to run the brush end of the darkest blue, Desert Night, around the edge of the front panel of the card to make it pop out from the card base. The Happy die coordinates with the Halftone Happy stamp set that has quite a few secondary sentiments to pair with the die cut.
My intention was to add some marker splatters, but I just got the Ocean Waves Ink Spray and I really wanted to try it out. The color is so pretty. This is definitely a lot of spray. This was one squirt from a good foot above the card!!! Wow! It’s a metallic sparkle spray and the color is just gorgeous. Up close, all those little dots shimmer and it doesn’t seem as overwhelmed by the spray in person. I always find it a challenge to catch that shimmer in a photo.
You can just see that I added a dark blue piece of card stock below the die cut so that when I popped the die cut up on foam tape you would see the dark background below. That is a detail that I think really adds to this technique. That little touch of dark below the script die just finishes the technique and adds that little extra touch.
The sequins are from Neat & Tangled Jewel Tones mix. I really like the blue sequins with the Ombre die. The “Day” sentiment is stamped in permanent black ink to finish off my sentiment.
It is a fairly clean and simple layout, although I don’t know if a purist CAS card maker would consider it clean and simple with the spritzed background!! I do and I really love the spritz. (Did I tell you that it sparkles?!)
Thank you for joining me! I’m embracing the imperfections as I learn new techniques and experiment with new products and tools.
With all of the classes that I’ve taken, I’ve been surprised at the number of different ways I can add color to my cards and projects. I’ve also been impressed by the instructors. The one thing that I think that is very clear is that they are not afraid to try techniques in new ways to see what results they will get. They create color cards and charts to experiment on and then they keep them to refer to. They experiment with papers, inks and techniques to see what they prefer and what conditions the tools work best in. It’s almost like a science experiment!
I’ve also learned that you can’t watch one video and become an expert. It’s all about practice, practice, practice.
I’m delighted that I’ve had the time and opportunity to try some new products and techniques. I feel like a whole new world has been opened and I can’t wait to take more classes and try more things!
You should check out the classes offered at Altenew Academy. I think you will be surprised at how being creative and learning new creative techniques can really fill you up!
Happy day!!!


CONGRATULATIIONS, Kim, on your certification! I applaud your persistence and consistency to move forward and learn new techniques. It has transformed your card making. You were one of the first demonstrators I followed when I began Stampin’ Up! I like the new look of your blog and your newly designed cards. Thanks for sharing….glad you are back!
Hi Sandi! Thank you so much for your lovely comment! I am truly enjoying learning new techniques and I’m so happy to have the time to be creative again!
I love love that die and how you colored it with Altenew Artist Markers! Truly beautiful, Kim!! Love this!
Thank you, Virginia! The markers blended so beautifully to give me a nice Ombre effect!