I have not been able to put down these watercolors that I got from Altenew. Their watercolor set is AMAZING!
They also have several watercolor classes that you can take for less than $10 each in Altenew Academy. I love the classes. Sometimes the lessons are techniques that I already know how to do and feel like I’ve mastered, but I still end up getting good tips and ideas that I can use to improve my technique. Many times, I get tips and ideas about techniques that I have not yet tried.
I had never watercolored with actual watercolor paints before taking several classes at Altenew Academy. It has definitely made me braver about trying new things and experimenting with new ways of added color and images to my projects. I’ve also learned a lot about adding details that I never thought of doing, yet they add so much to a card.
The technique that I used today is to use my watercolor paint like an ink. I added watercolor paint that was hardly watered down at all directly to the stamp, spritz it lightly then stamped the image on to the watercolor card without smooshing it or rocking it at all.
This is a great way to make it look like you hand painted the images. It’s like a cheat for watercoloring!
I did hand paint a few things on this image. I hand painted the grasses. The florals and the vase image came from Altenew’s Garden Silhouette stamp set.
This quick technique gave me a colorful single layer card that looks completely hand painted.
Here is another attempt with the Build-A-Flower: Chrysanthemum stamp set:
I LOVE the blue colors in this watercolor set. I think I have at least 3 different blues on that image.
One little detail that I added on this card that is a detail I really like is adding a touch of a reddish brown to the leaves. I think that little detail adds a more realistic leaf look.
Another fabulous sentiment from Altenew. I love the sentiments that they include. I feel like they have a lot of positive affirmations and uplifting sentiments. I love this one to give to students. I will actually add this card to my stash of cards that I will take to school to keep in my desk. This will be sent to a student who I feel needs it at some point during the next few months. I will include a very positive note inside about something they did that impressed my in class.
The floral image really does make a difference in this technique. The instructor suggested selecting one of the detailed layer stamps from a layering stamp set. This is not the 3rd layer of a 4 layer floral image and I like this. I can tell that it is a flower, but there is a lot of open space.
Here is my first attempt with that same stamp set, but with the 2nd layer stamp in the set:
I just love the way the blues mixed in this one. I still feel like I see the flower, although this was perhaps too solid of an stamp to select for this technique. I still liked it well enough to make it into a card and add some finishing touches.
On all the cards, I used the MISTI to stamp the sentiment because I’m using Arches Cold Pressed Watercolor paper and it has a lot of texture. The sentiments needed to be stamped 3 times to get bold, crisp images.
I also added splatter on each card and my favorite iridescent sequin mix from Neat & Tangled.
Here is the supply list: (This is an affiliate link.)
Thank you so much for stopping by! I hope this inspires you to do some watercoloring and check out the new watercolor set from Altenew!!


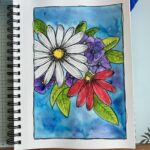

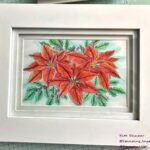
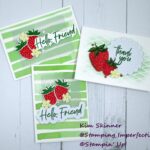

When I saw the thumbnail for your project in the gallery, I thought for SURE you hand painted those flowers! It wasn’t until I saw the full sized photo that I recognized it was our Garden Silhouette set. I can tell from all 3 cards that you have this technique mastered! Great job!
Thank you! I just watched the final lesson so I see why you thought that I painted them! This stamp set really lends itself really well to watercolor techniques.
So beautiful; love the first one especially!
Thank you!!