
This week’s craft room organizing mission: Papers!
If you asked me what my biggest organizing challenge might be in my house, I would tell that it’s the paper mess.
So much paper comes into the house and it seems like I just keep making new piles of it! I find it especially challenging to keep papers organized in my office. I’ve tried a lot of different systems and organizing tools, boxes and binders. None of them worked that well.
Do you know what the problem is? Me! I hate filing papers. End of story. The last thing that I feel like doing when I get home from work and open the mail is to actually then file and shred stuff. Even knowing that if I just spend 5 or 10 minutes doing that chore every day, it would get rid of the paper mess, I don’t like to do it.
I believe that I shared with you that I am spending the summer getting my entire house decluttered, organized and cleaned!!! Both of my kids have moved in to their own places and it is time! I’ve had the most productive 3 weeks ever as I work my way through the house. It’s like a weight is being lifted off my shoulders. I remember how great it felt years ago when I got my finances in order. Now I’m getting my house in order!
I know that in order for any organizing system to work for me, it needs to be easy to use, within reach and it can’t be like putting together a jigsaw puzzle to work or it’s not happening!
I have been sharing my organizing systems for framelits, thinlets and embossing folders with you. If you missed those blog posts, you can check out part 1 here and part 2 (with the free project printable and video tutorial) here.
Today I will be sharing the paper systems that work in my craft room. (I won’t be sharing any office organization tips…still working on finding what works for me!)

Admittedly, this pile is small compared to some I’ve had to deal with! Most of my card stock and card stock scraps are organized because the system that I have in place is working and has been working for me for over 3 years. It ain’t broke, so I won’t fix it!
My designer paper system works well too, but I just received some new designer papers from the new annual catalog and I haven’t put it in place yet. Today is the day it is getting done!
Designer Paper Organization
I keep my designer paper in two drawers in and Alex Drawer unit from Ikea that is below my desk. Here is the before pile:
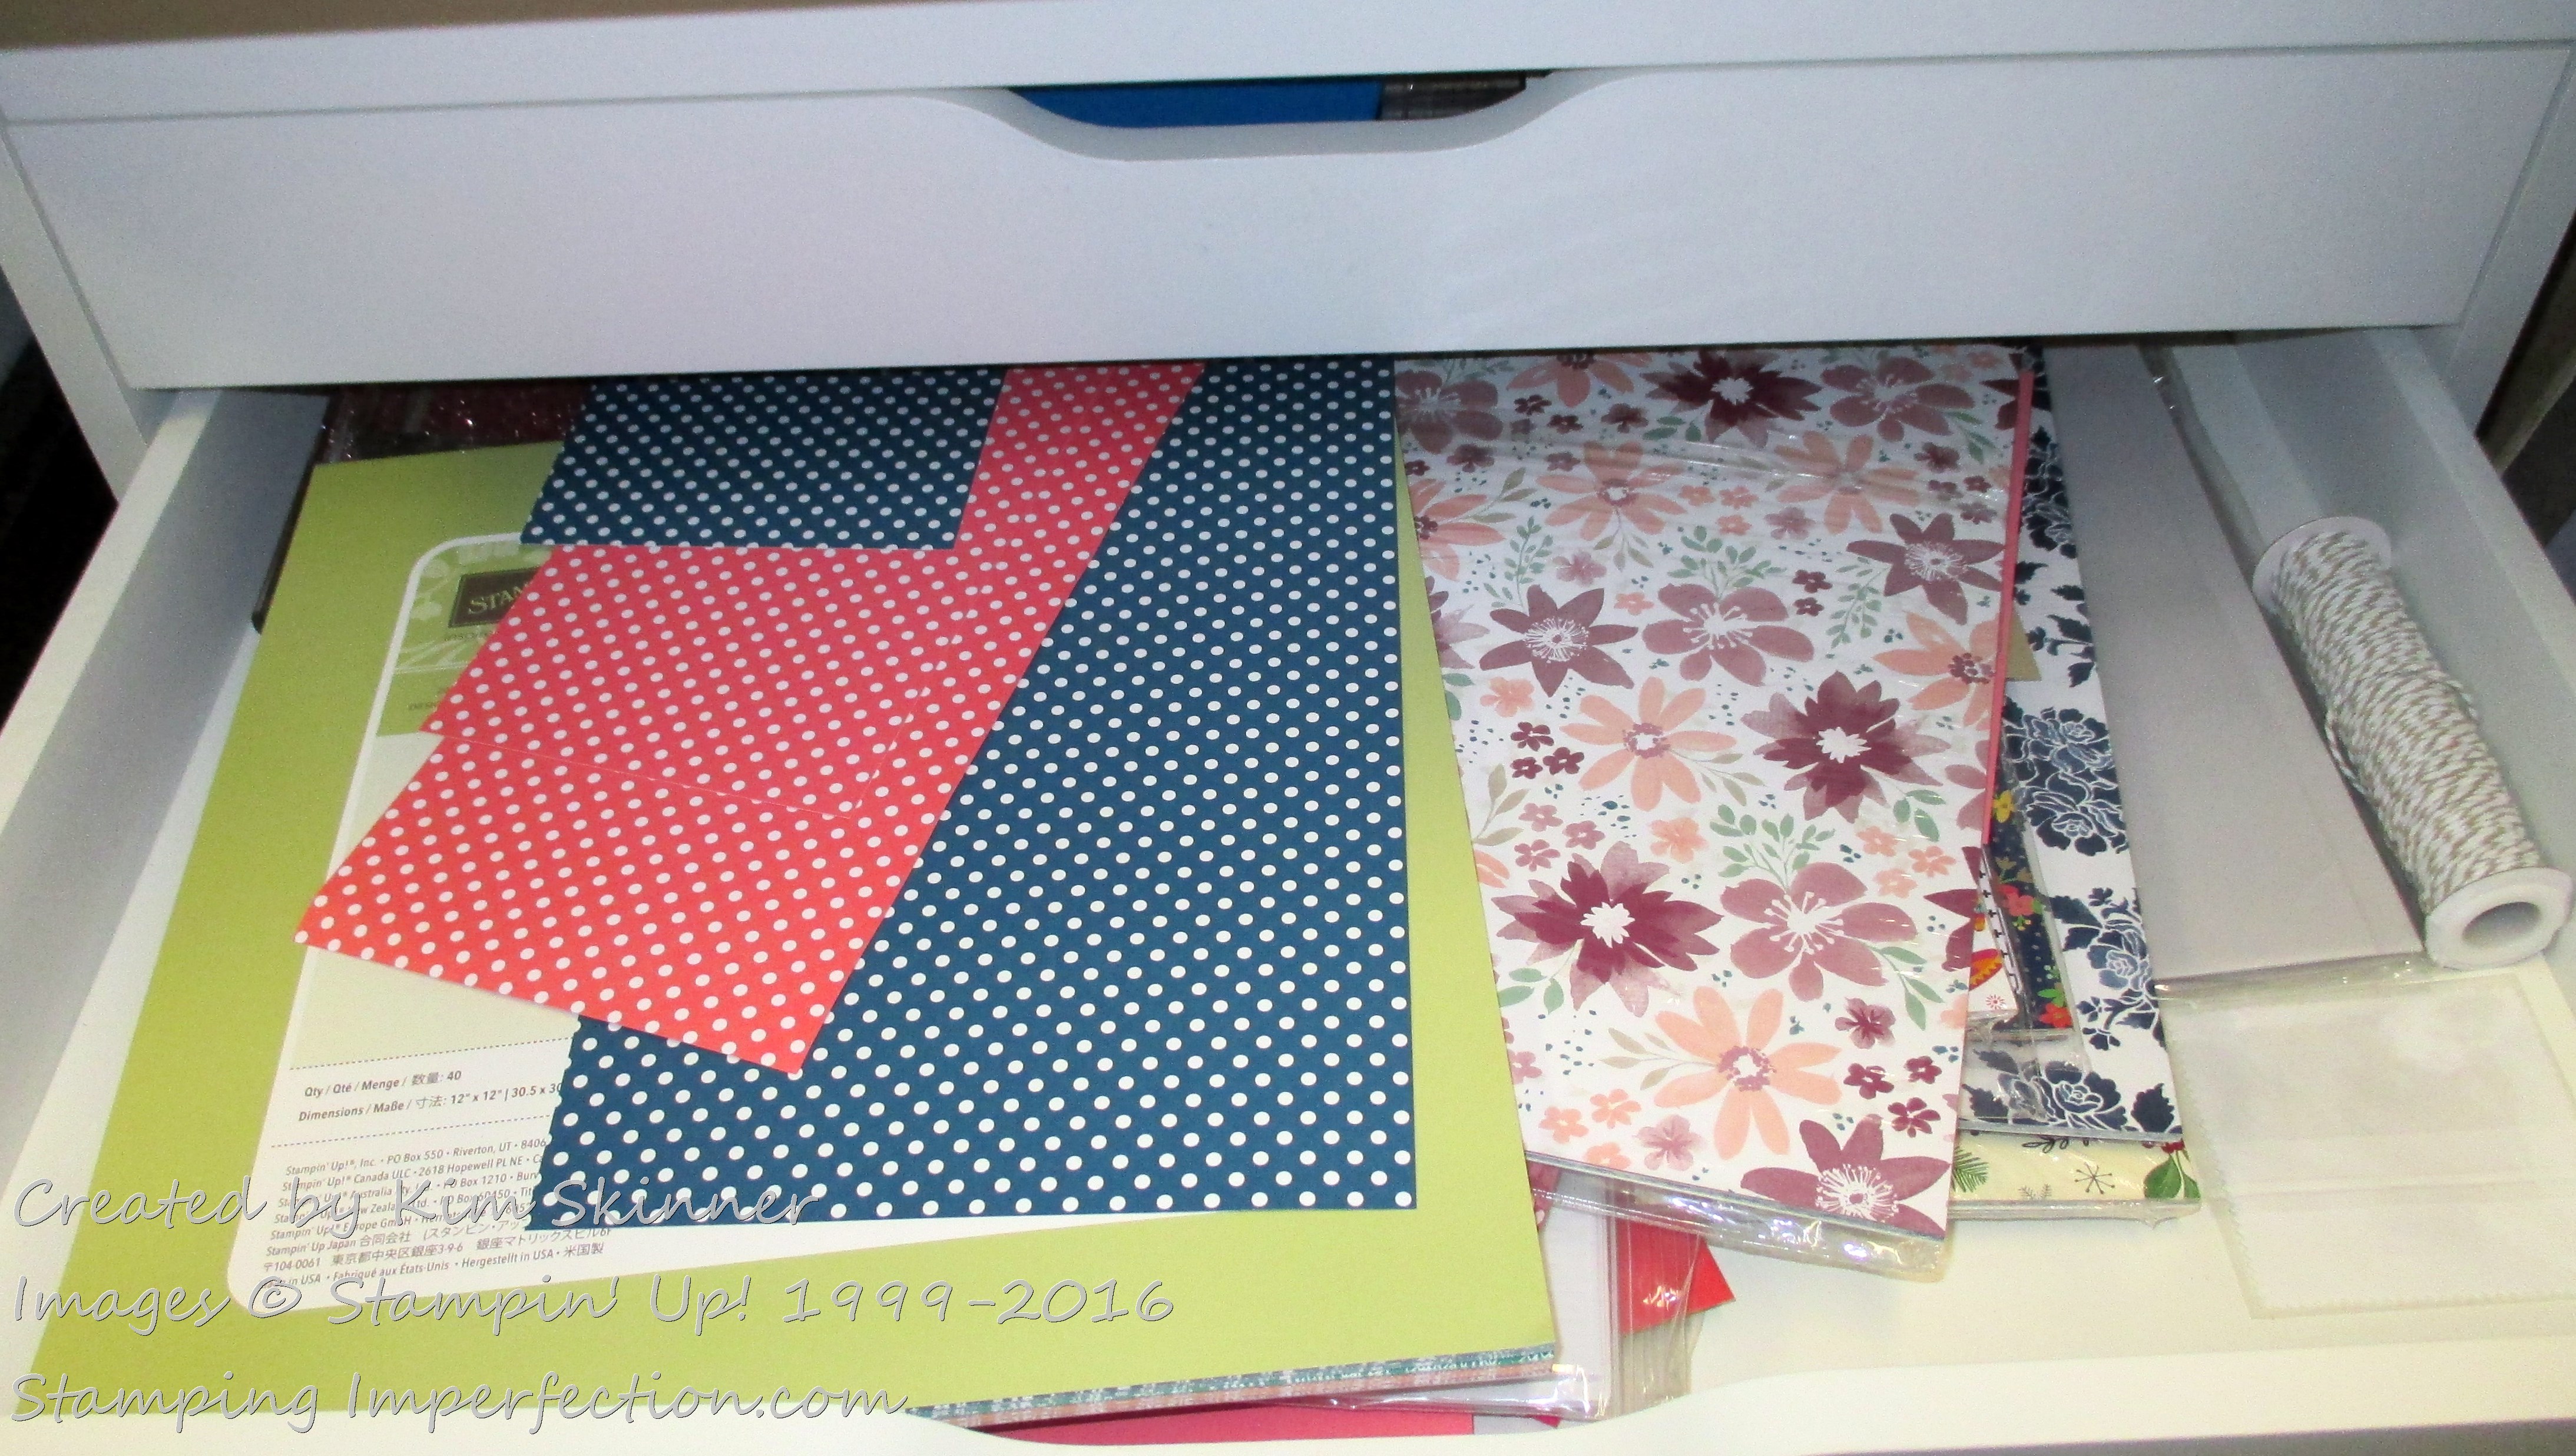
You can see that it’s just a messy pile and there is stuff in that drawer that belongs somewhere else. I started by emptying the drawer and making a pile of designer paper and a pile of card stock.
My designer paper was then sorted by paper packs and each pack was placed in a 13 x 13 plastic envelope that I got on clearance at a craft store. These sleeves are supposed to be used for organizing scrapbooking projects, but they work great for organizing designer papers and scraps. I think they come in a package of 10, so you get a good quantity when you purchase them.
I label each envelope with the name of the paper and then all the new paper and the scraps go directly into the sleeve and then into the drawer below my desk. As soon as I use a piece, I slide the scraps right into the appropriate envelope. The system works for me for two reasons: it is right next to my knee within easy reach and it’s easy to use. I just slide the leftover paper into the appropriate plastic envelope (which is usually on top because I just pulled it out to get the paper to use)!
It’s not alphabetized or anything crazy like that…don’t go overboard with your system or it won’t work because you won’t be able to keep up. (You perfectionists know who you are!)
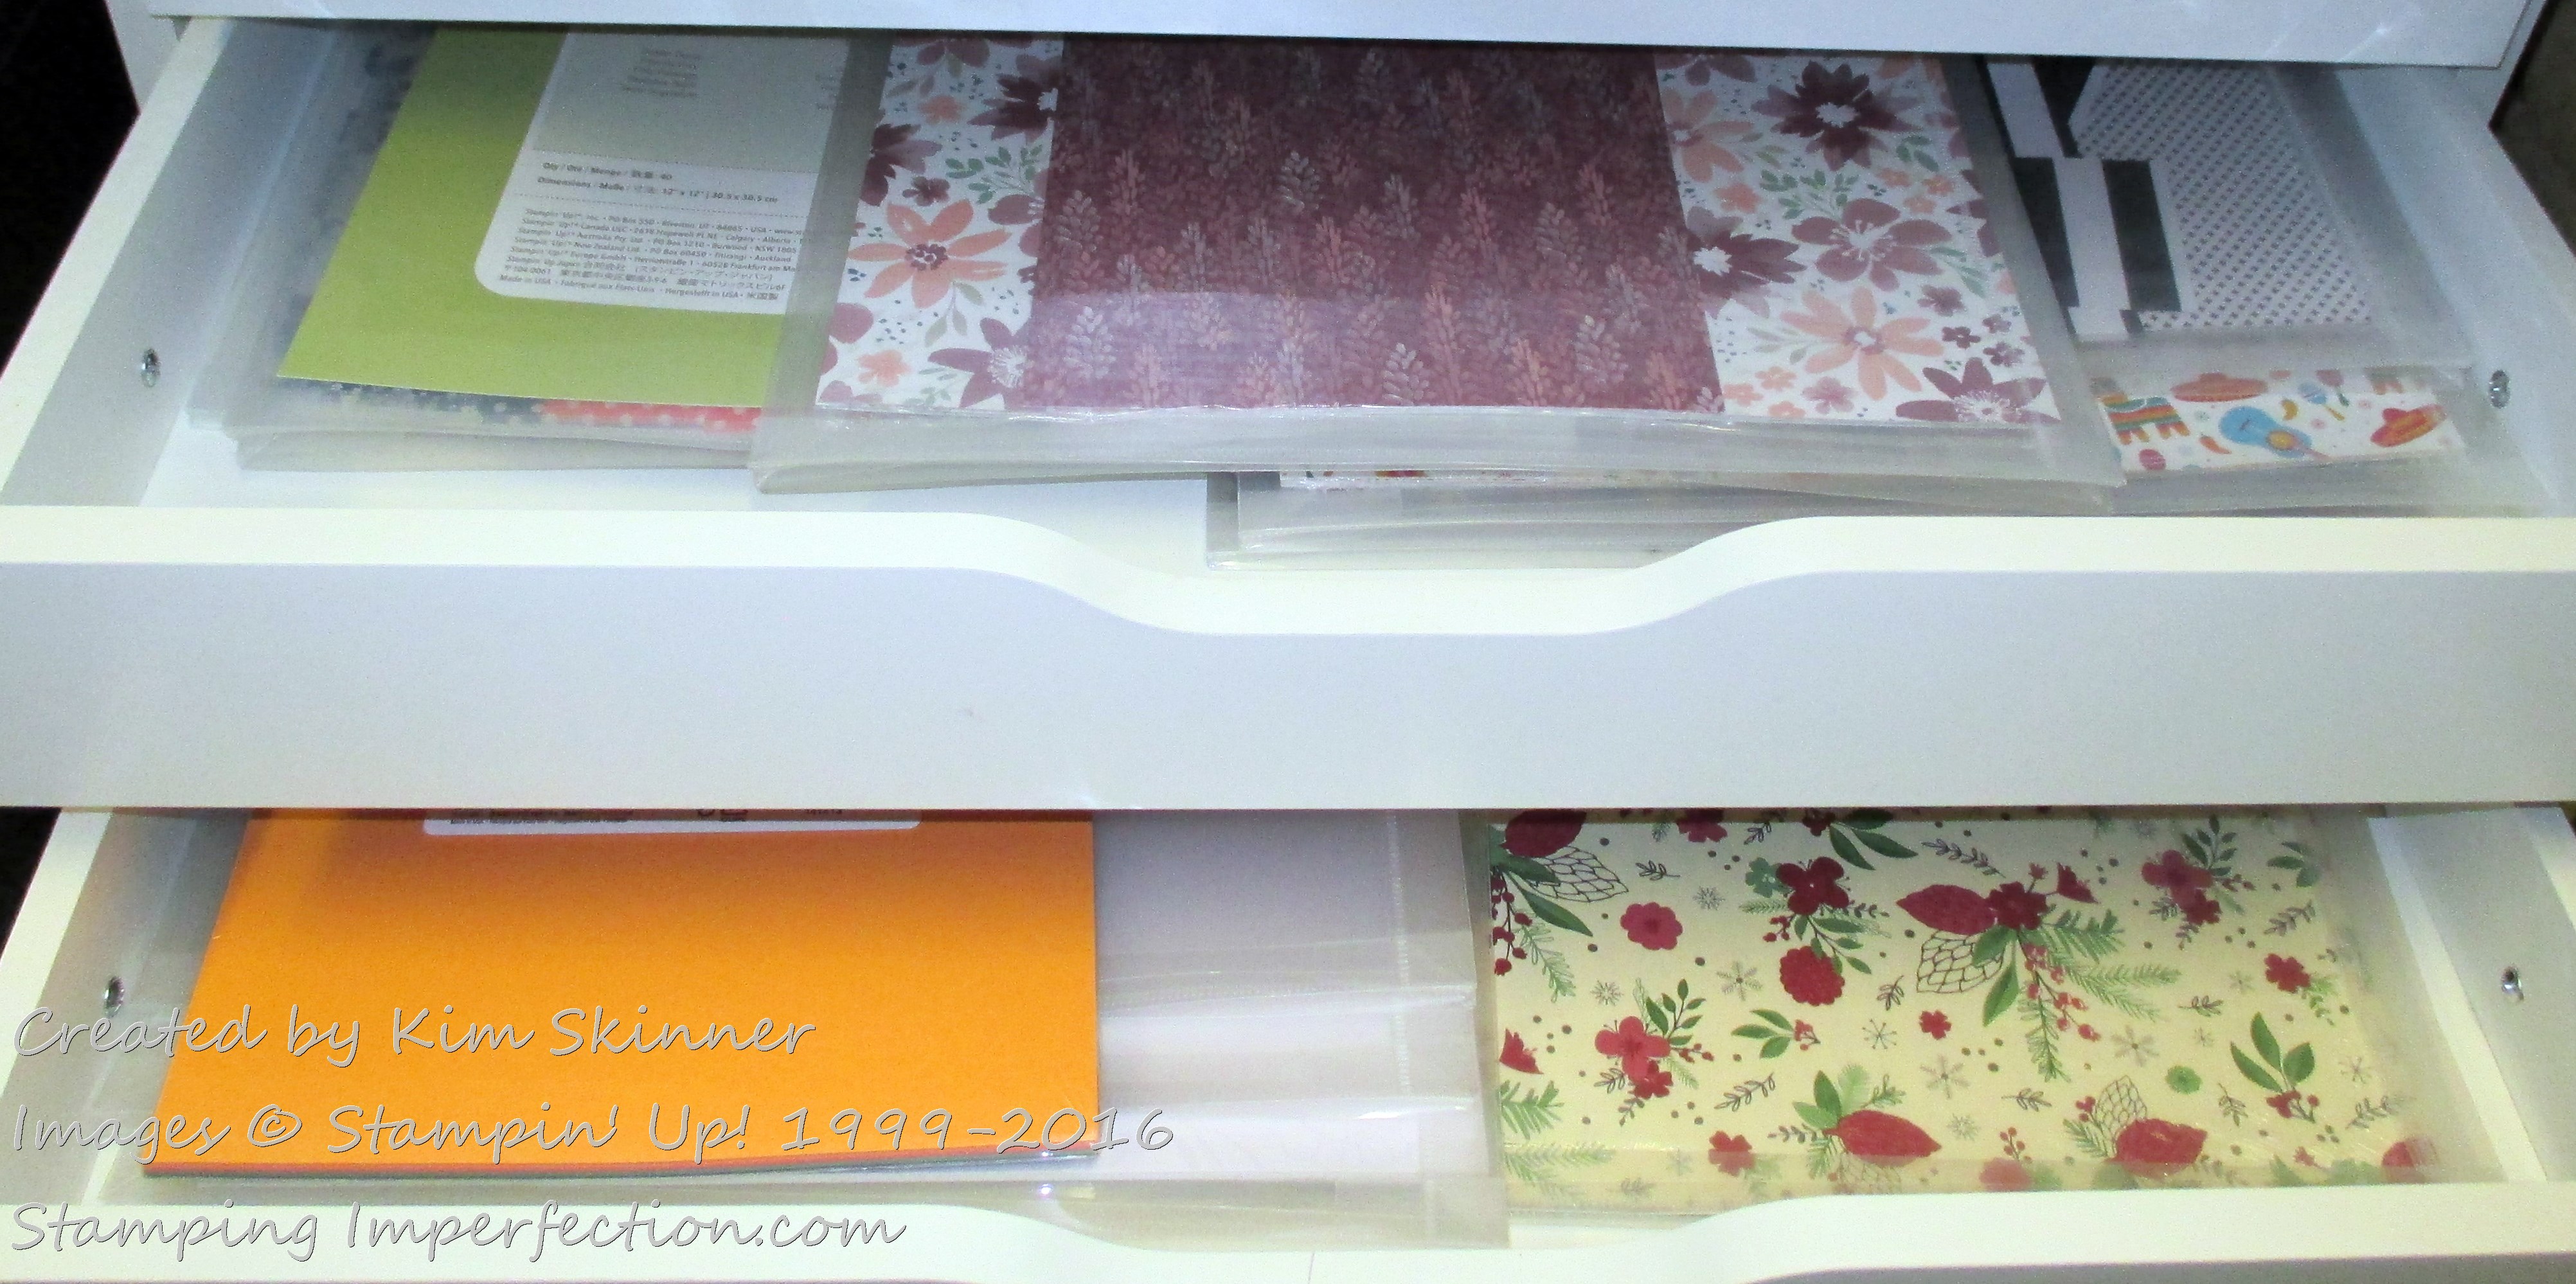
All of my current paper fits into two drawers (which I believe are about 22″ wide and maybe 28″ or so deep). I don’t keep it across the room, I keep it right next to where I work so I don’t even need to get out of my chair to put the paper scraps away. Simple. It may not look any different that my before picture, but I can find everything and there are no small pieces of paper floating around in the drawers.
My retired paper gets donated. I don’t even keep it in the house so it can’t become clutter that I have to find a place for. (Church groups, youth groups, day care centers, nursing homes and elementary teachers are often very happy to take the papers!!)
Card Stock Organization
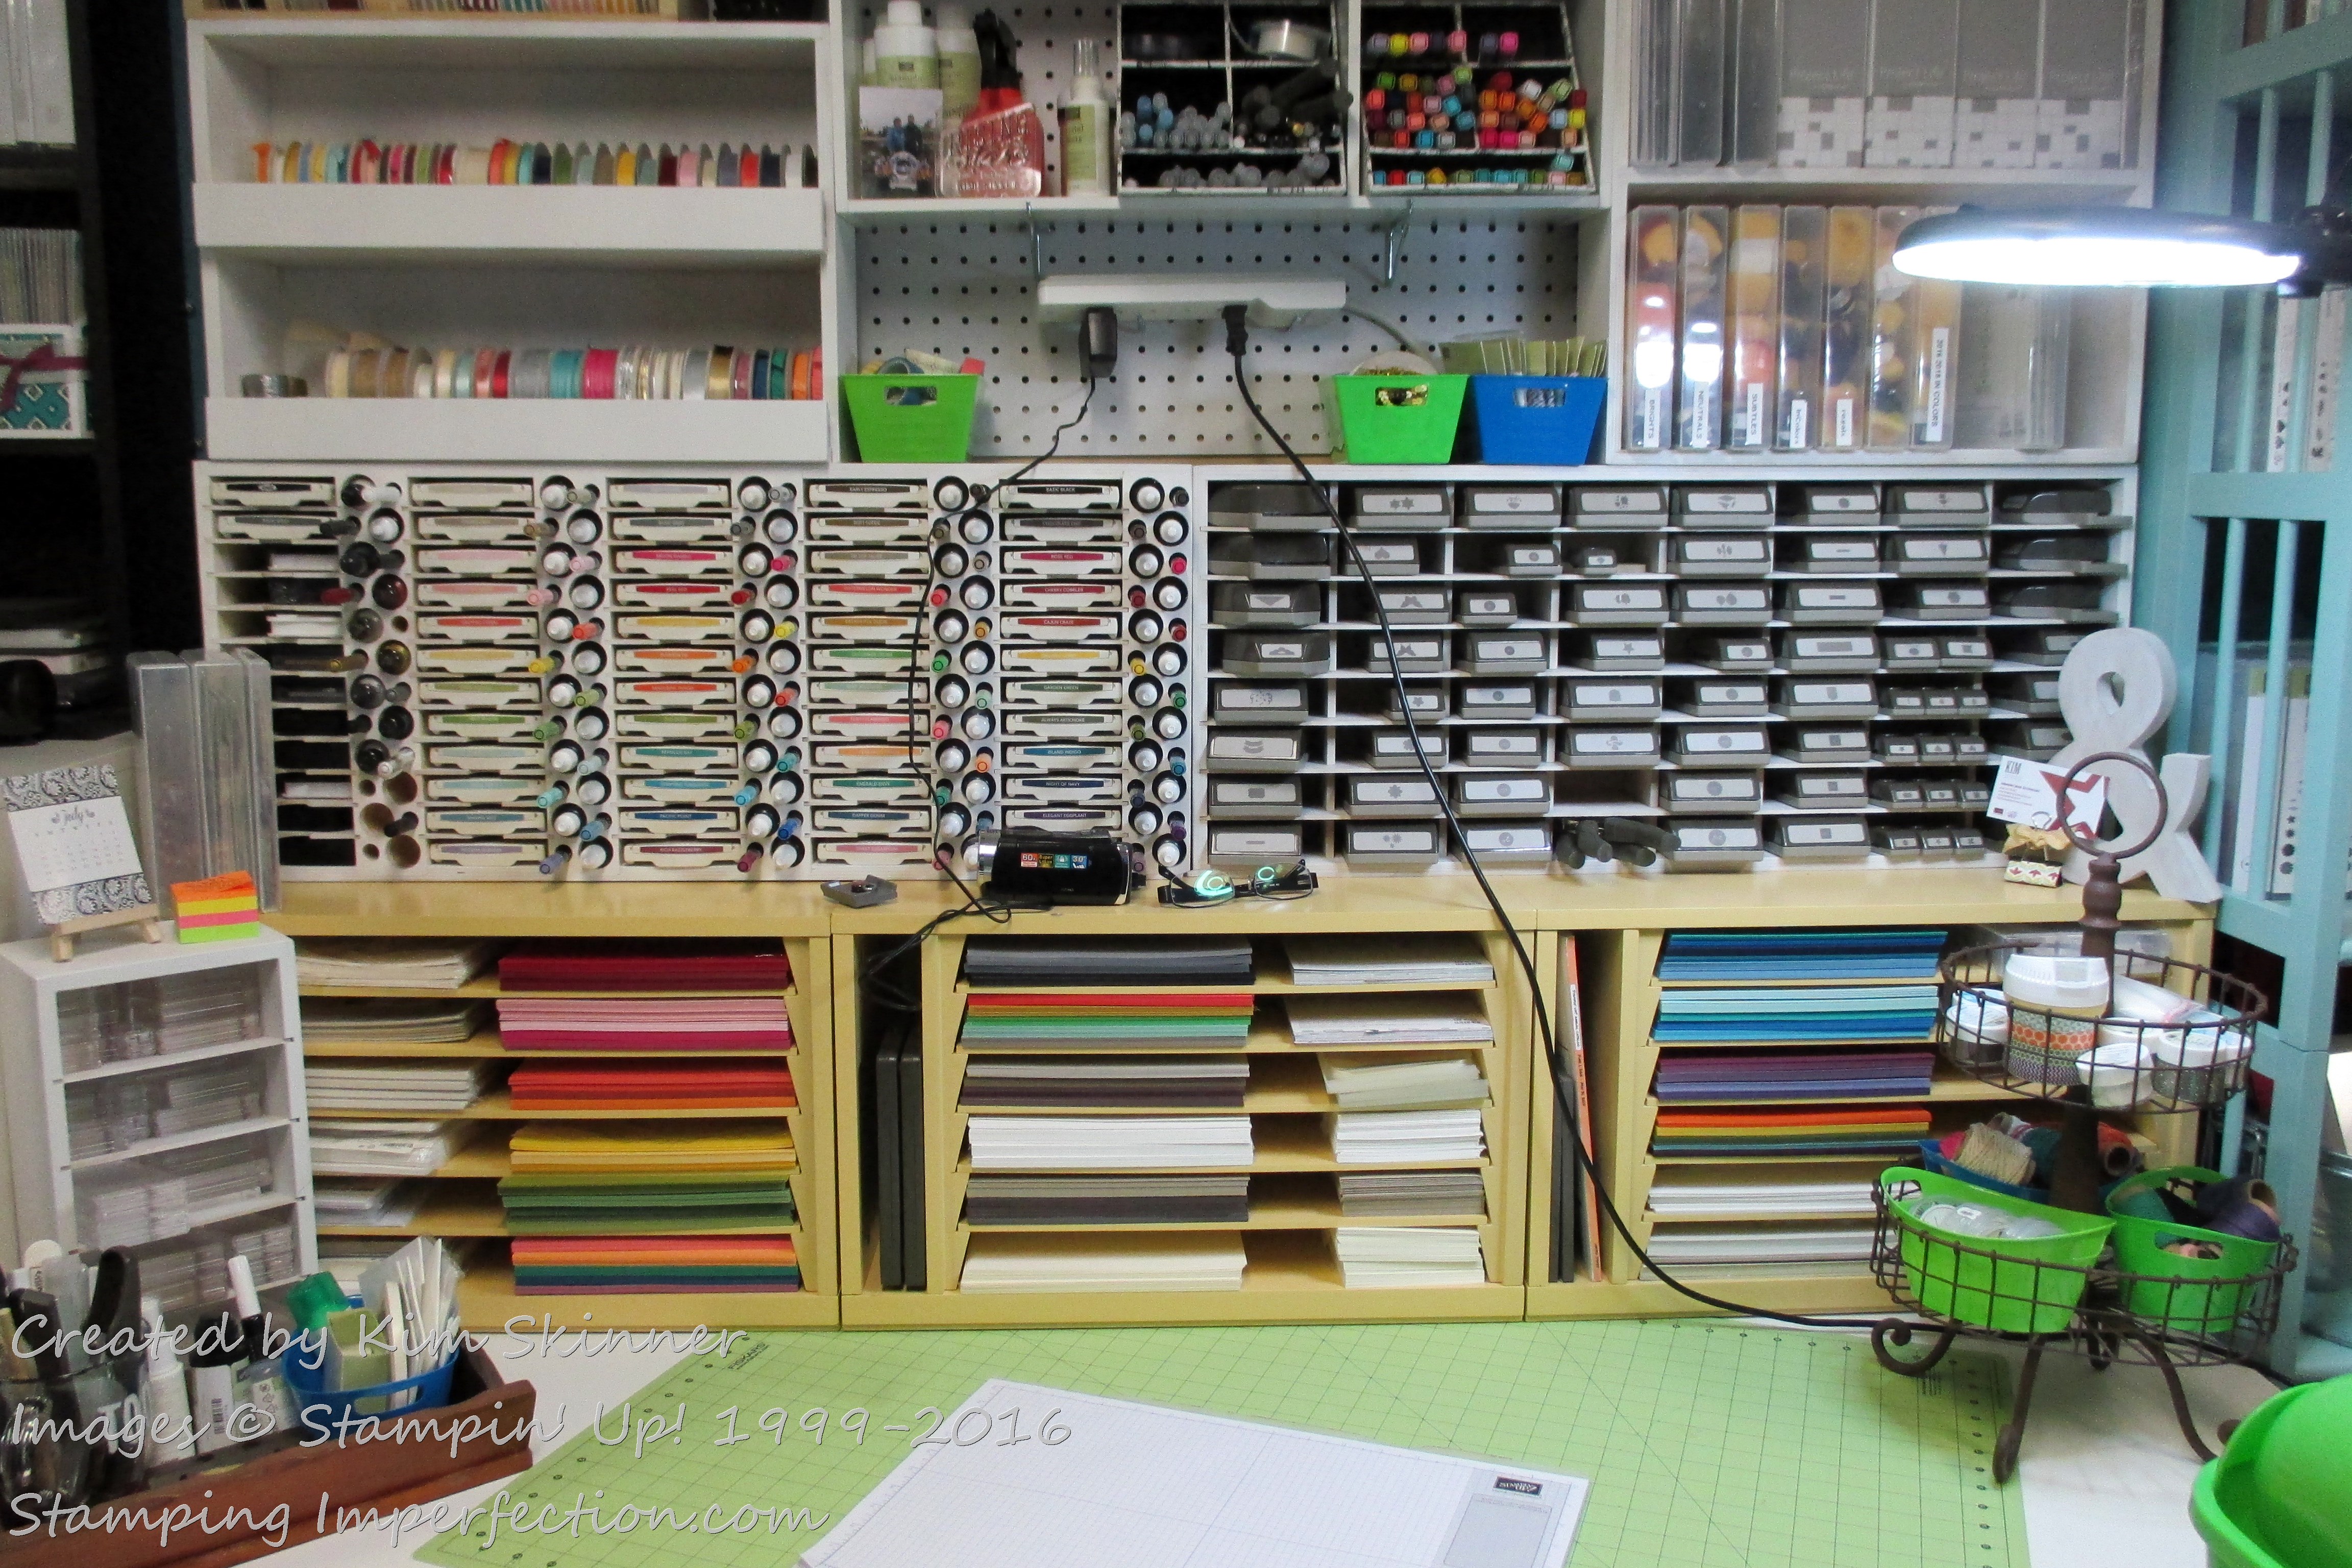
I don’t have a professionally designed all-white craft room with a granite counter top that looks like nobody every crafts in there. I have a very colorful, functional room with organizing pieces I really love from a variety of sources.
I just love this room! In this picture, you can see my card stock organizers. This is the system I use for the whole sheets of card stock. The paper organizers came from Home Decorators (online) and they were on clearance with free shipping. (Thankfully, because those things are HEAVY!) I did not have a choice with the color (although I do love that soft yellow) because this was the only color on clearance. The white ones cost 60% more, so I decided the yellow ones were 60% more perfect. I actually have 5 of these, although I only have 3 on my table. The other two are on a shelf along another wall holding my Project Life materials and specialty papers.
These organizers were clearly designed for 12 x 12″ papers, but I use them for card stock and envelopes. It works really well for me. You can see that I don’t have one slot for each card stock color. I have one card slot for all my reds and one for all my yellows and so forth. I only have one package of each color open at one time so that it all fits.

Each organizer has a vertical slot. Here you can see that I use this one for my Stampin’ Scrub. I’ve got my piercing mat in another and my catalog in the last one. Everything is within reach. I love it!!
My card stock paper scraps are filed in boxes by individual color. I’ve shared this with you before and I’ve been using this system for at least 3 years. It works for me and I’m careful to keep up with filing the scraps either at the end of each crafting session or at least once each week.
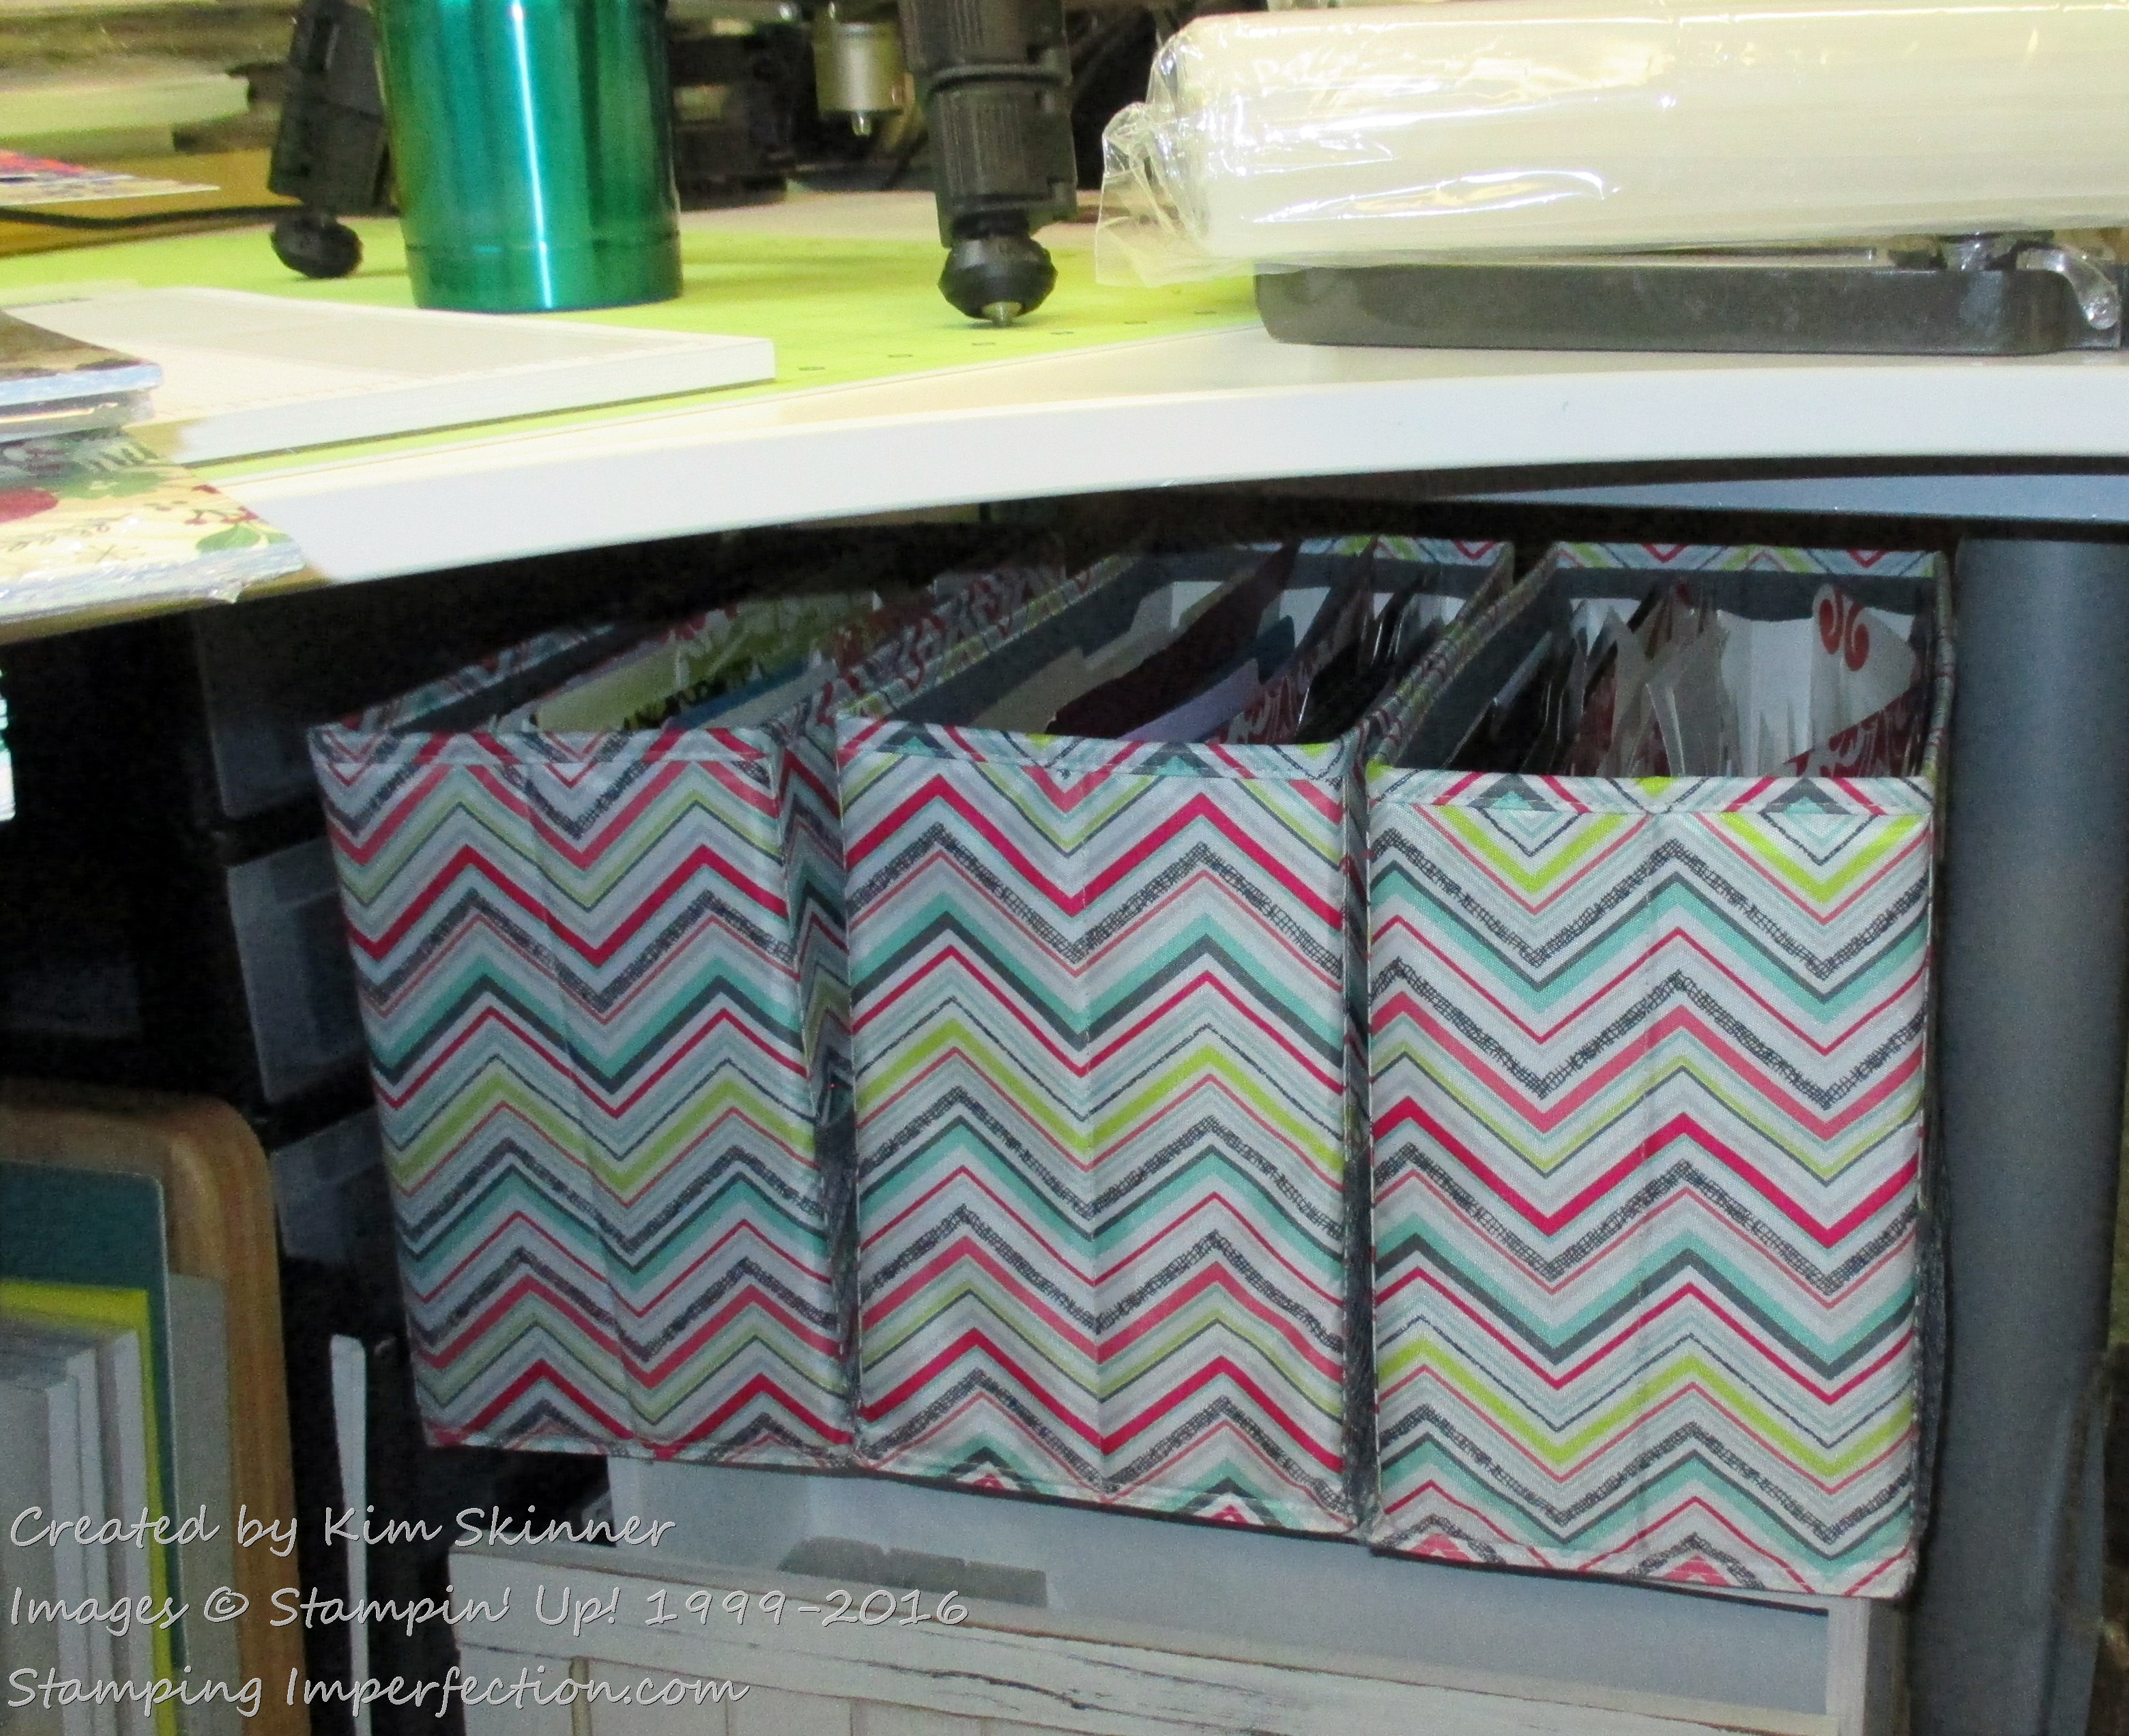
My craft table (from Ikea) is a gigantic “L” shaped table. The designer paper drawers are to the left and my scrap files are to my right under my desk. Because the desk is so big, I have room to store this stuff below and still have plenty of room for my legs and my chair to slide under.
The file boxes are organized by colors…again, all the reds, then oranges and so forth. Each individual color has a labeled folder within the color category.
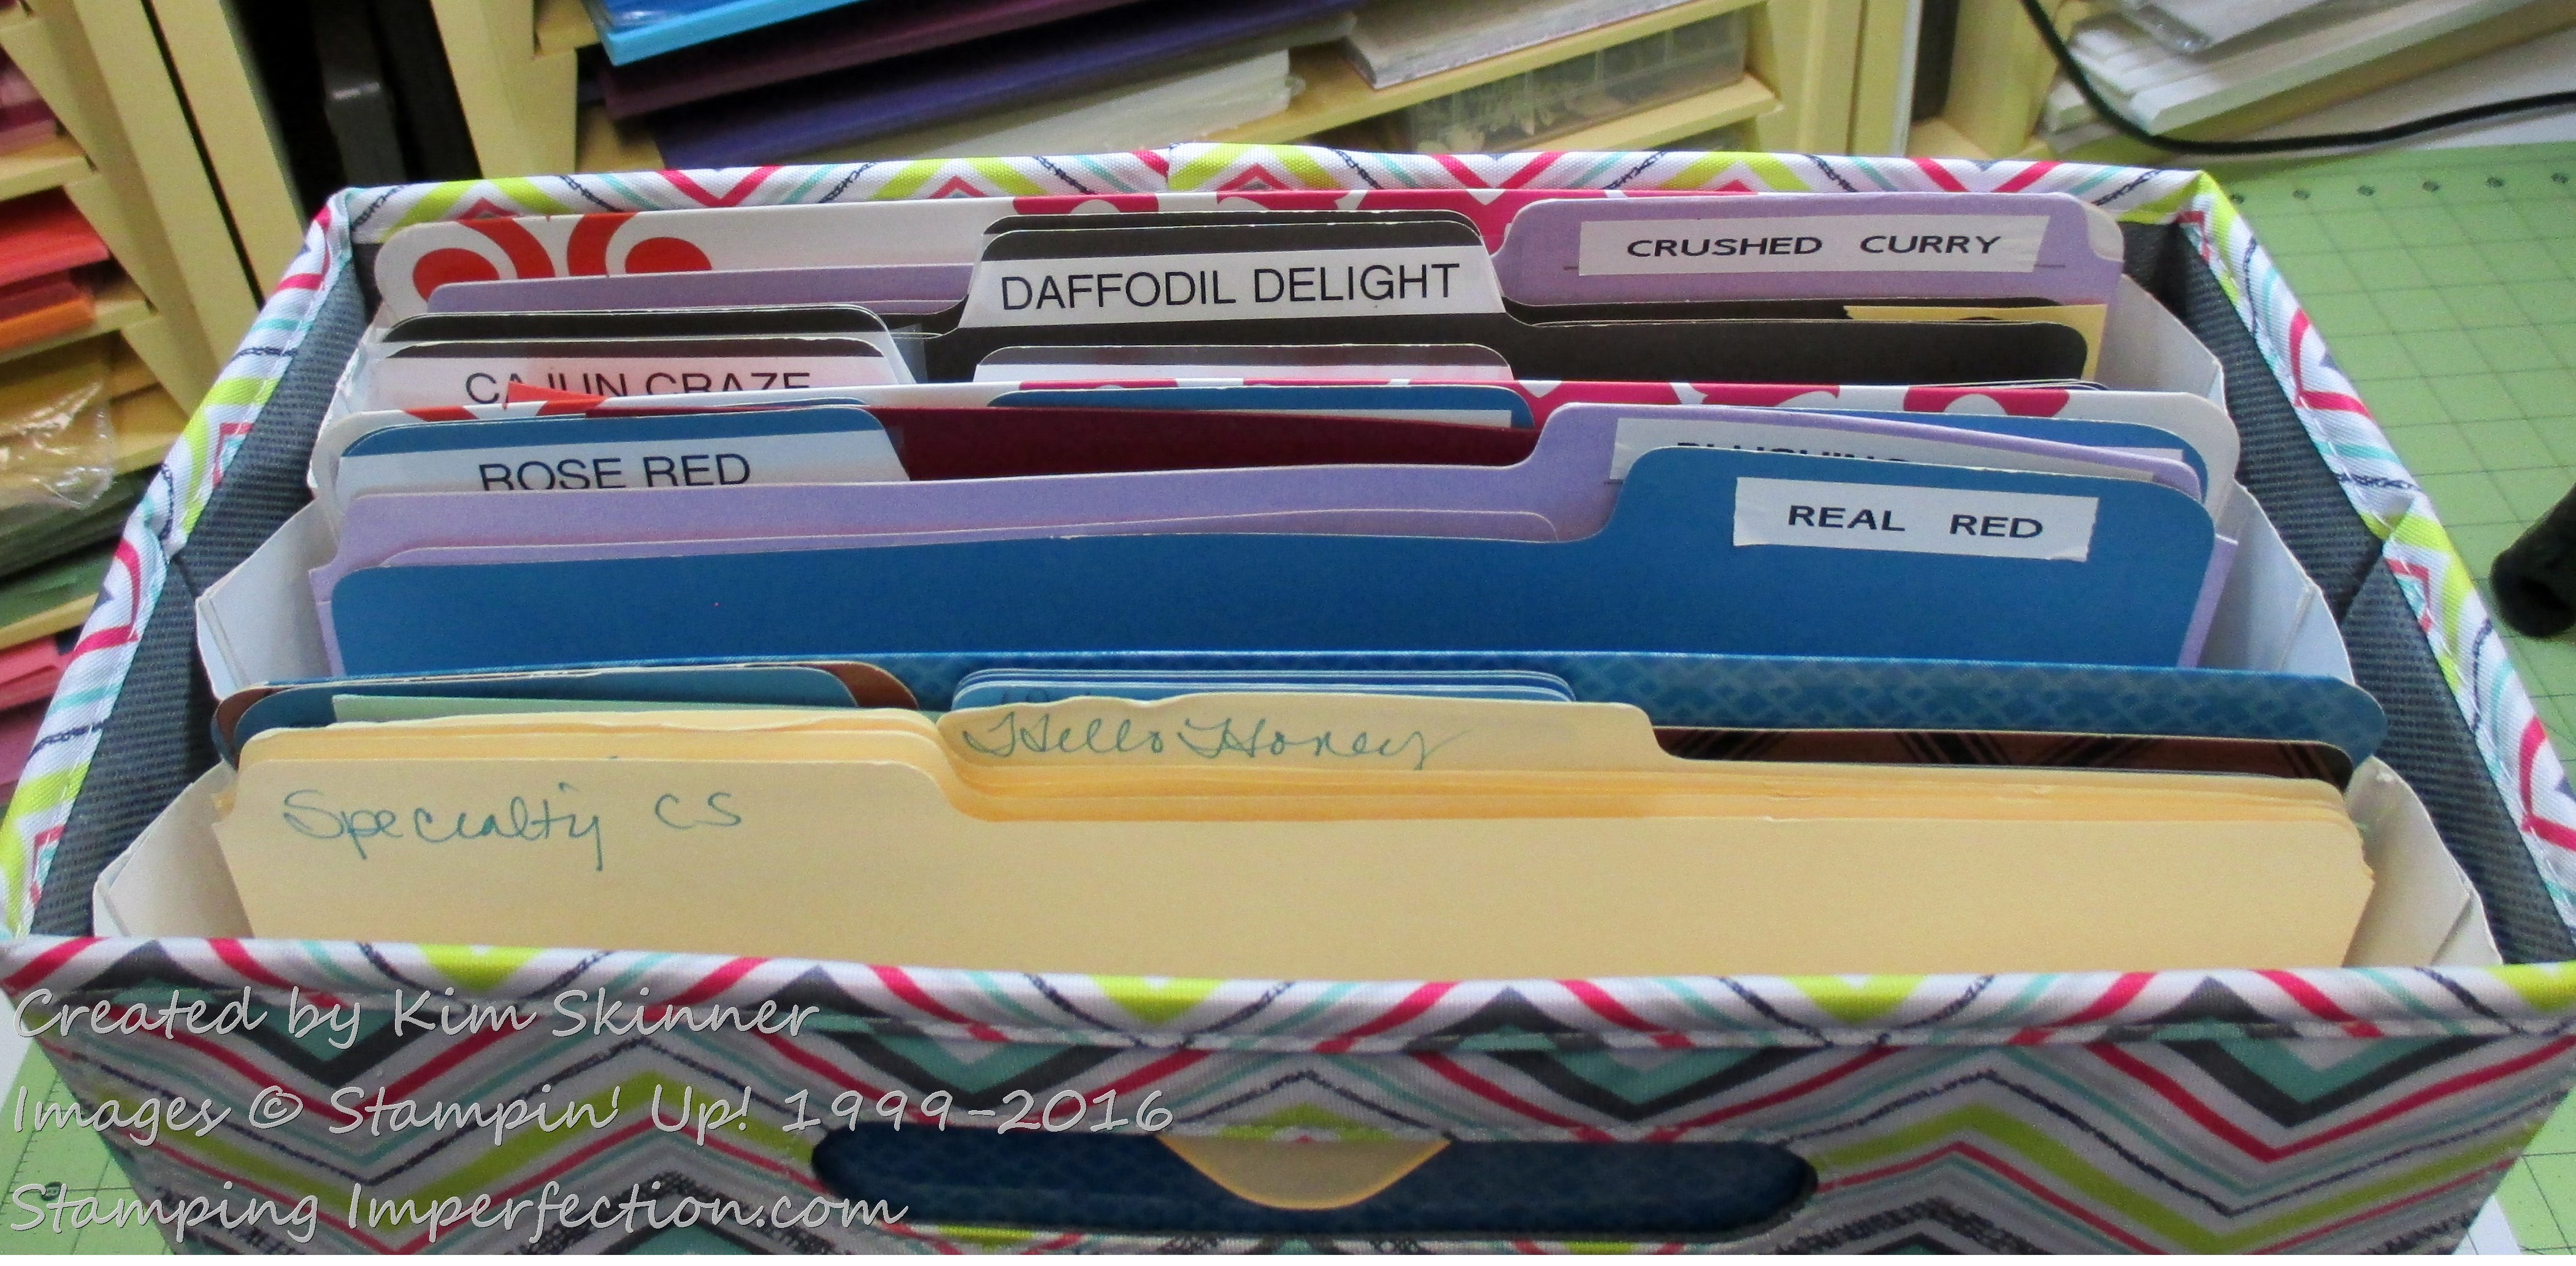
When I first set this up, all the folders matched and they were all labeled with pretty labels! It looks quite raggedy now, but it works. (As long as you keep up with filing the scaps!) This holds 3 accordion folders with individual file folders for individual colors. The file box is from Thirty One. I have 3 of these. This one holds my In Colors, Reds, Oranges and Yellows. I have another for Greens, Blues and Purples and one for all the neutrals.
I hope you find this helpful. I would love to know how your craft paper organization system works!
Bonus Days
For every $50 you spend in between July 7 and July 31, you’ll get a $5 US Bonus Days coupon that you can use between August 2-31. (That is $50 in product before shipping and handling.)
How to get $30 of free stamping stuff:
Host benefits still apply. If you order $150 in product, you get $15 worth of free products of your choice when you order PLUS three $5 coupons!!! $15 now and $15 in free stuff during August!!
This is a great opportunity to shop from your wish list, whether you buy your favorite products now or later in August with your coupons!
Important things to know about the coupons:
• Promotion period: July 7–31, 2016
• Redemption period:August 2–31, 2016
• An email address is required to participate in this promotion; Bonus Days coupon codes can only be delivered via email.
• It is strongly recommended that participants save emails containing their Bonus Days coupon codes AND write down the coupon codes in a safe place. Codes cannot be resent if the email is lost, and lost codes cannot be recovered.
• Bonus Days coupon codes can be redeemed for any product, excluding Starter Kits and Paper Pumpkin subscriptions. New prepaid Paper Pumpkin codes can be redeemed.
Thank you for stopping by! Happy organizing!!


Hi Kim,
I recently started using Avery job ticket holders for my paper. I use one for each SU color collection and then behind that I can fit two colors of single colors from that collection. Example would be a folder for the neutrals, then I have crumb cake and very vanilla in the next folder, smokey slate in another etc. I saw a video with this idea and I love it. On my desk I keep whisper white, some crumb cake and some very vanilla at my fingertips since I use that most. If you are interested I can give you name of the you tube video I saw. I only have a desk and small area of a guest room for my craft area. Works out just fine for me. Nothing fancy but neat and organized. I recently bought a six drawer rolling cabinet I use for my markers, some ink, and punches. I try not to spend a lot of money to organize. I would rather spend more on stamps.. I feel the better organized you are the more creative you can be. Thanks for sharing your method of organizing!
Hi Anita!
I would love to see that video! Are those like plastic folders or sleeves? That is a great idea because they wouldn’t get as raggedy as the manila folders. Also, see through is always a plus. I used to keep all my paper crafting stuff in one of those big rolling scrapbooking carts. I kept it in the corner of a room and rolled it to the kitchen when we wanted to craft. Once the kids went off to college, I took over a section of the basement which is really like the land of unloved furniture. I mostly use old furniture pieces from the kid’s rooms that once held toys and books. My craft room is such a hodge podge of furniture from parts unknown, but it is so organized!!! I have just a few pieces that I’ve treated myself to that I just love. Most of them you can see in the photo above. I so agree that we are so much more creative in a tidy peaceful space! I have to say that the last 4 weeks have been my most productive ever! I’ve got one bathroom and my son’s room left and my entire house is clean, tidy and organized. I can’t wait to be done and just enjoy the space! (Keep in mind that my house is the size of a shoe box, but I love it!)
Thanks for sharing!
Hello Kim! If you search on you tube for ” Darlene Devries new craft room tour” you can see her gorgeous new room and great storage ides. Of course keep in mind that her crafting is a full time job. She does beautiful work with lots of different type of water coloring, markers and other mediums. Very talented. These job ticket holders are clear like page protectors but heavier and I just love them. You would still be able to keep your paper just as you do now. Check this video out.please let me know if you cannot find it.
I did see the video and I really like the idea of using the plastic folder/sleeves to store the paper. It would look a lot neater and hold up better with long term use. Thanks for sharing!